Cursor Practice Project-16: Rapid Development of Social Media Image Tools with Cursor - A Complete Guide from Concept to Launch (Part 4) — Domain Purchase + GitHub + Vercel + Cloudflare → Website Deployment
Project Description
From Zero to Live: Deploy your website to the internet in 2 hours using domain + GitHub + Vercel + Cloudflare.
What you'll accomplish: Select/bind domain → Push code to GitHub → Vercel auto-build deployment → Configure DNS & HTTPS, all in one seamless process.
Core philosophy: Focus only on coding, let automation handle the rest; commits trigger deployments, updates go live instantly, with one-click rollback for errors.
Final outcome: A globally accessible, HTTPS-secured website under your custom domain.
Estimated time: ~2 hours, suitable for absolute beginners.
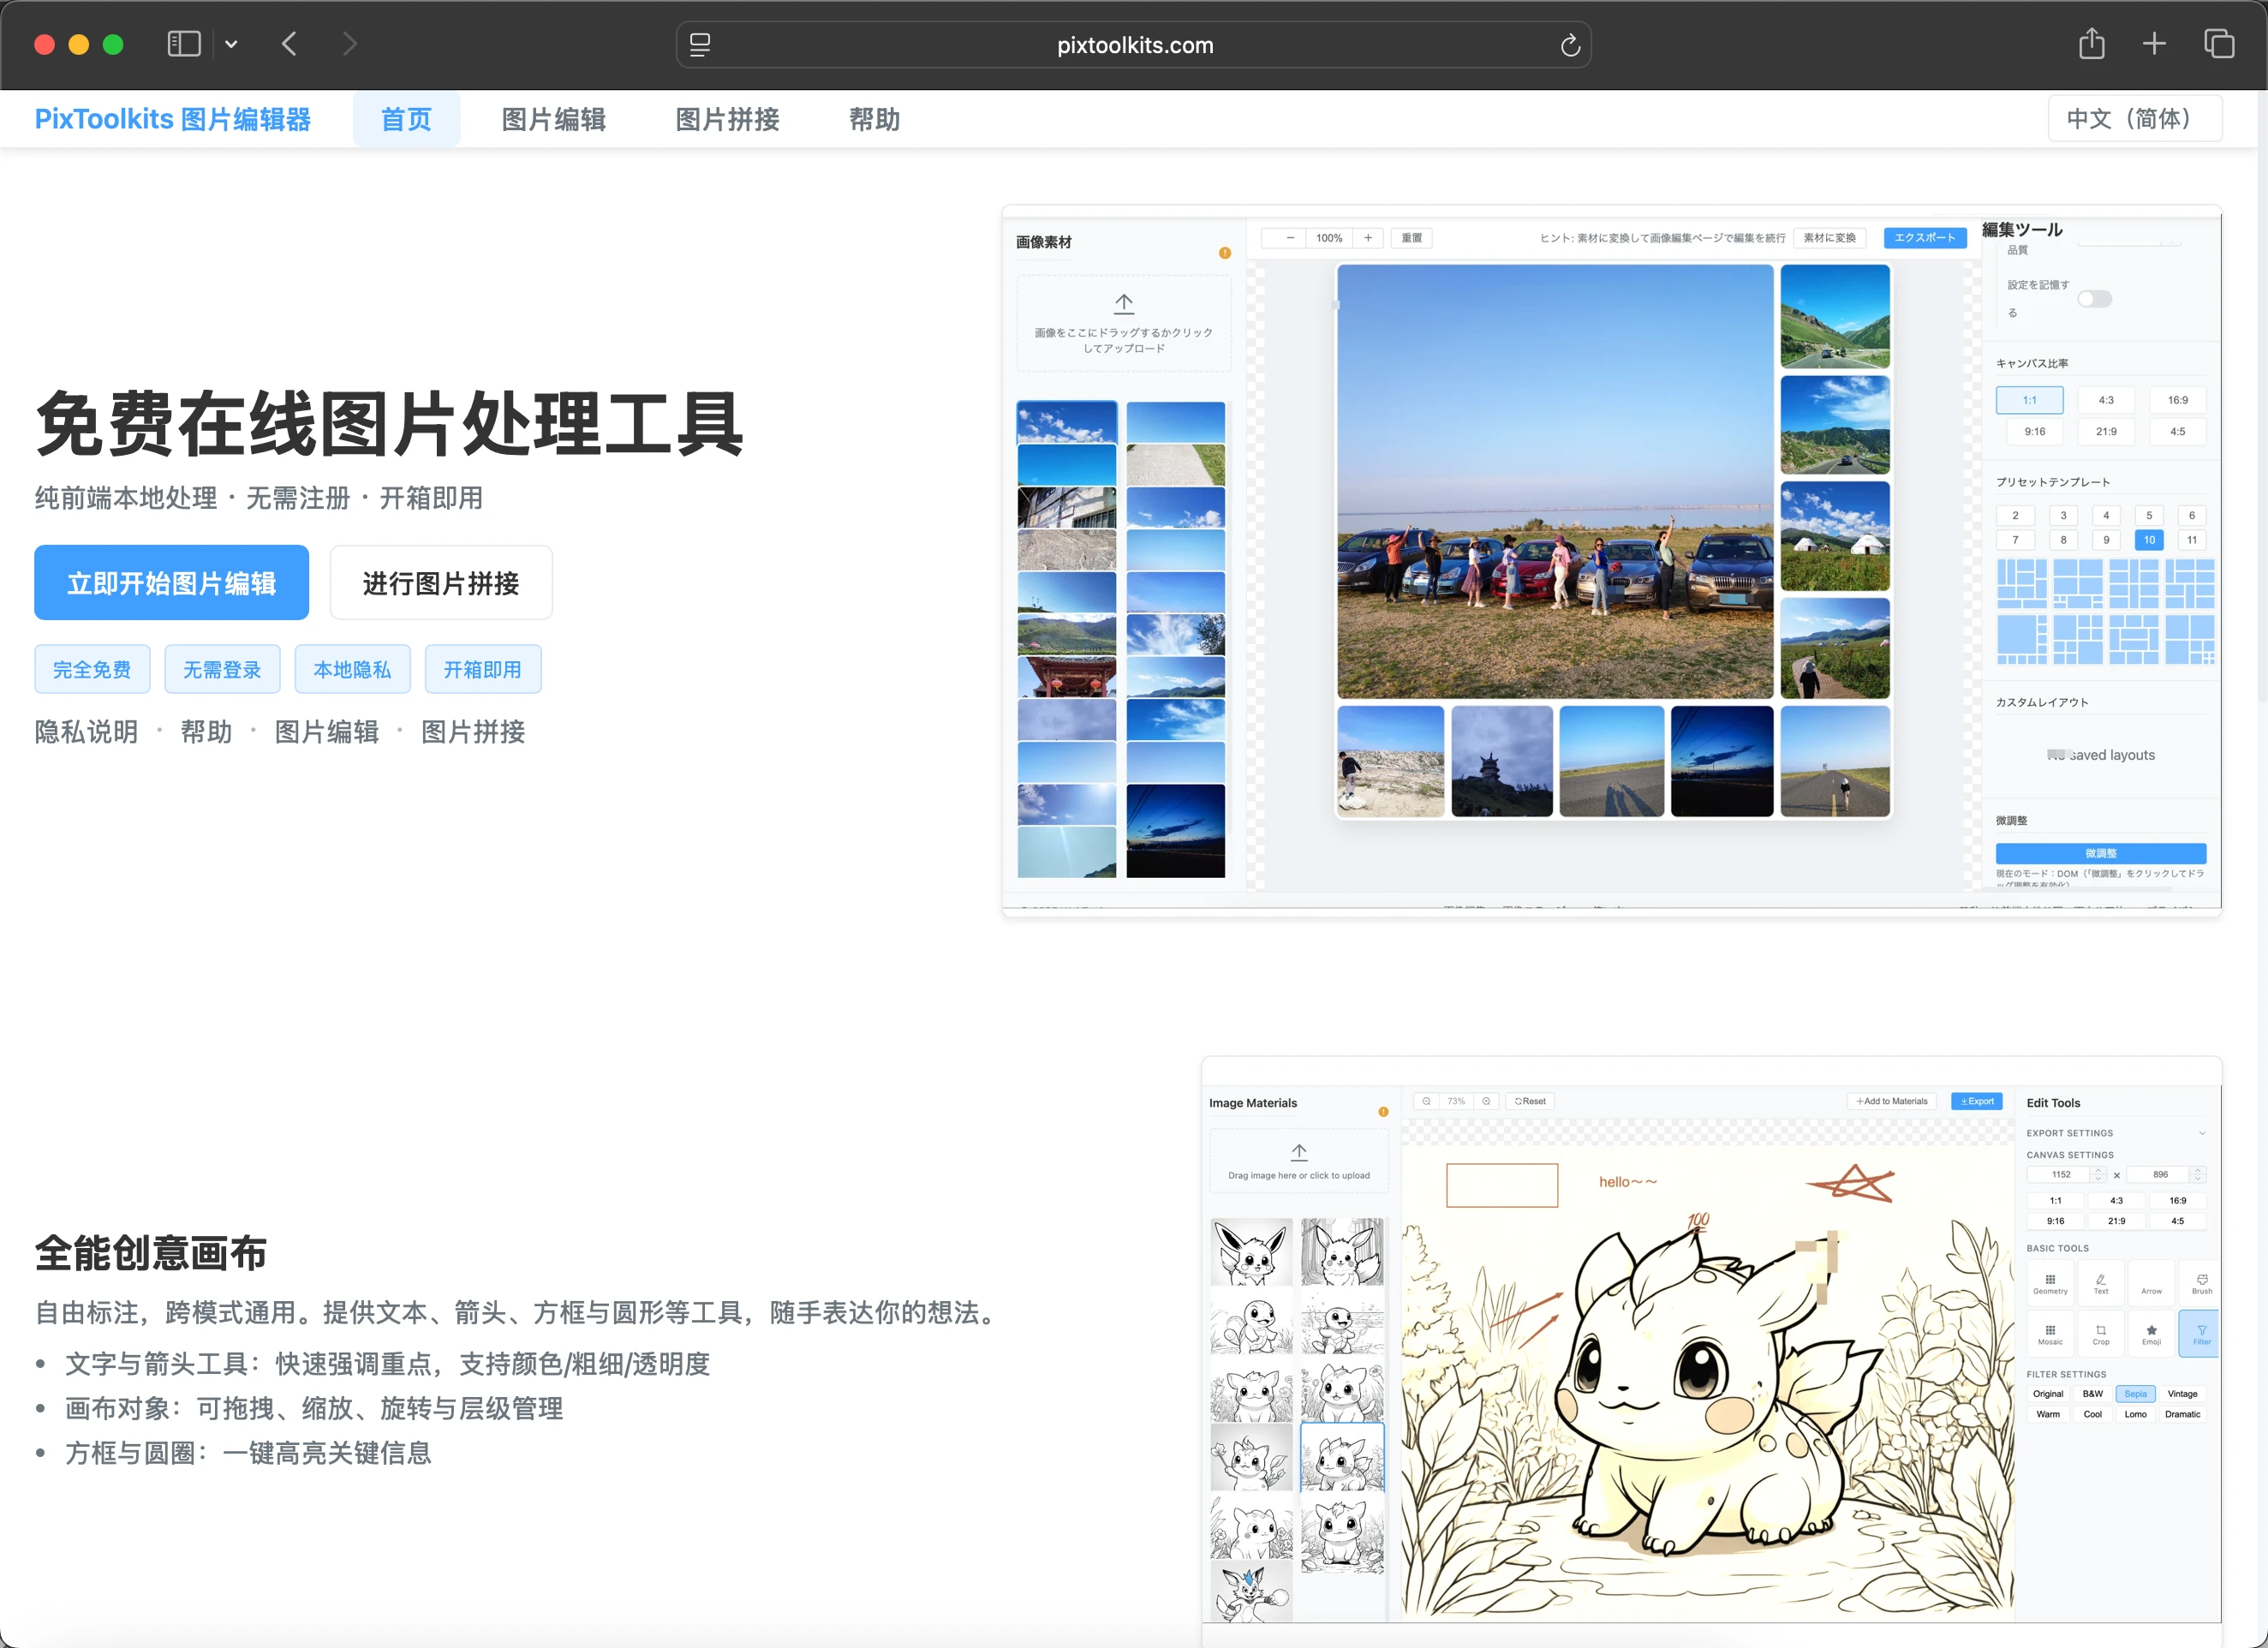
Demo
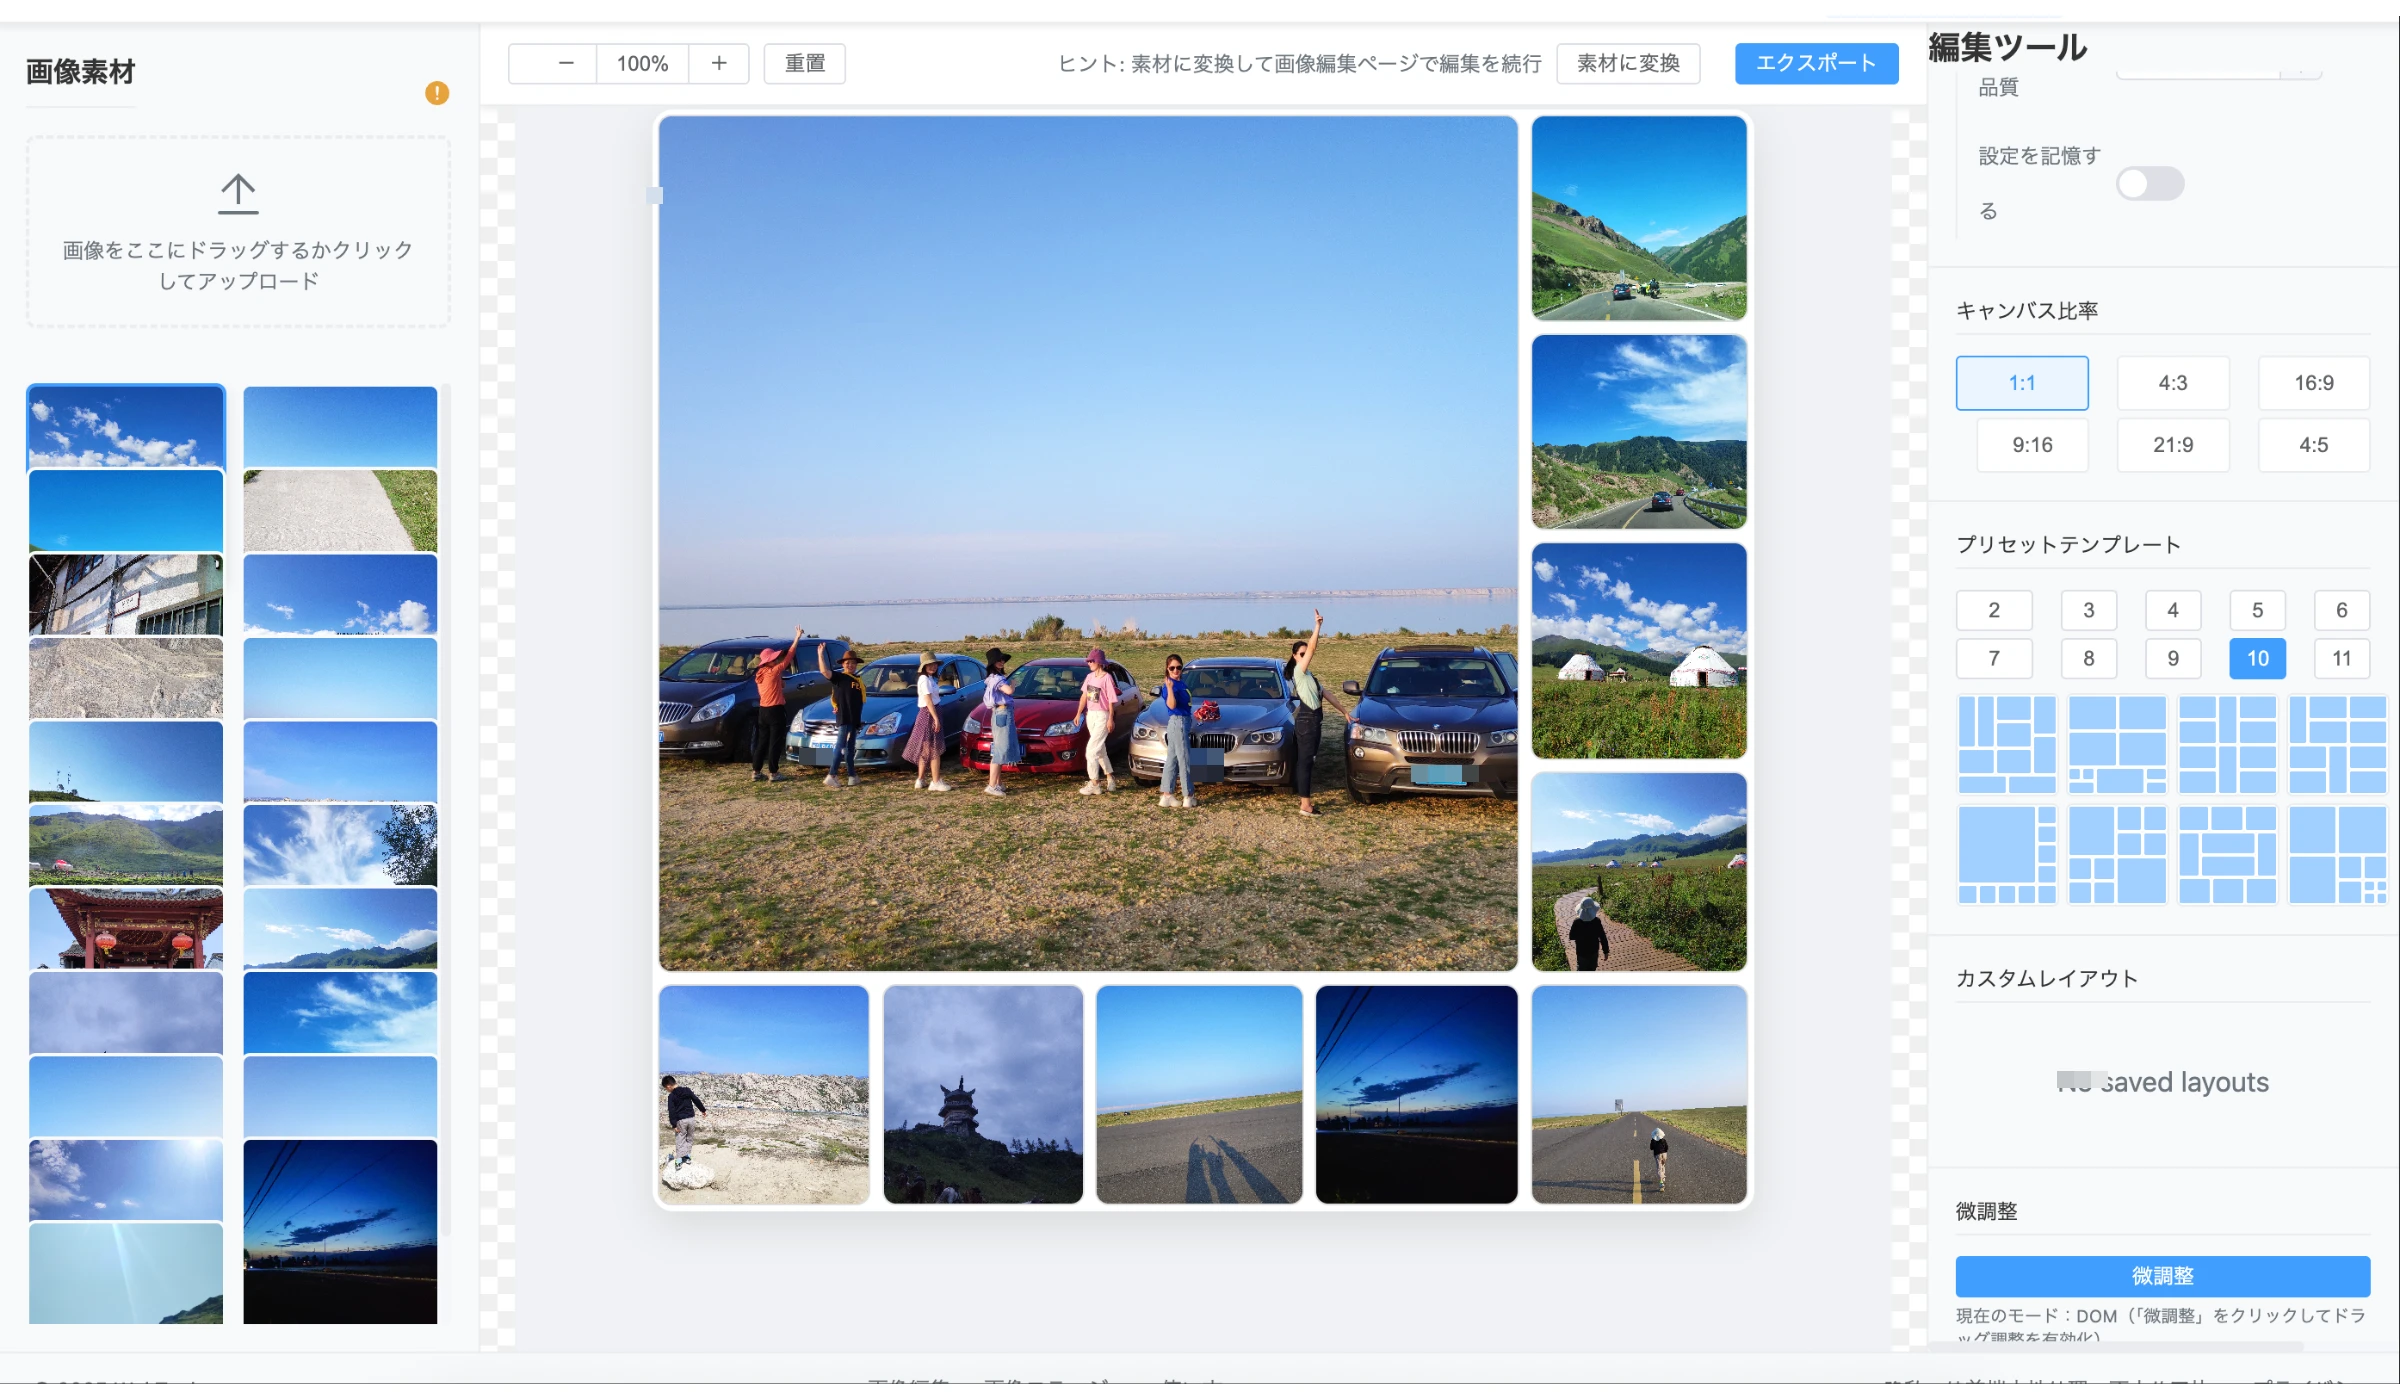
Live website: pixtoolkits.com
Prerequisites
- Cursor
- Version: 1.3.9
- cursor rules: https://cursorpractice.com/zh/cursor-tutorials/prompts/system-prompts
- agent: claude-4-sonnet-thinking, GTP-5
- project rules: ./cursorpractice-06-10xUse.md
- Optional: Gemini CLI
- Install: npm install -g @gemini-cli/gemini
- Usage: gemini --help
Why Choose This Approach
- Component advantages: GitHub (collaboration & versioning), Vercel (zero-config deployment & edge capabilities), Cloudflare (global DNS & security).
- Hassle-free: Push code to GitHub and your site auto-deploys, no server management.
- Cost-effective: All services offer free tiers suitable for individuals/small teams.
- Faster access: Global acceleration for smooth access worldwide.
- Enhanced security: HTTPS by default with built-in protection.
- Better collaboration: Version history, preview URLs, and one-click rollback.
- Portable: Domain managed via Cloudflare allows future platform changes.
- Notes:
- Initial domain/SSL setup may take minutes to hours.
- Cache images/pages but avoid forced caching for APIs/real-time data.
- Instant rollback available for deployment issues.
Workflow
- Domain registration
- Create GitHub repository
- Code editing in Cursor, commit to GitHub
- Vercel setup & GitHub integration
- Domain binding, DNS configuration, auto HTTPS
- Access via domain
Detailed Steps
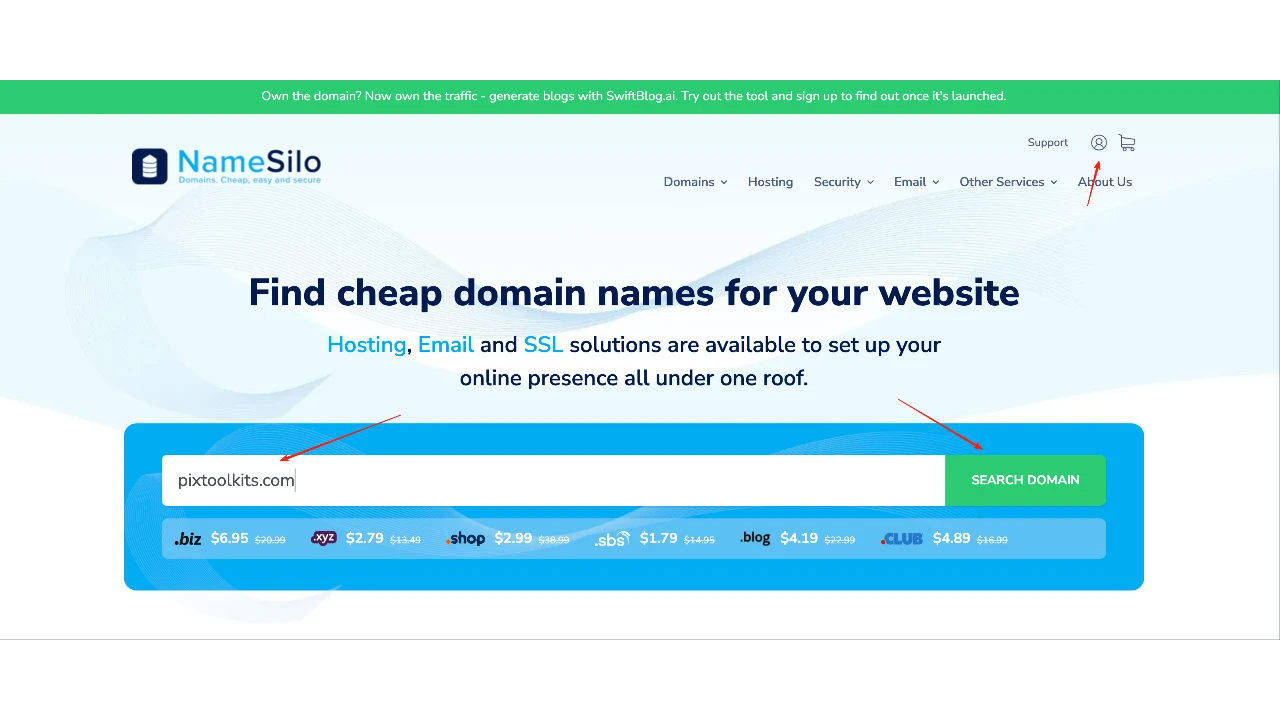
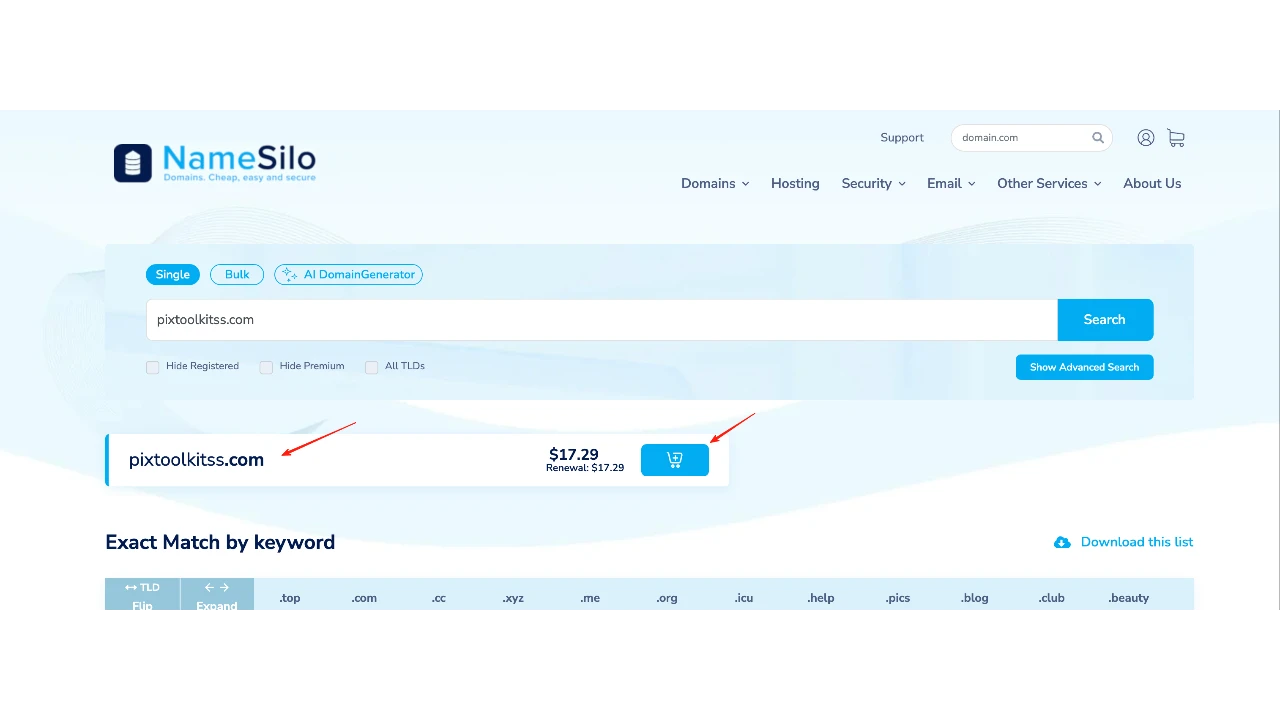
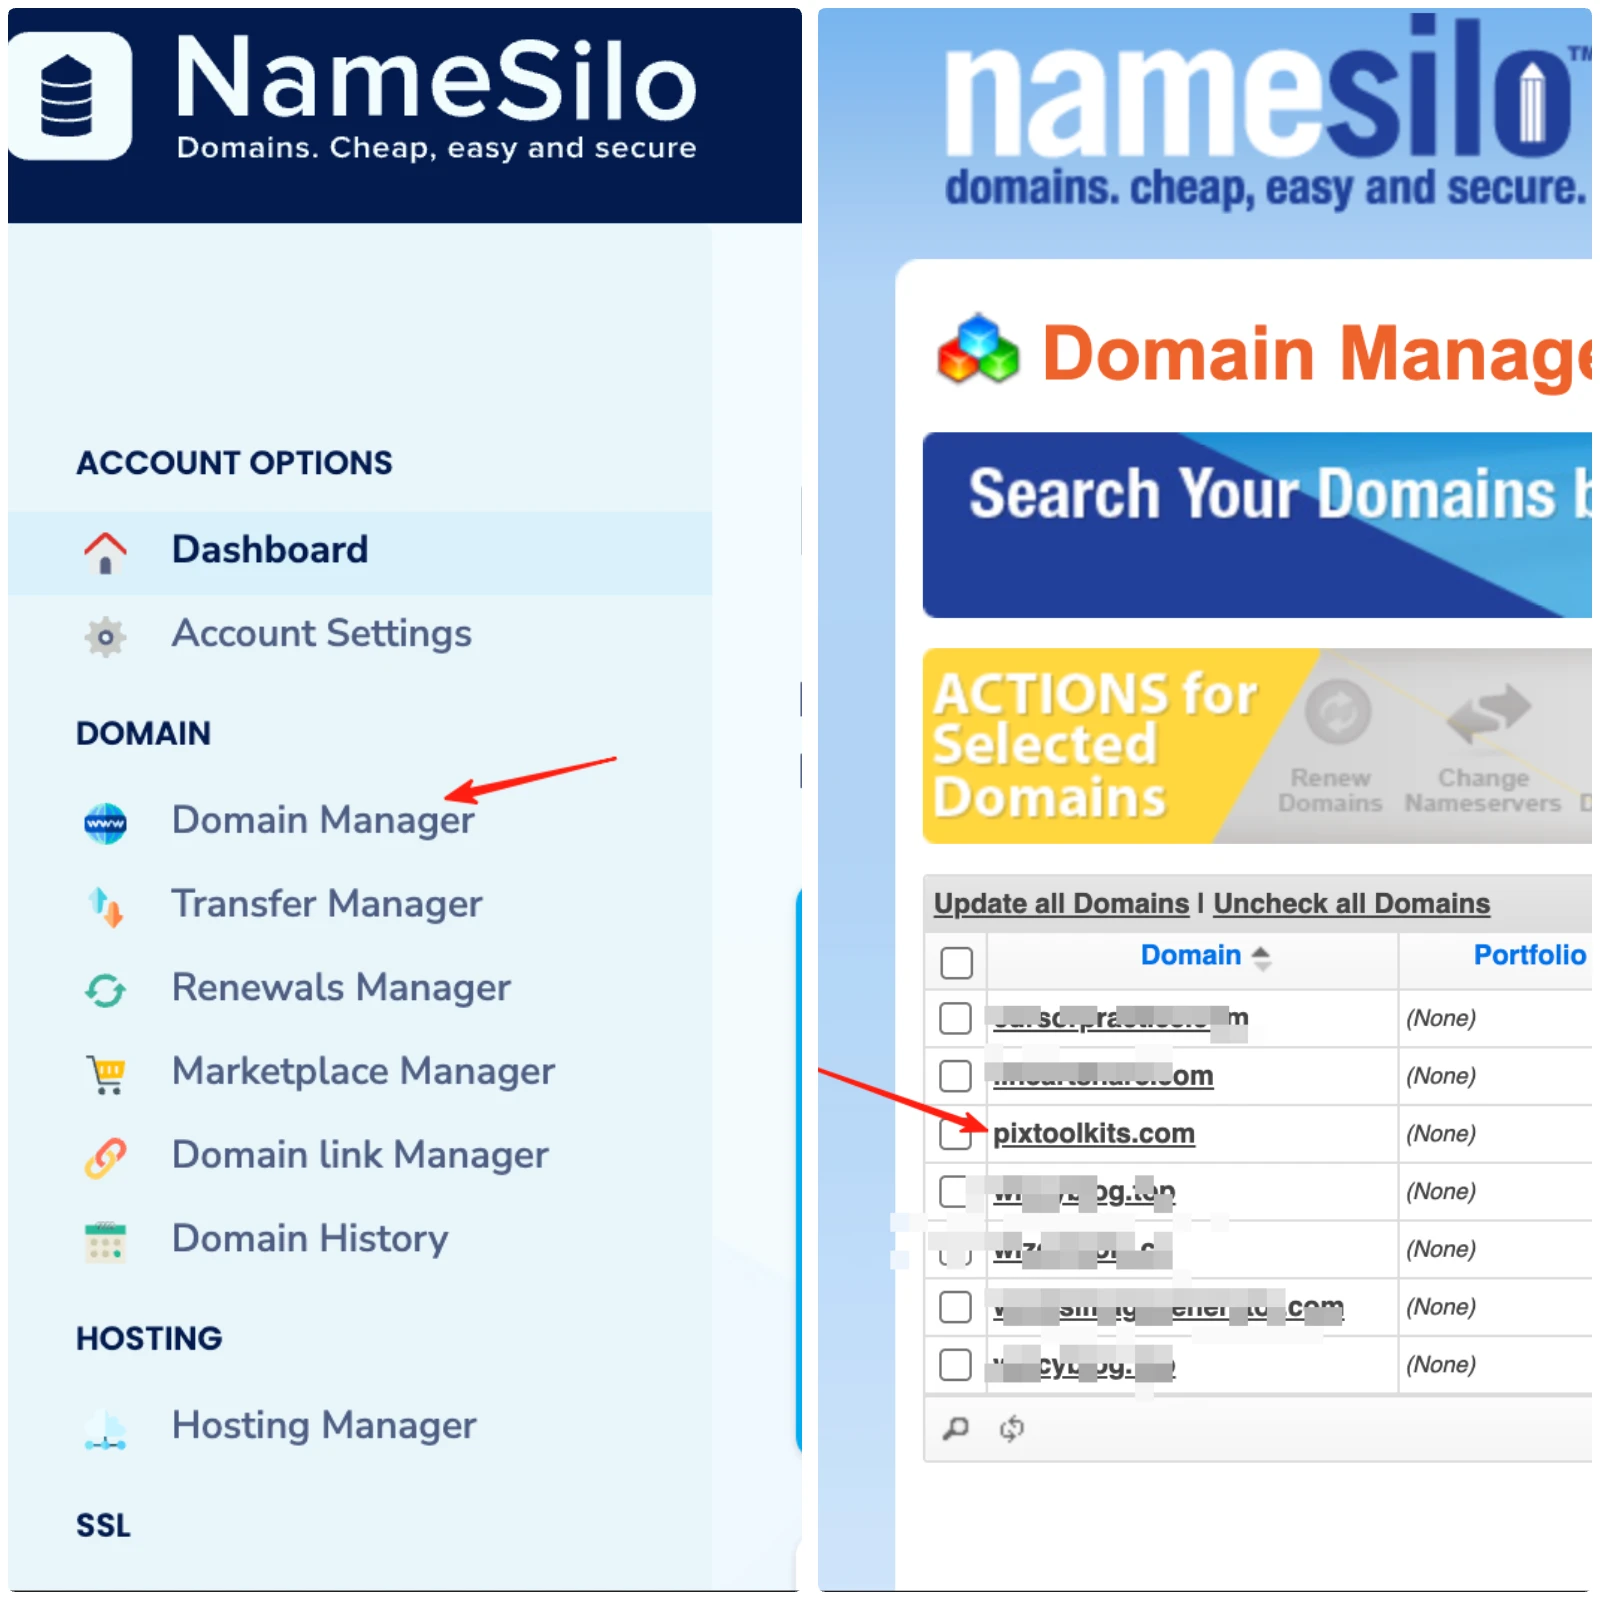
1) Domain Registration
- Multiple registrars available; we use NameSilo: www.namesilo.com/
- Have Cursor suggest domain names based on project functionality, then verify availability
- Purchase pixtoolkits.com
2) GitHub Repository Setup
- GitHub account registration
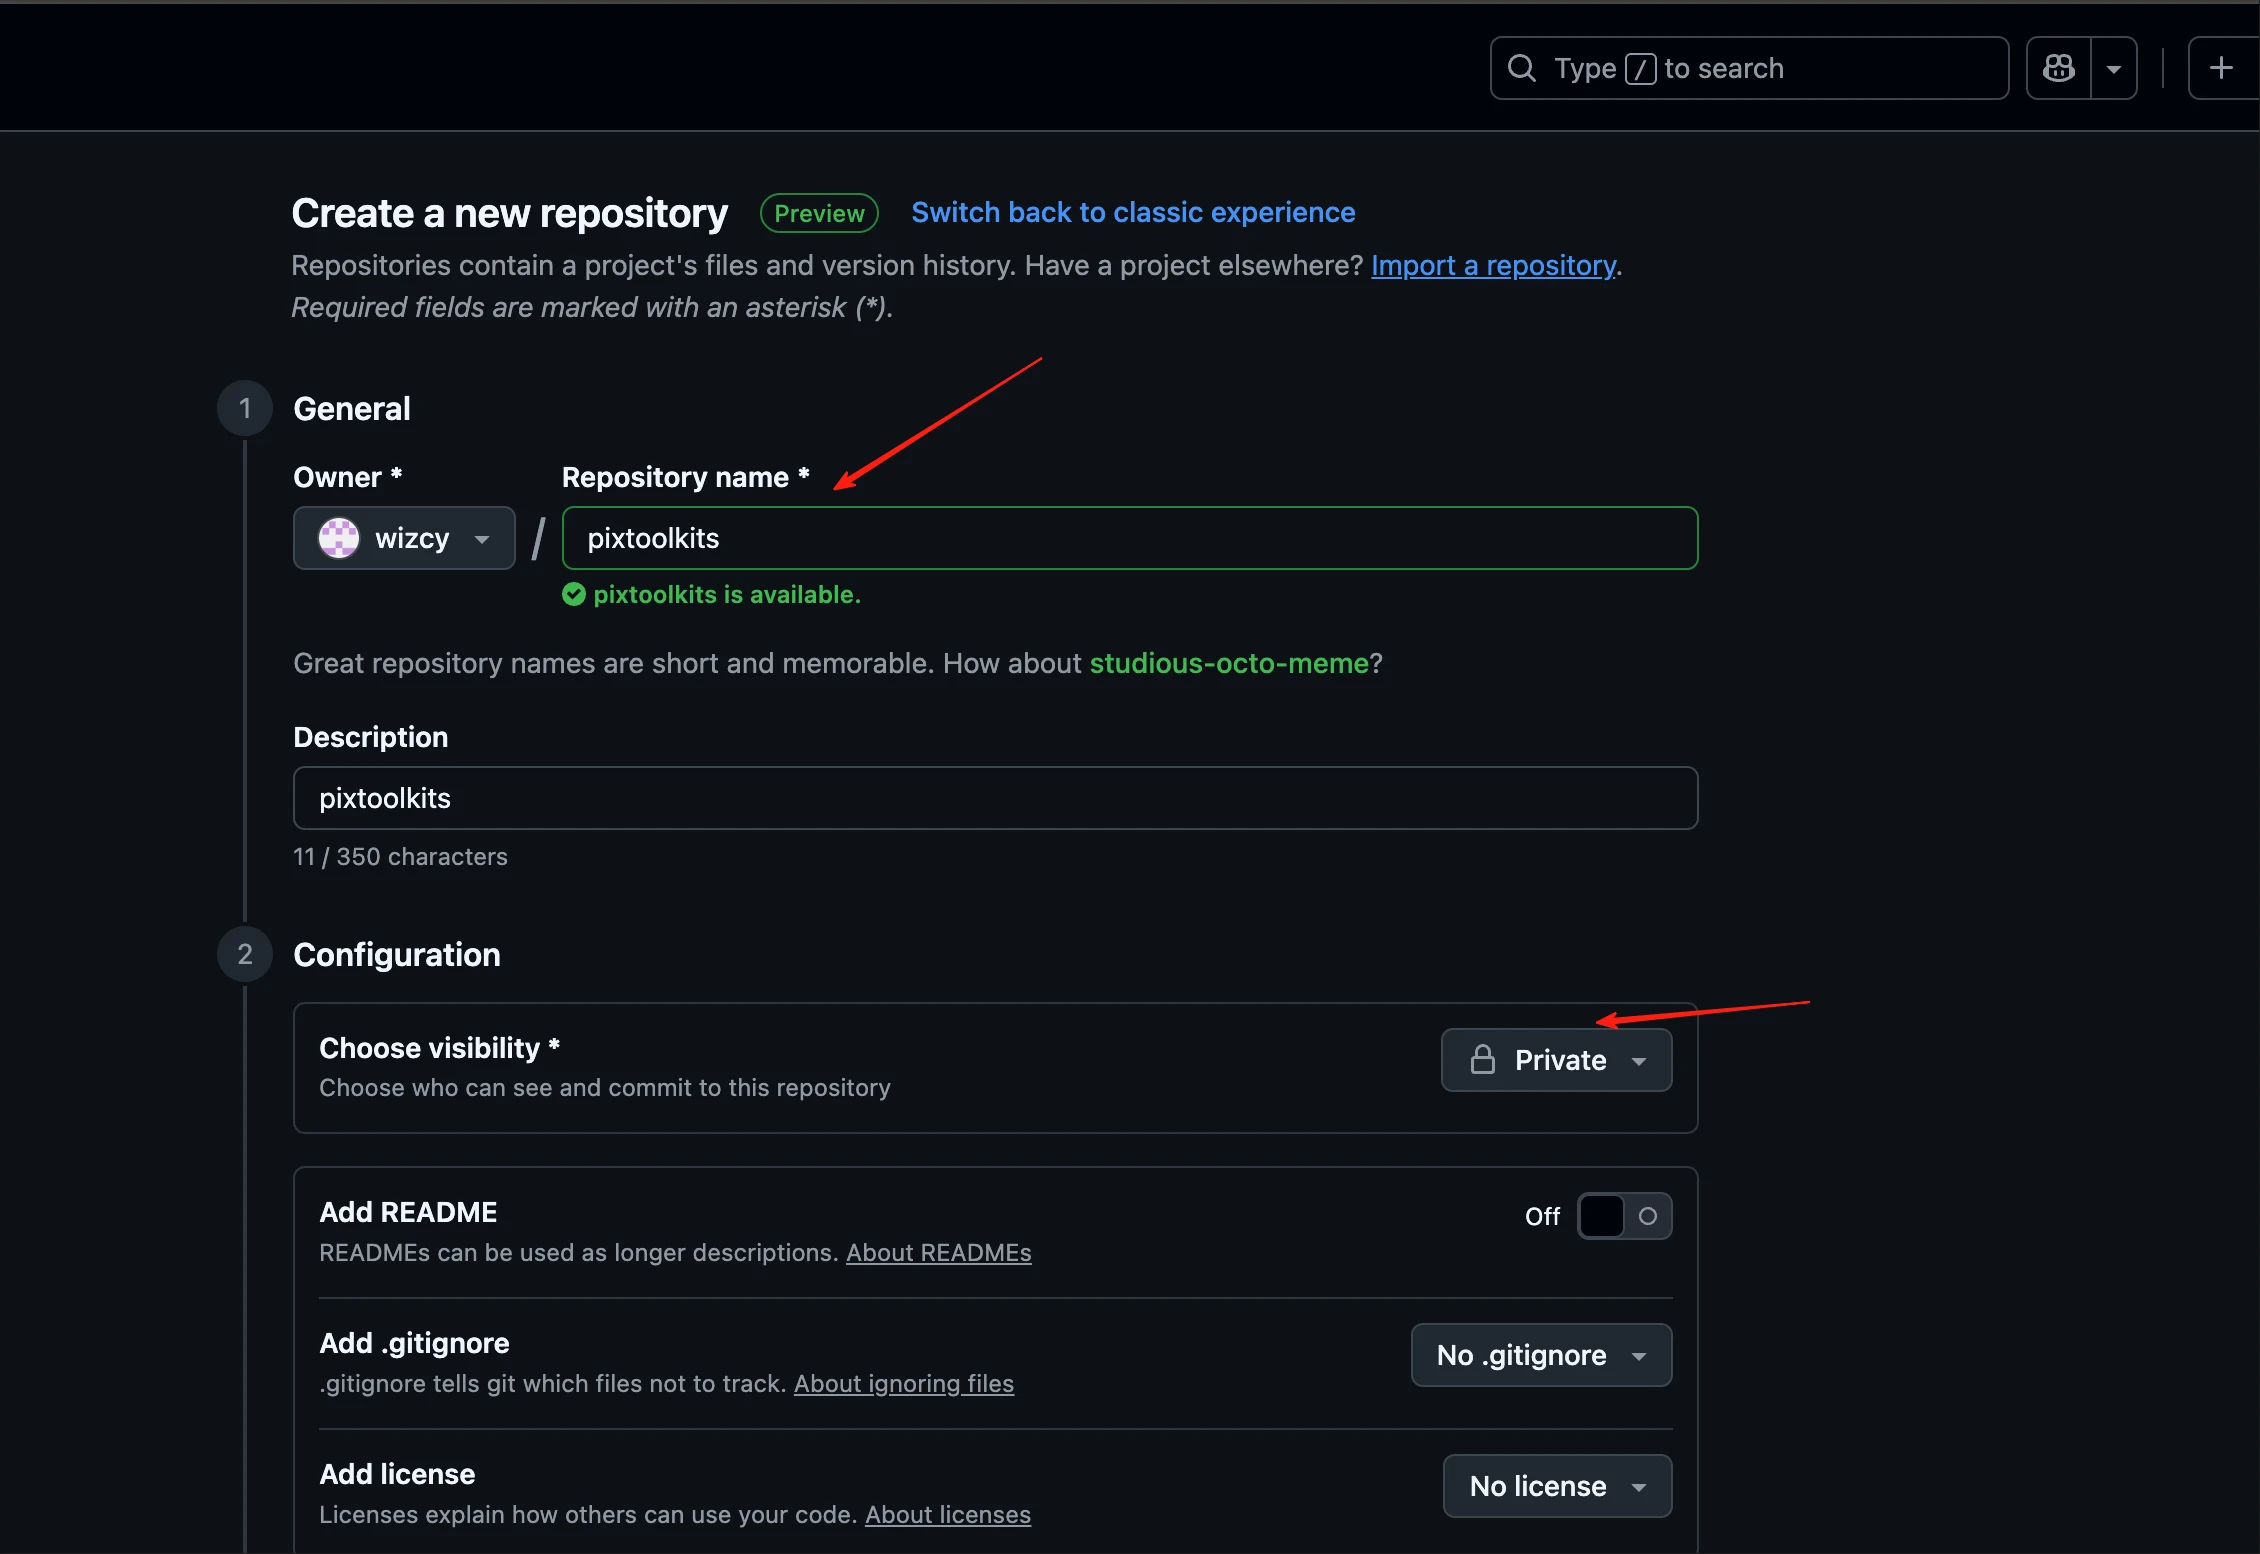
- Create new repository: Top-right '+' → "New repository"
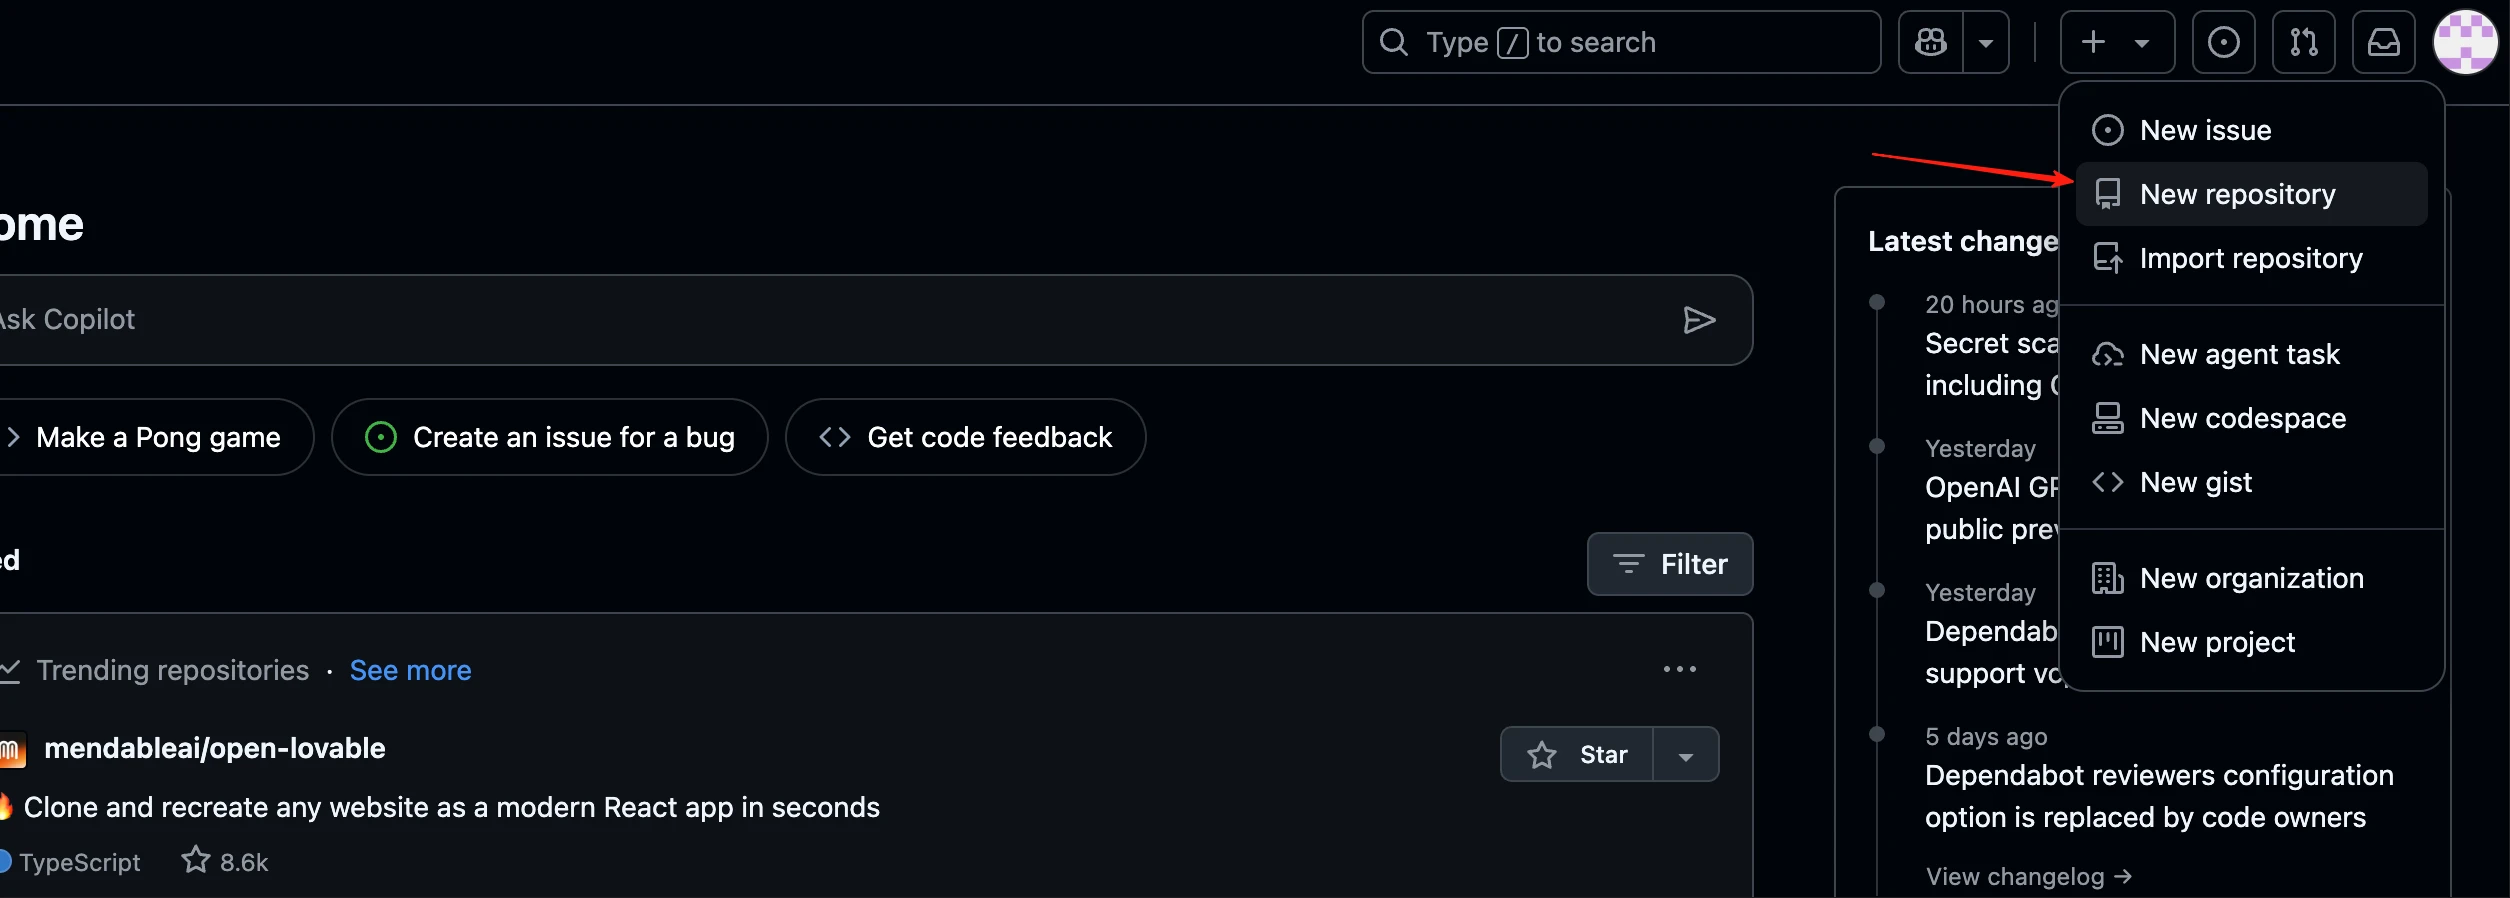
- Name repository (matching domain recommended), choose public/private visibility
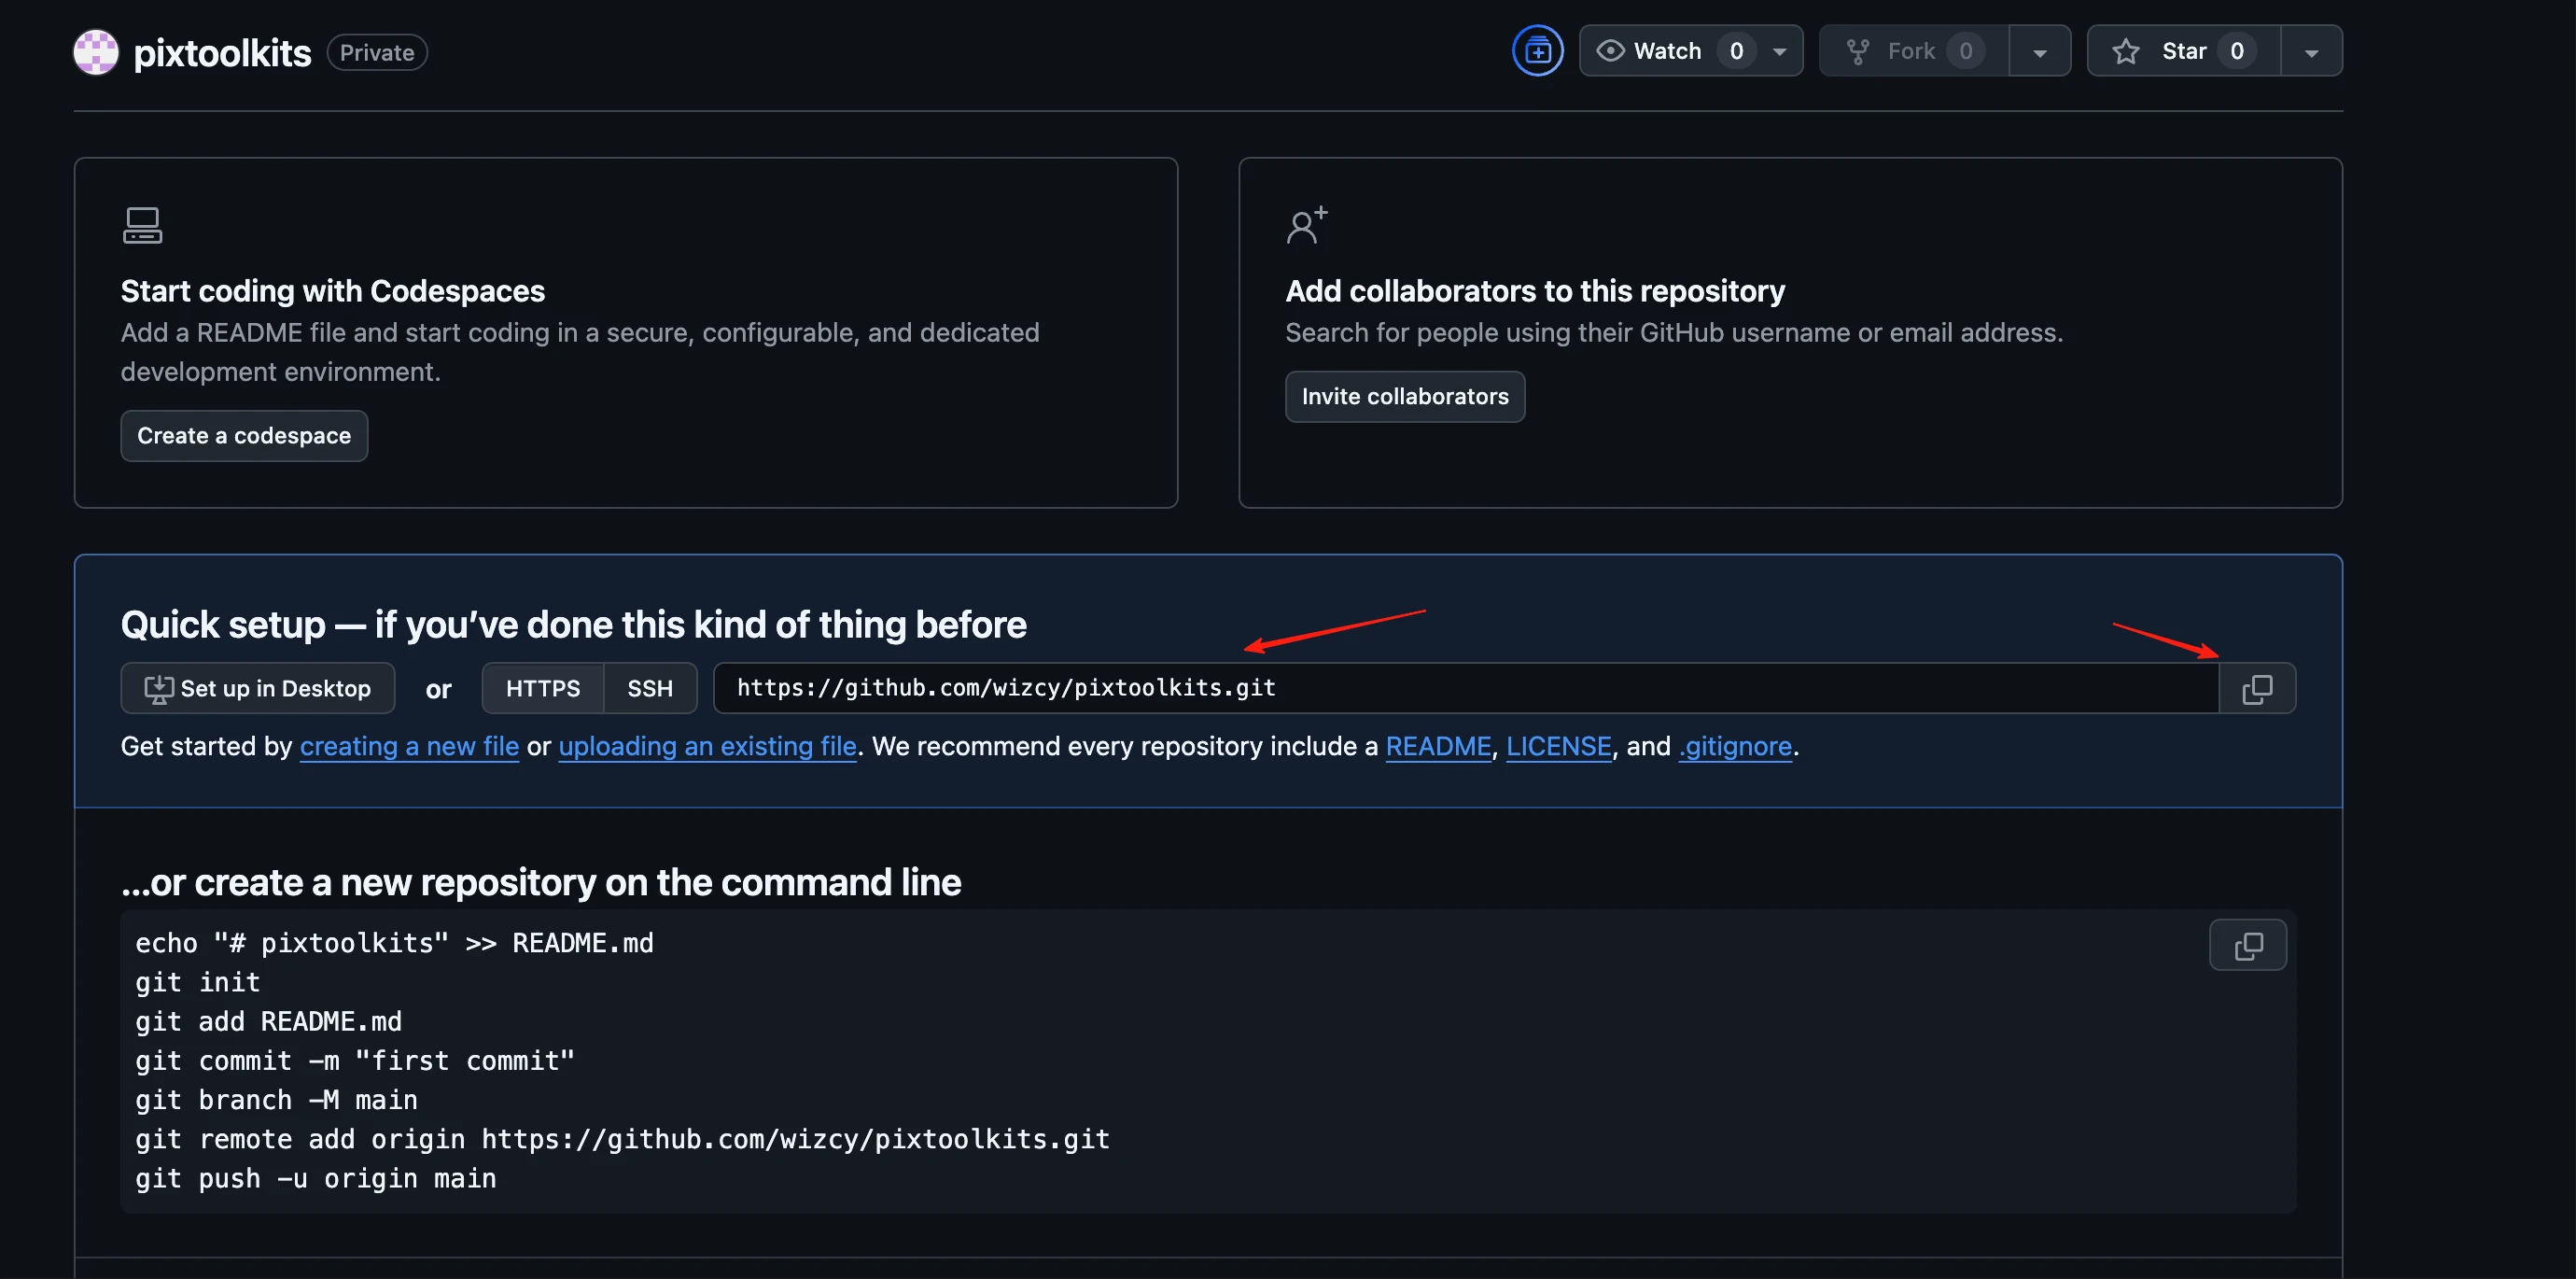
- Copy repository URL
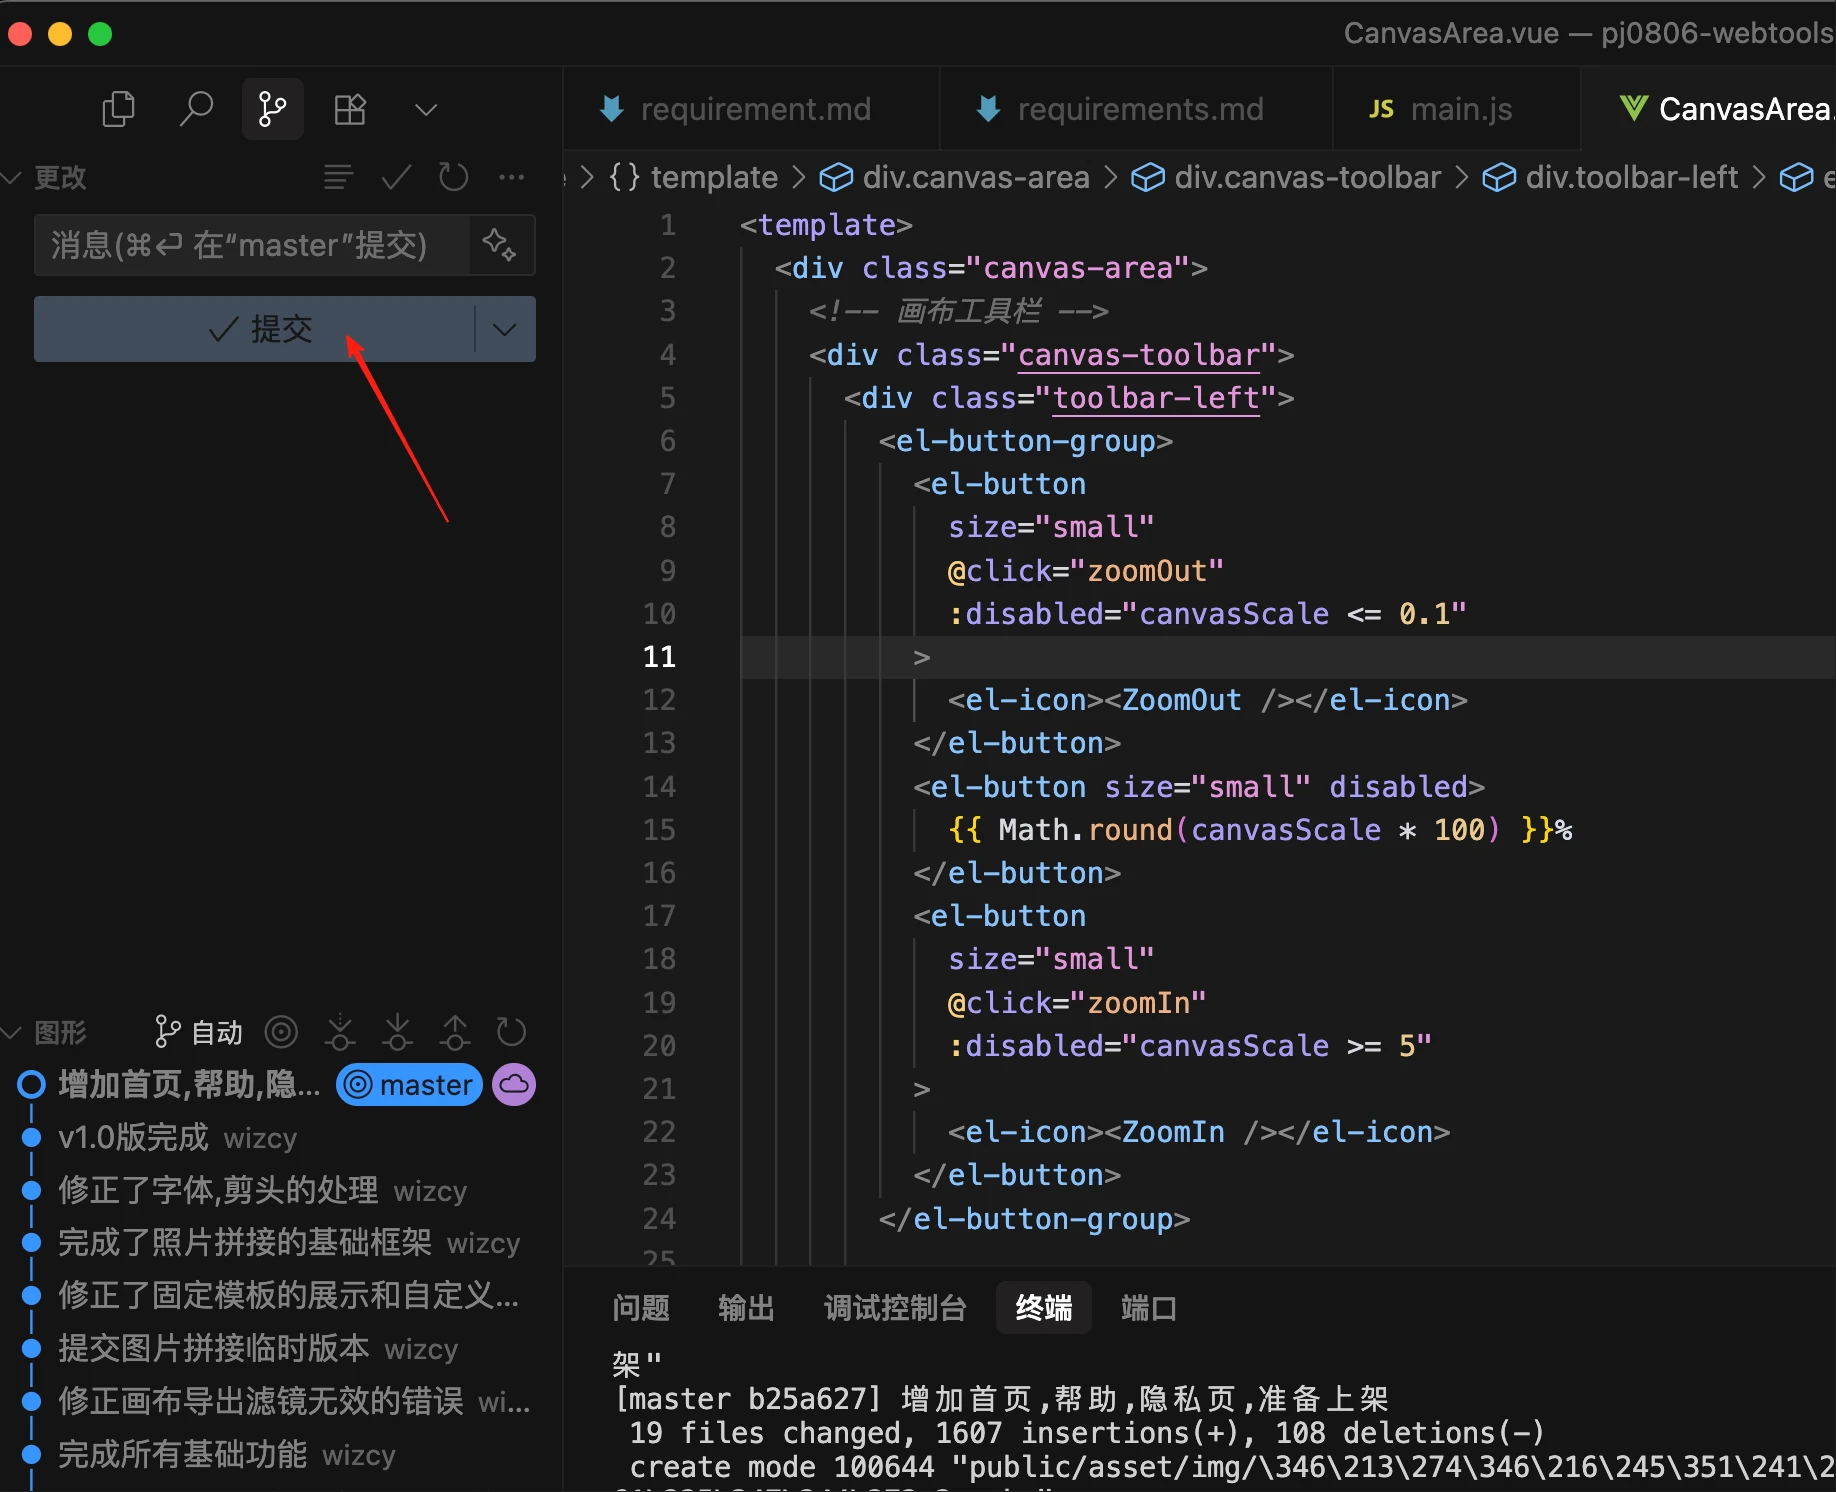
3) Cursor Code Editing & GitHub Integration
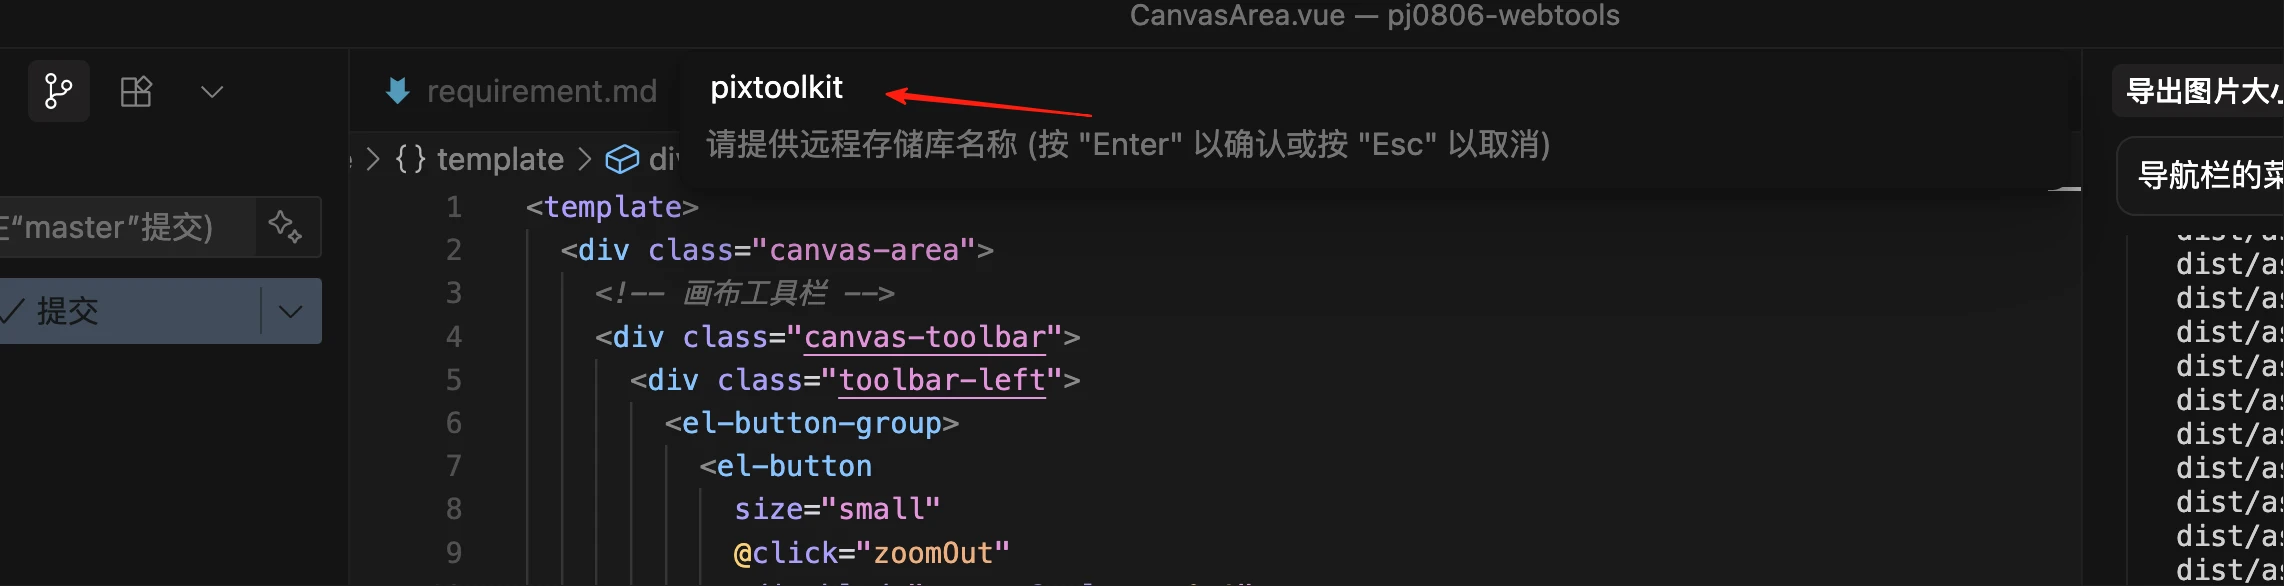
- In Cursor: Git icon → '...' → "Remote" → "Add Remote Repository" → Enter URL/name
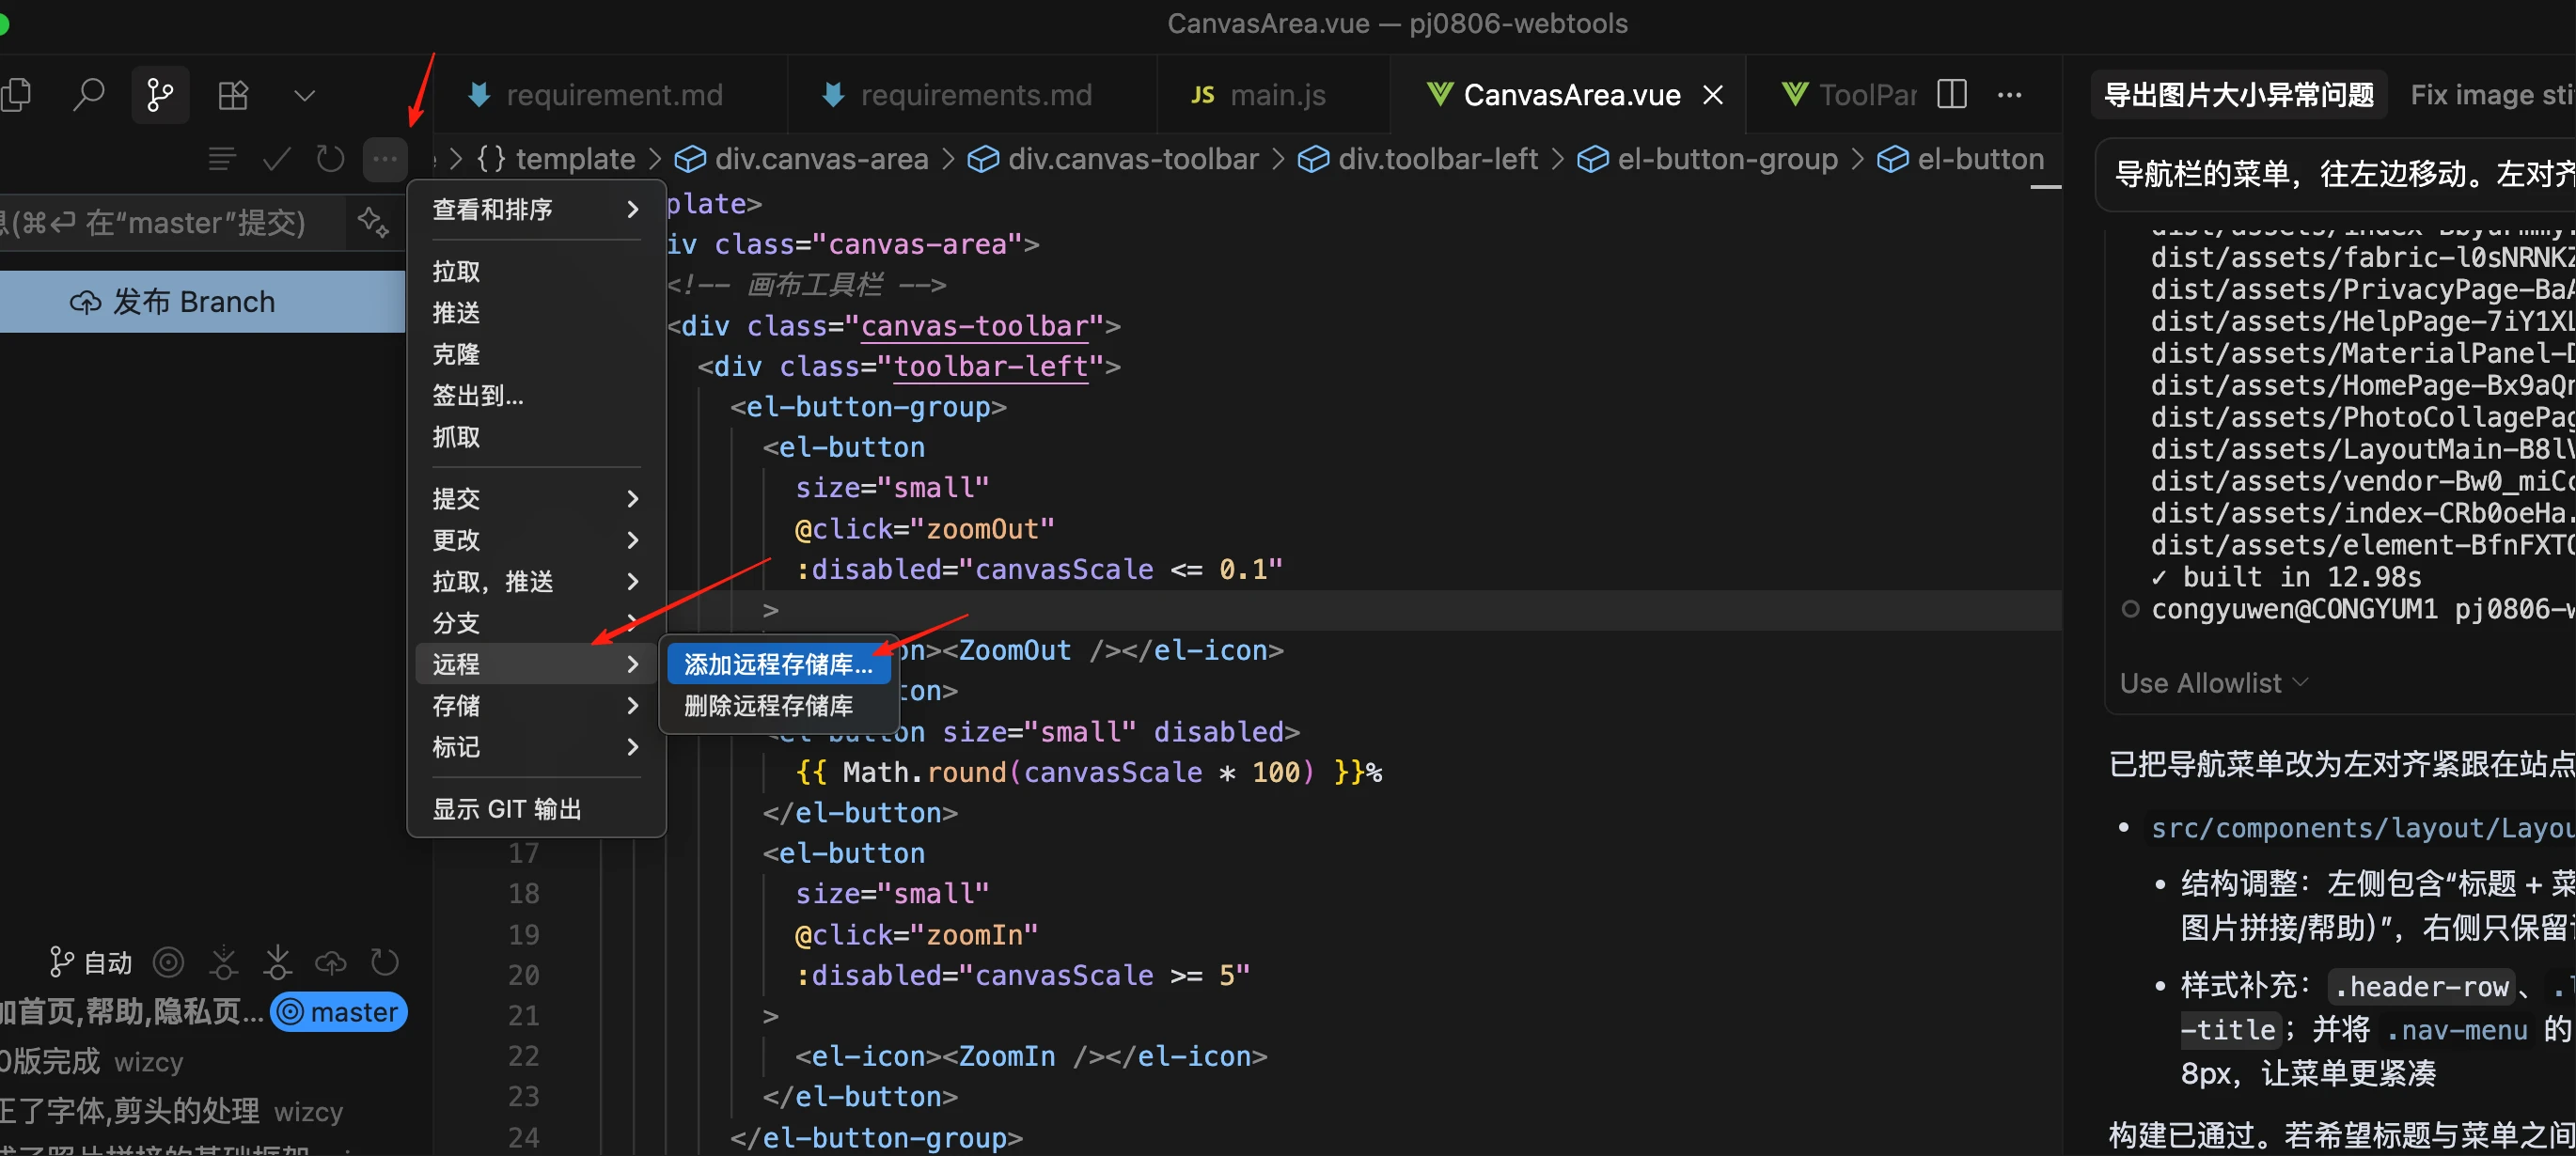
- Complete authentication if prompted (let Cursor assist if needed)
- After successful binding, push code (left panel shows local commits and orange cloud icon for remote)
4) Vercel Setup & GitHub Integration
- Vercel account registration
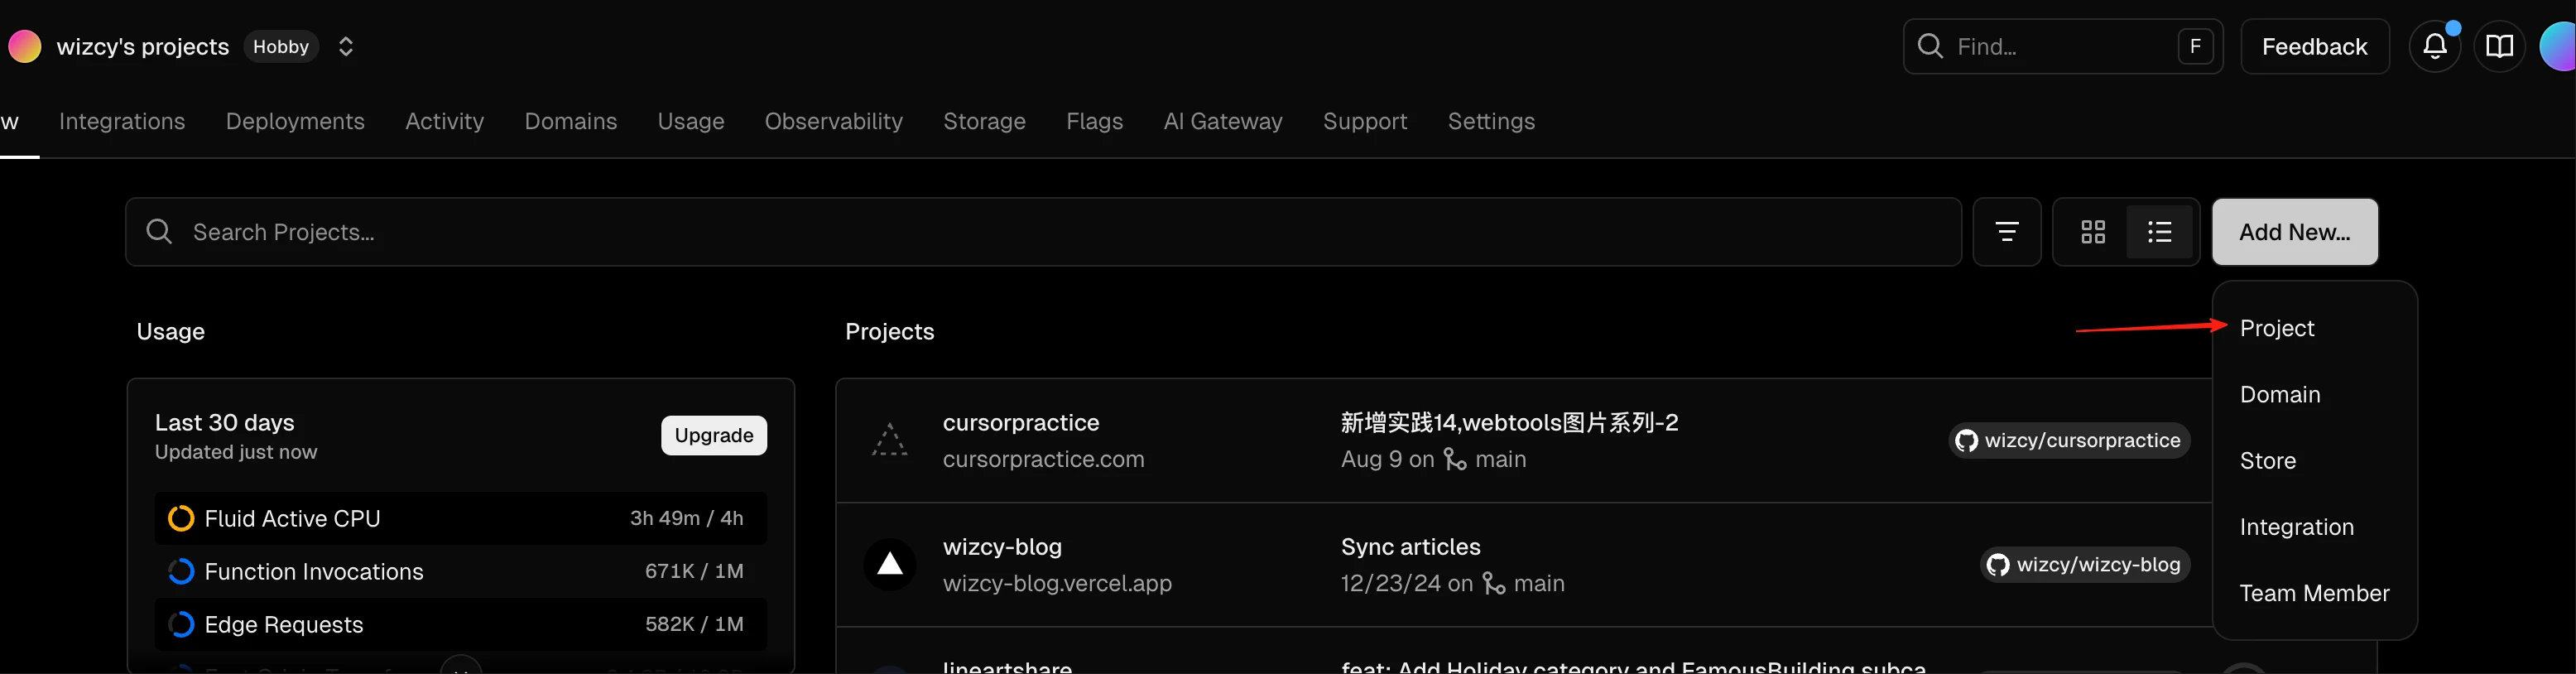
- Create project: "ADD NEW..." → "Project"
- Connect GitHub account (follow auth prompts)
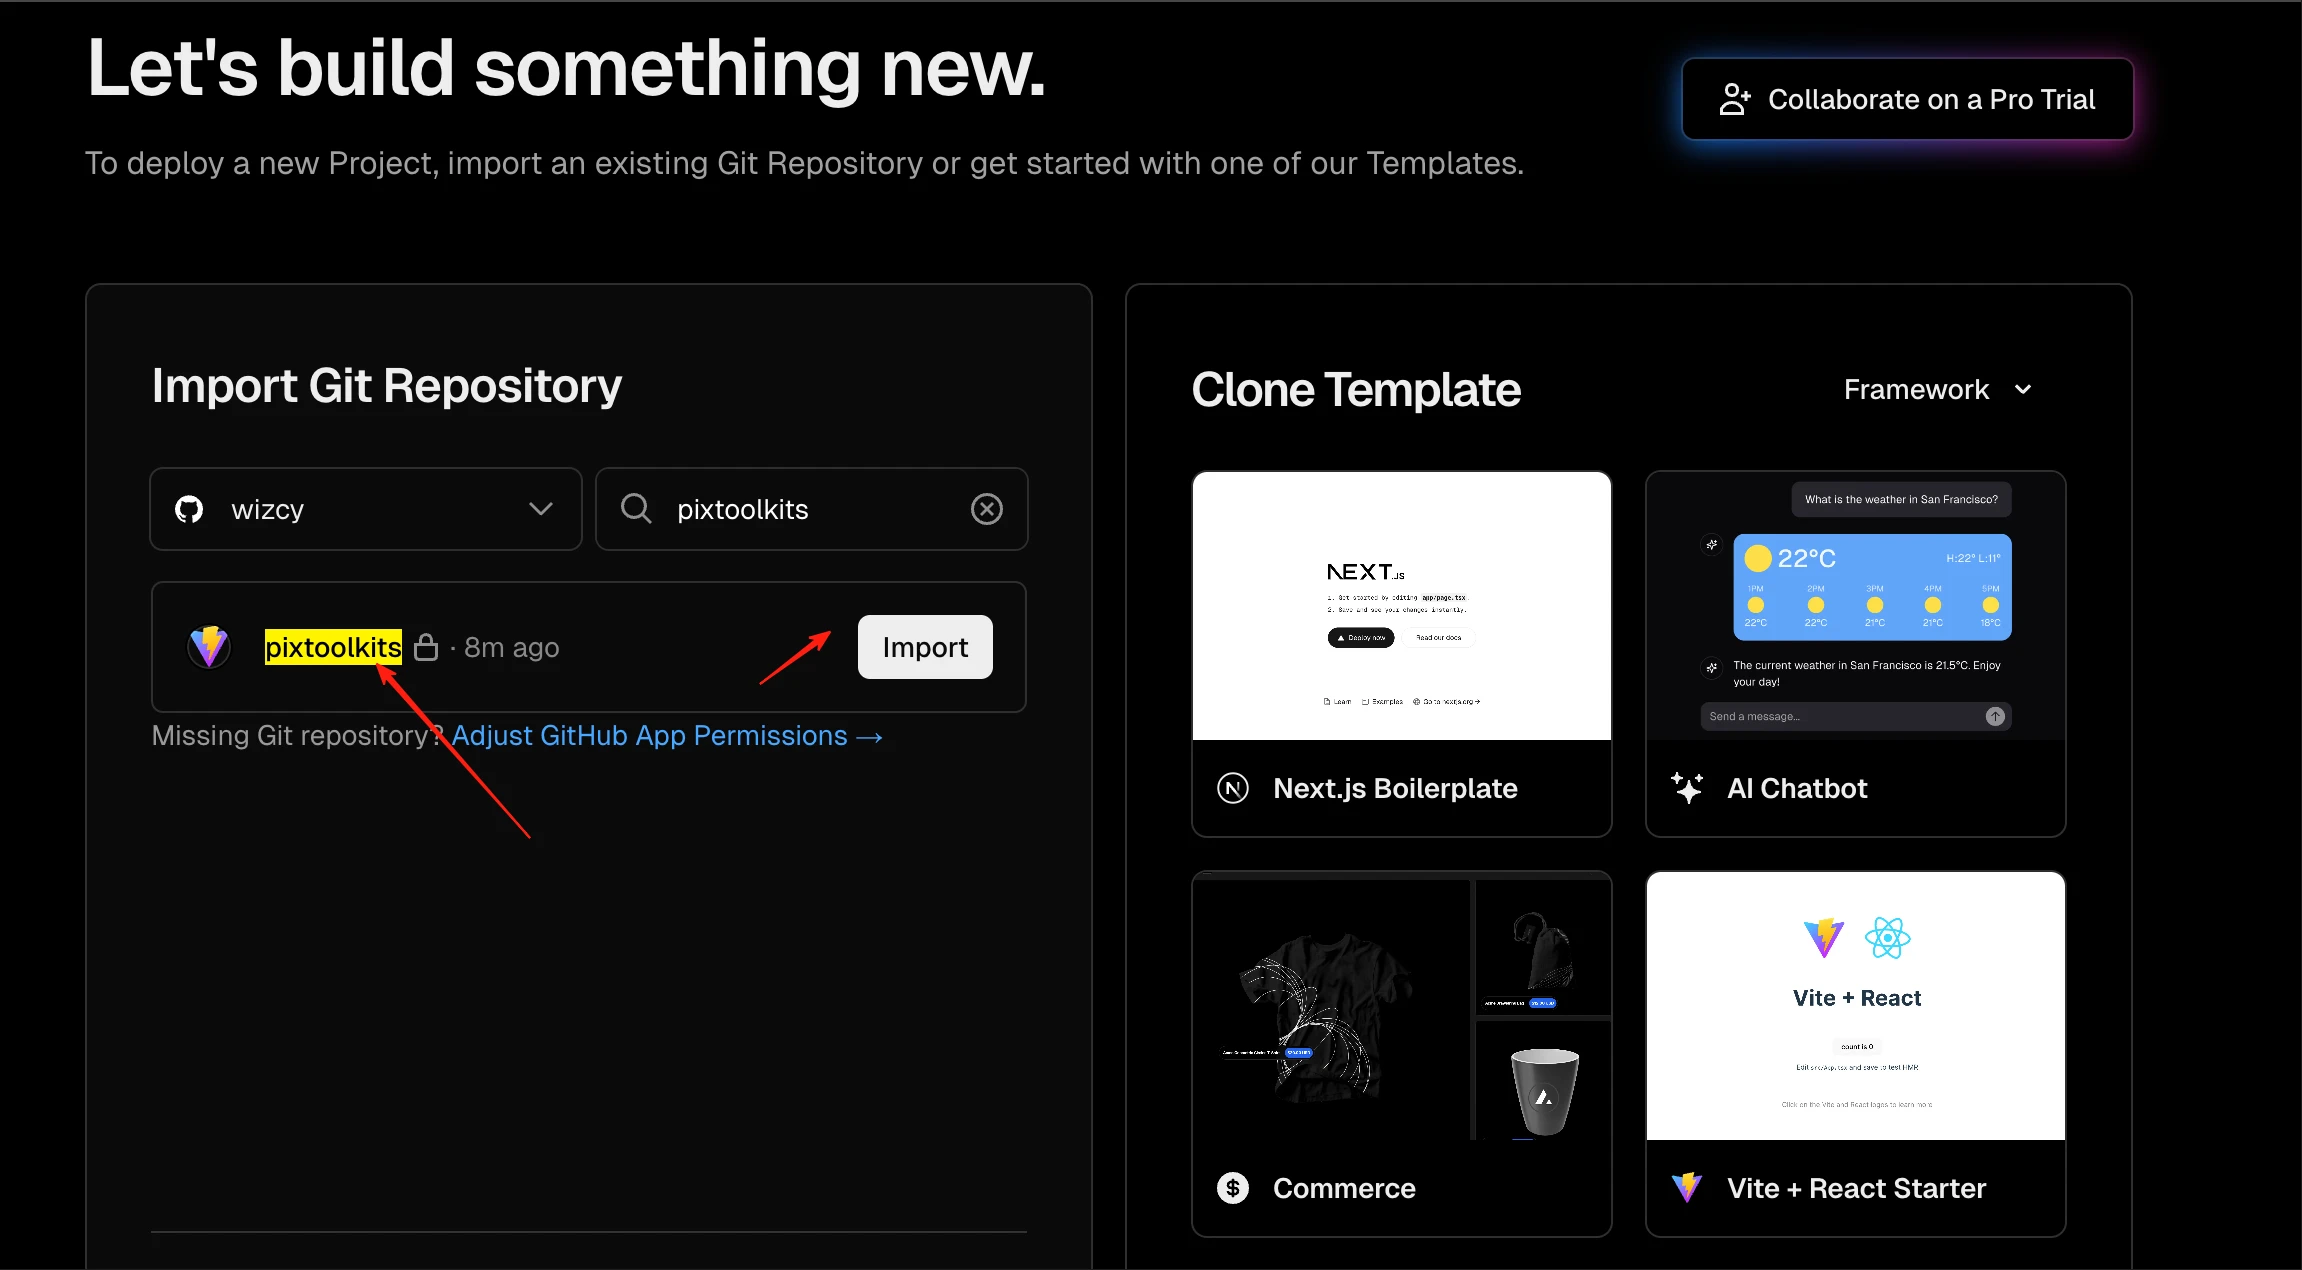
- Under 'Import Git repository', select your repo (may require GitHub App configuration first)
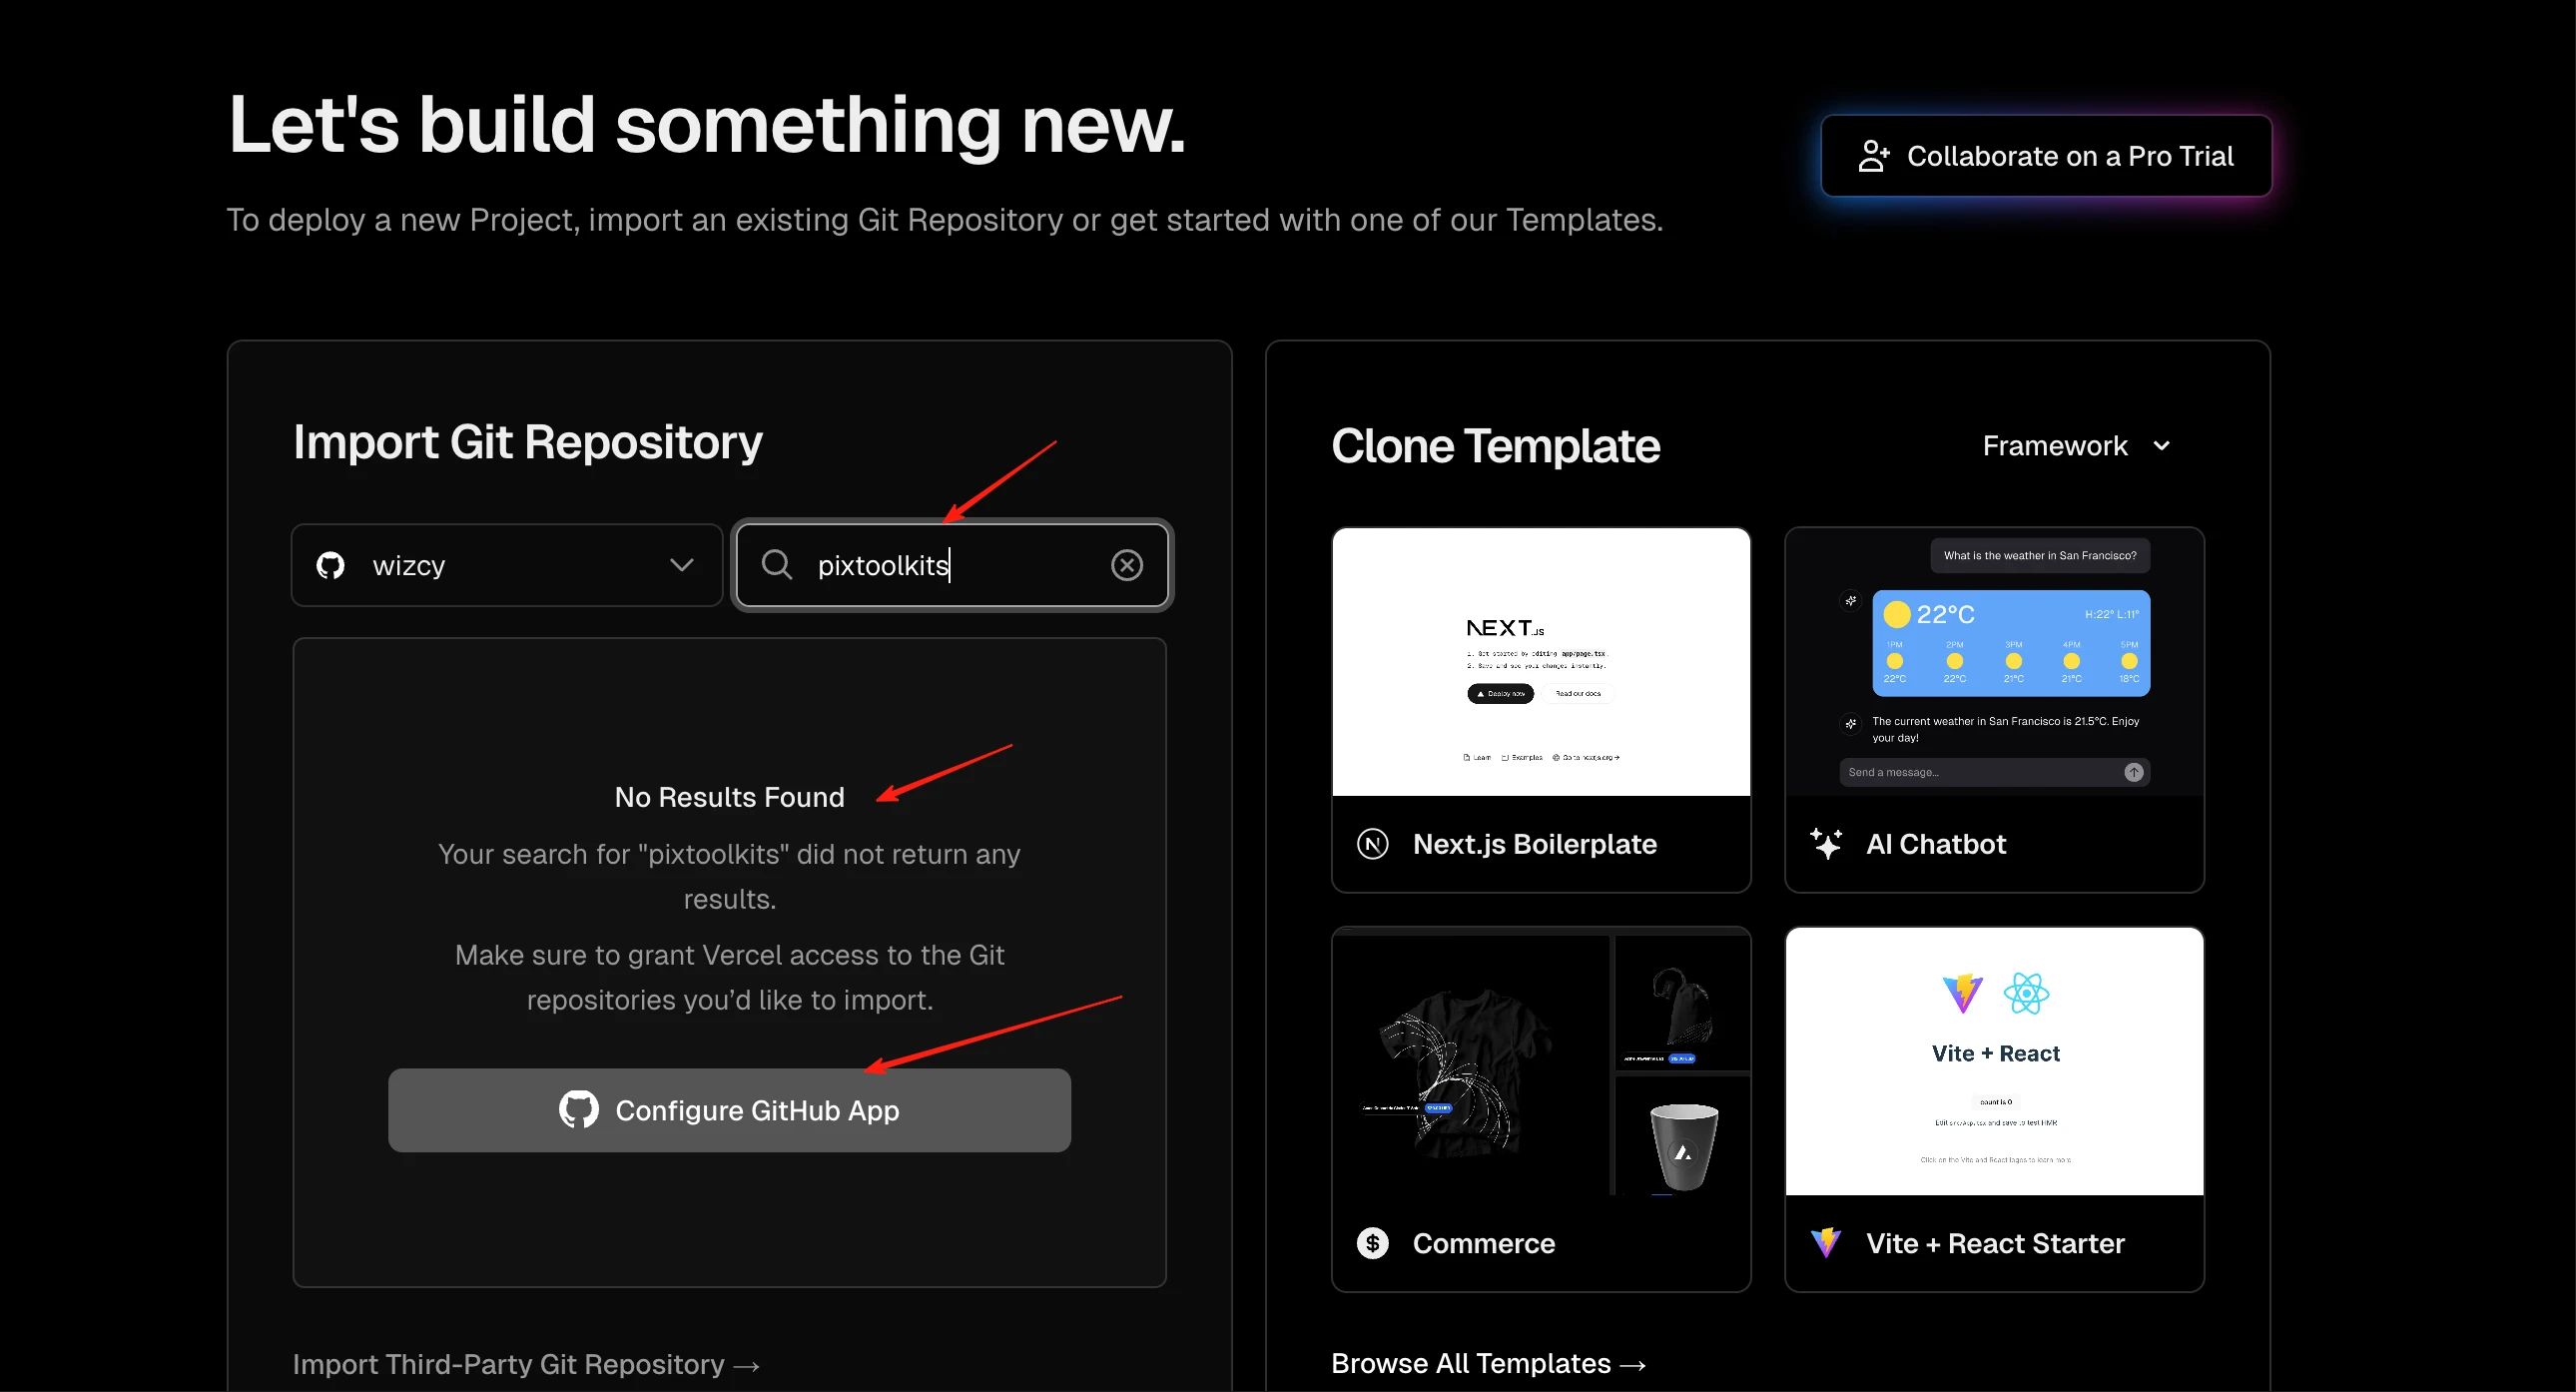
- In GitHub: Settings → Applications → Repository access → Grant access to specific repos
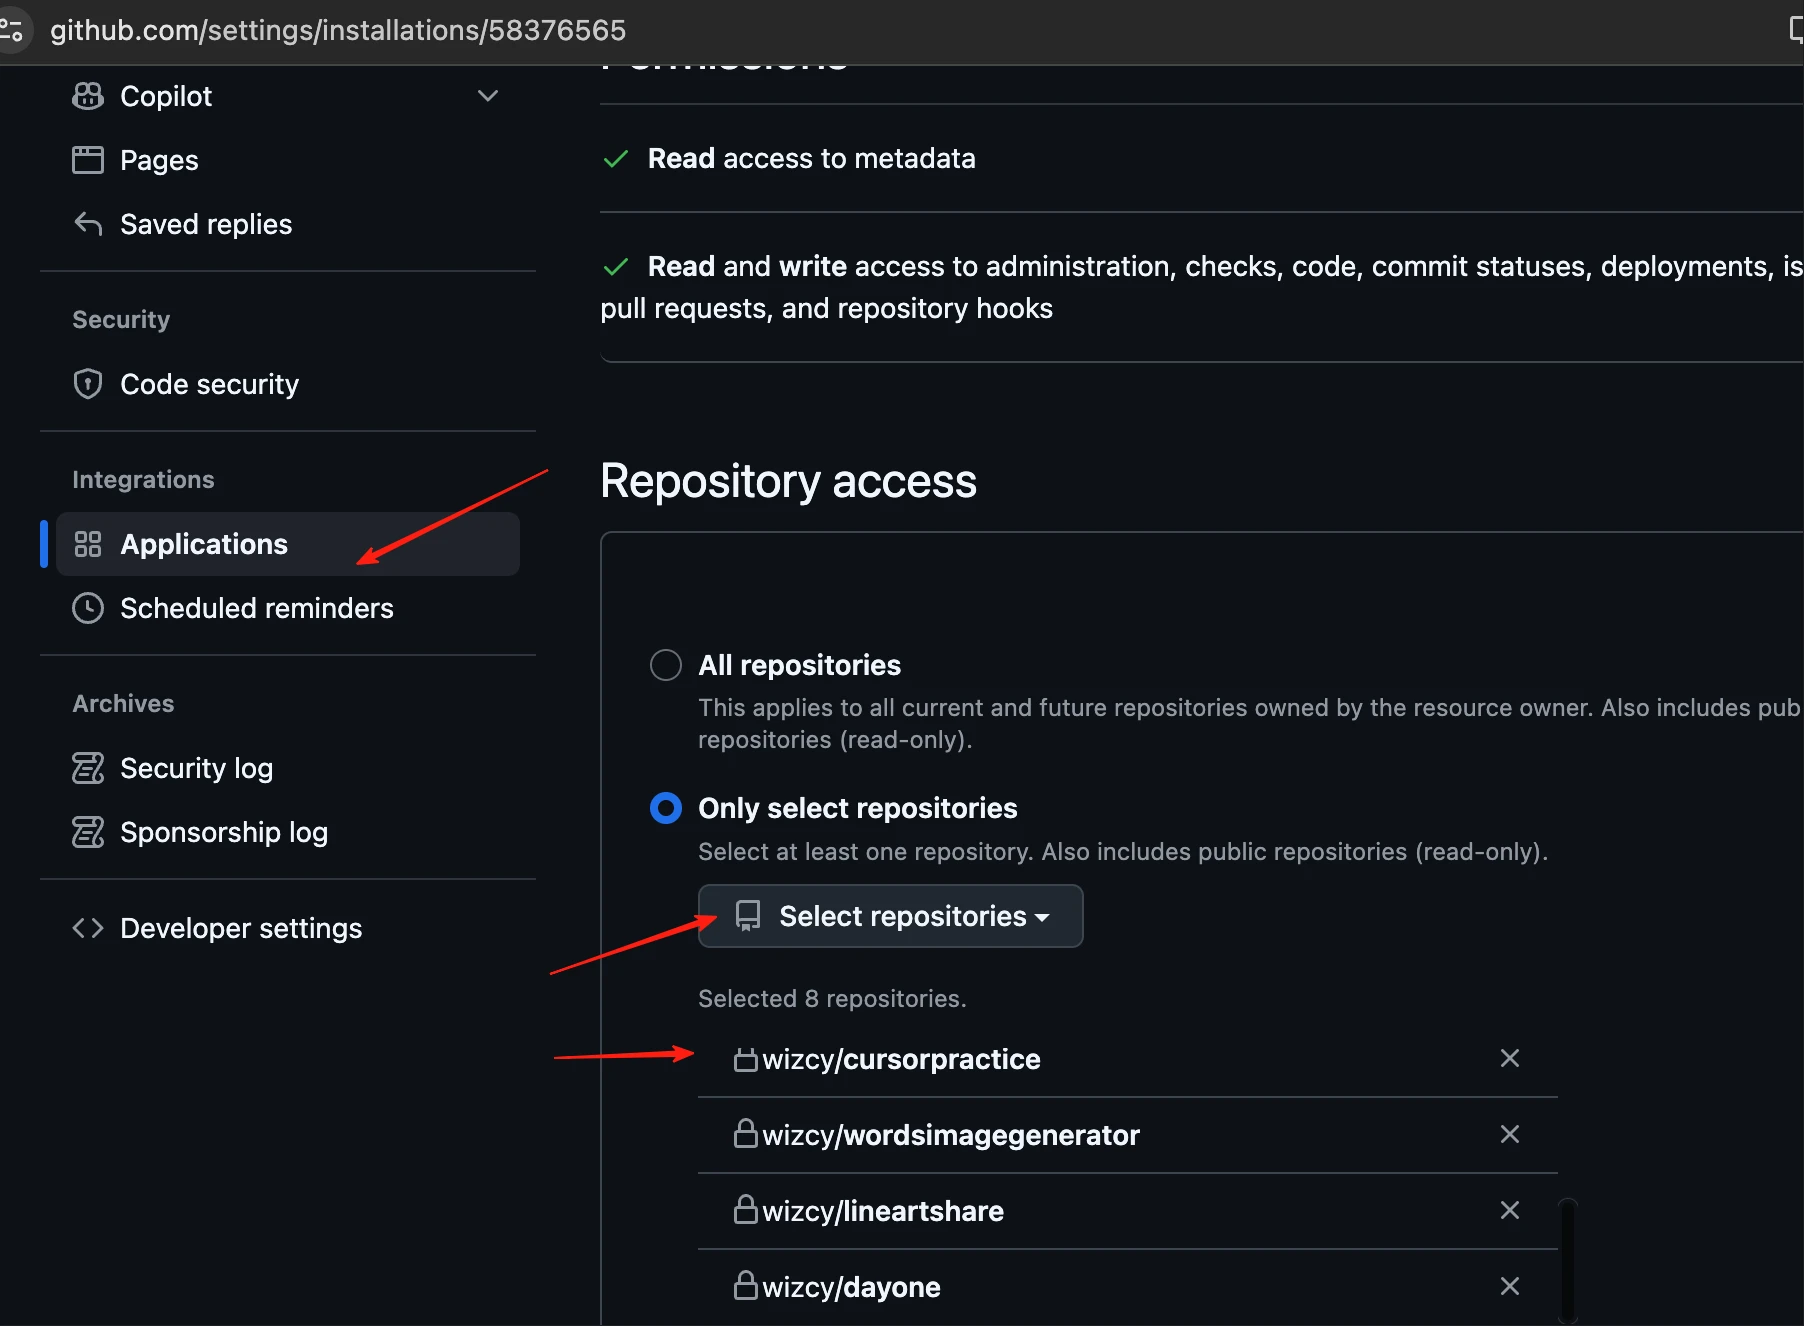
- Return to Vercel, select repo → 'Import'
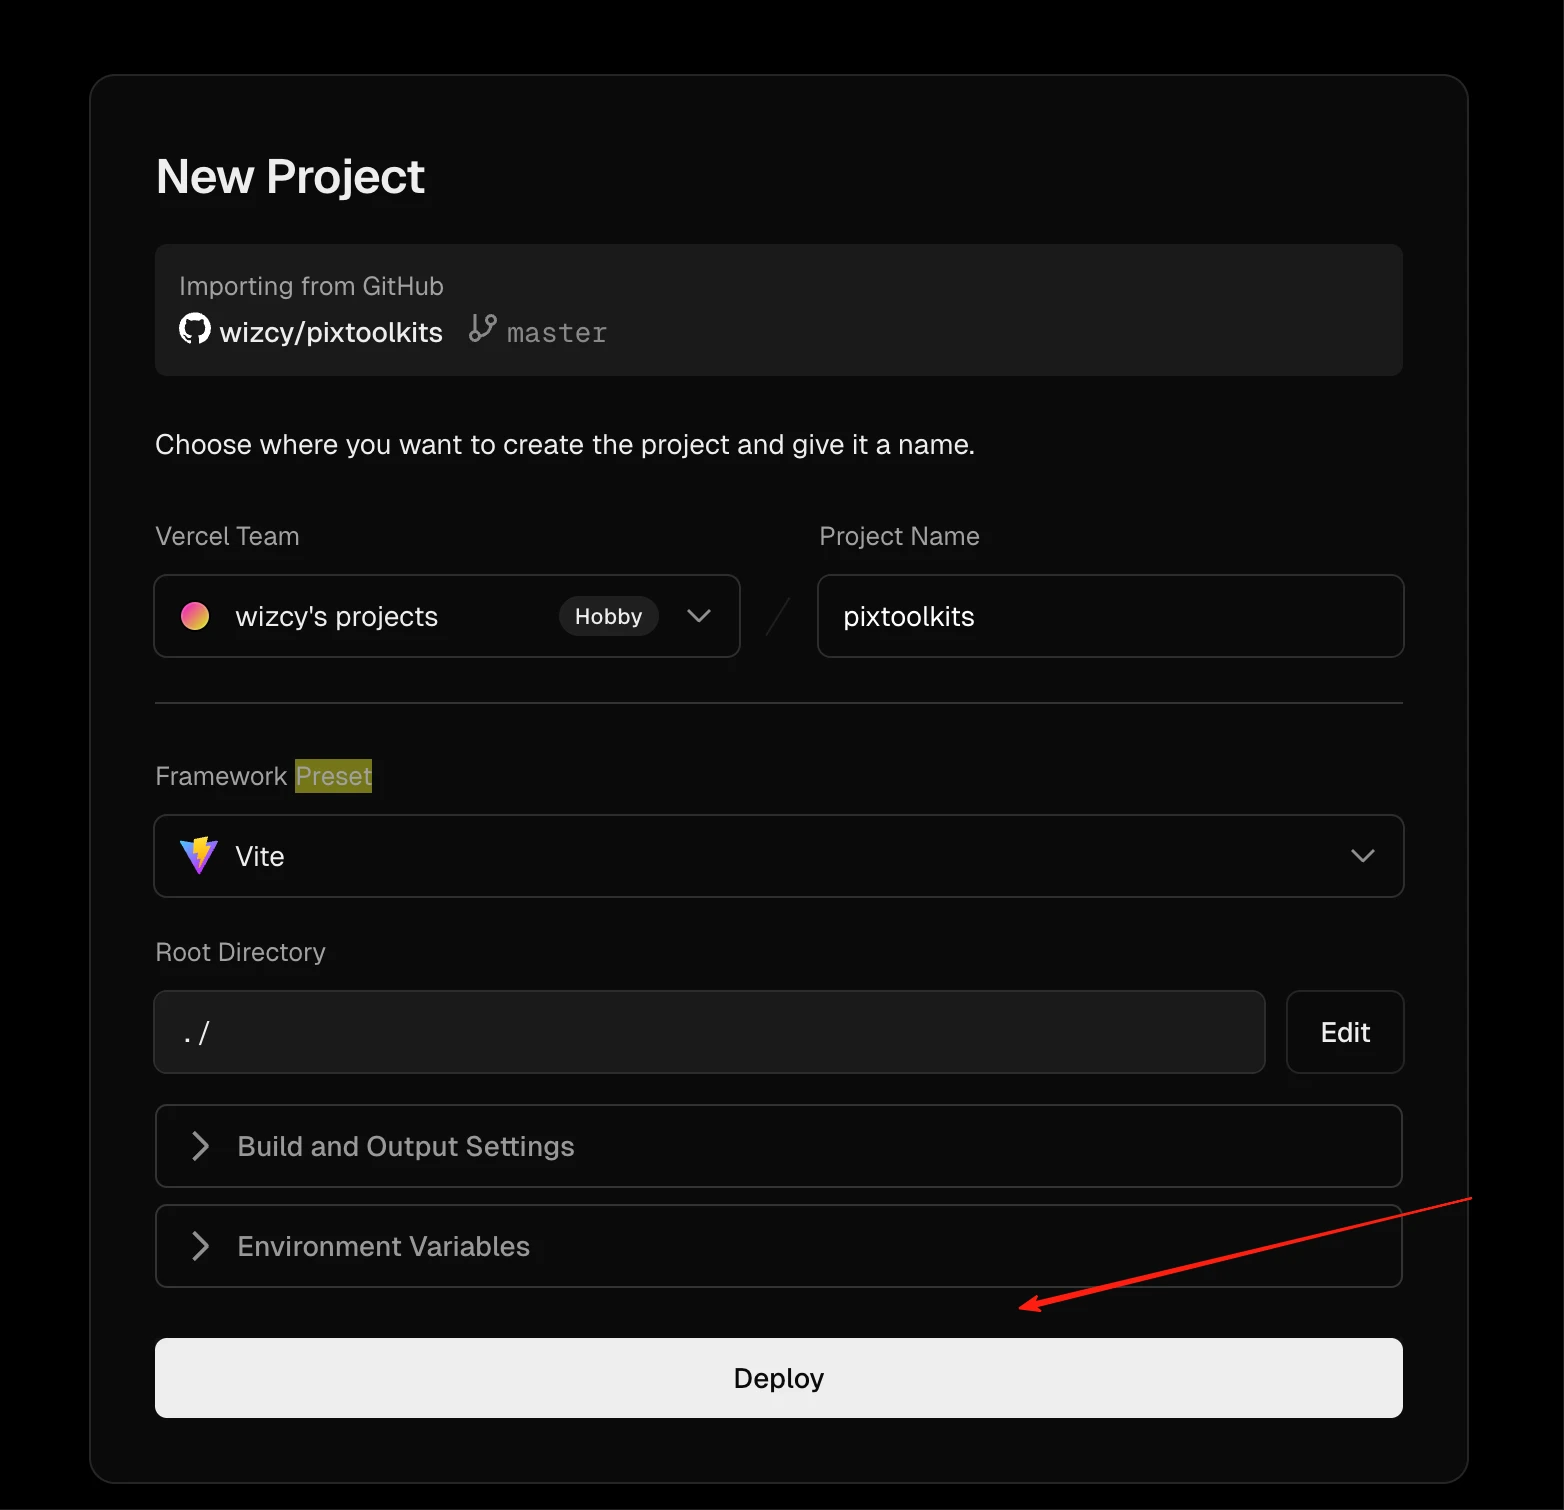
- Enter project name → 'Deploy'
- Monitor deployment (errors may occur)
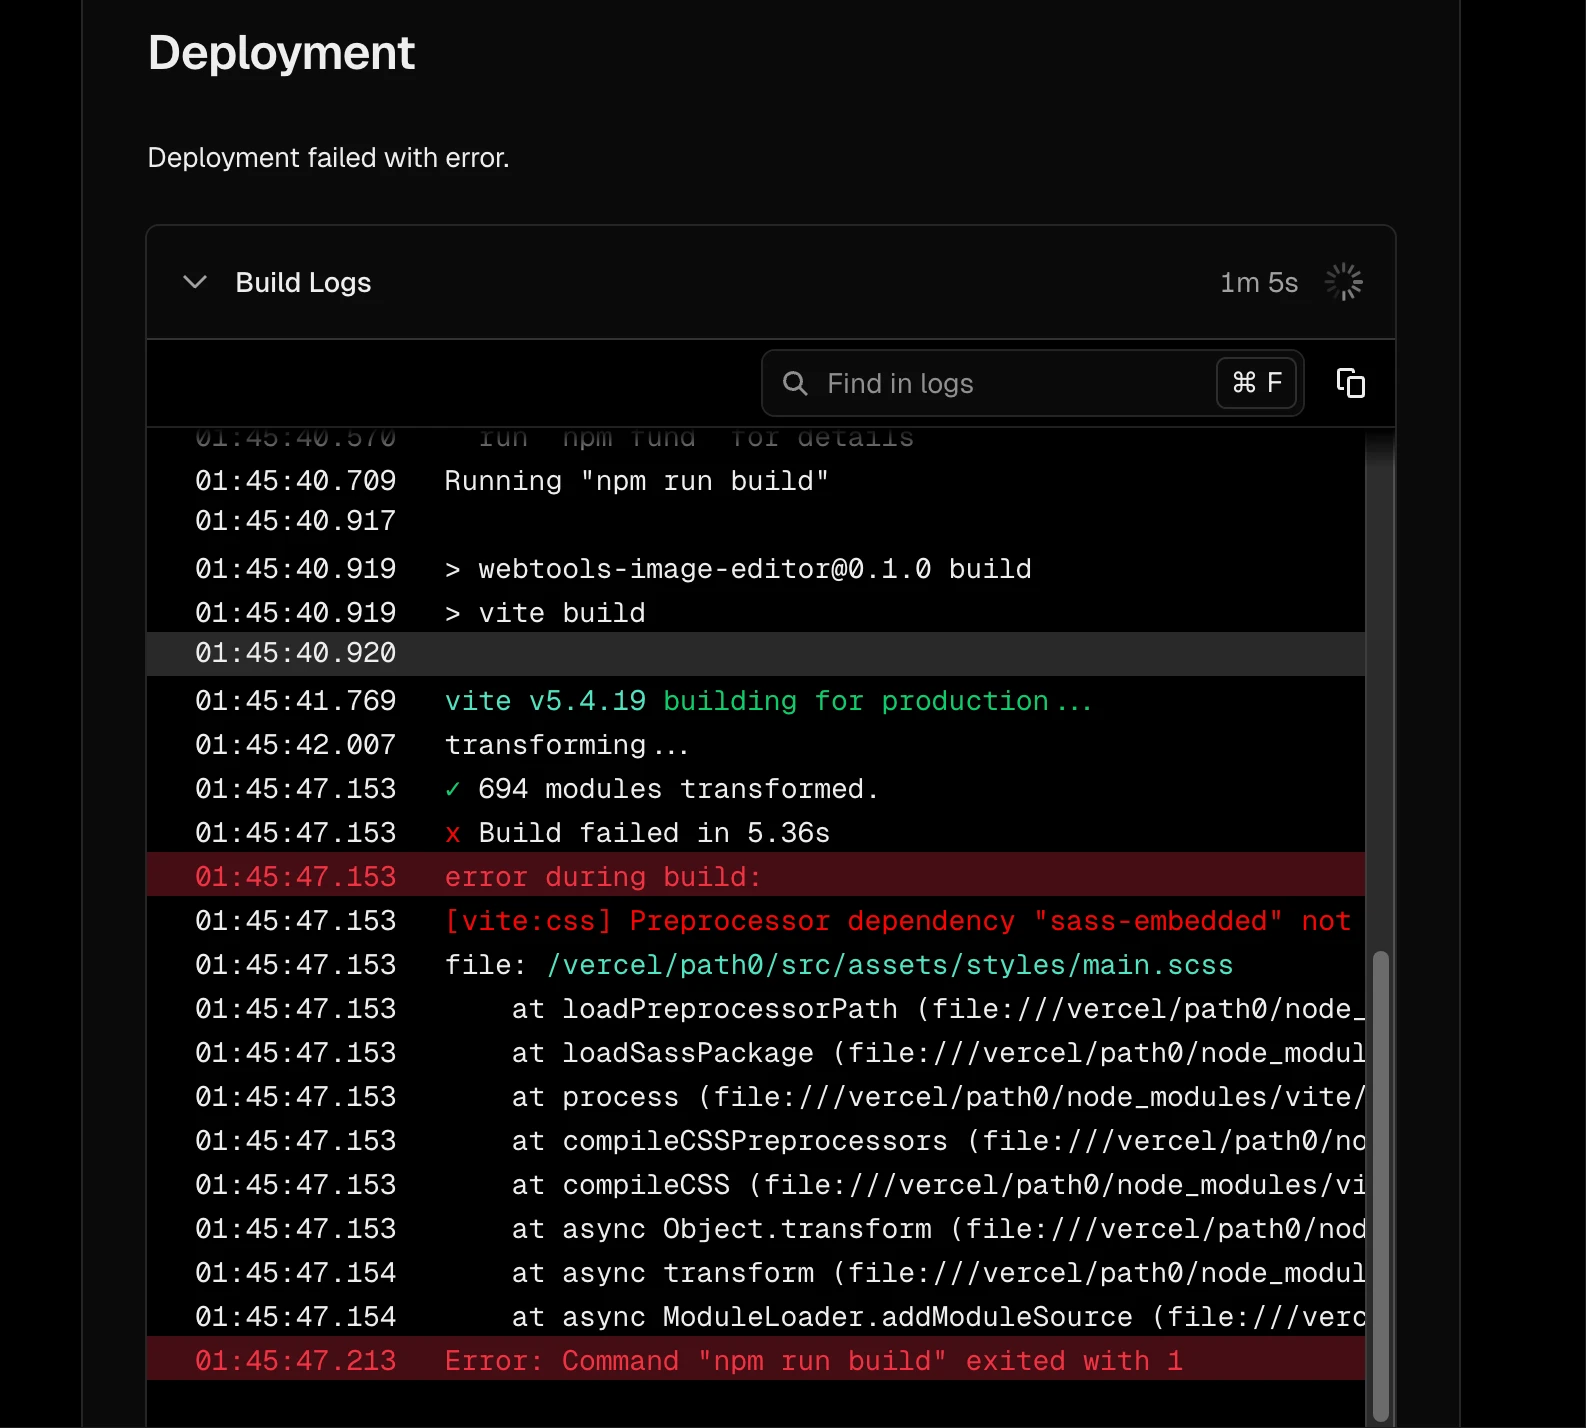
- Share error screenshots with Cursor for fixes
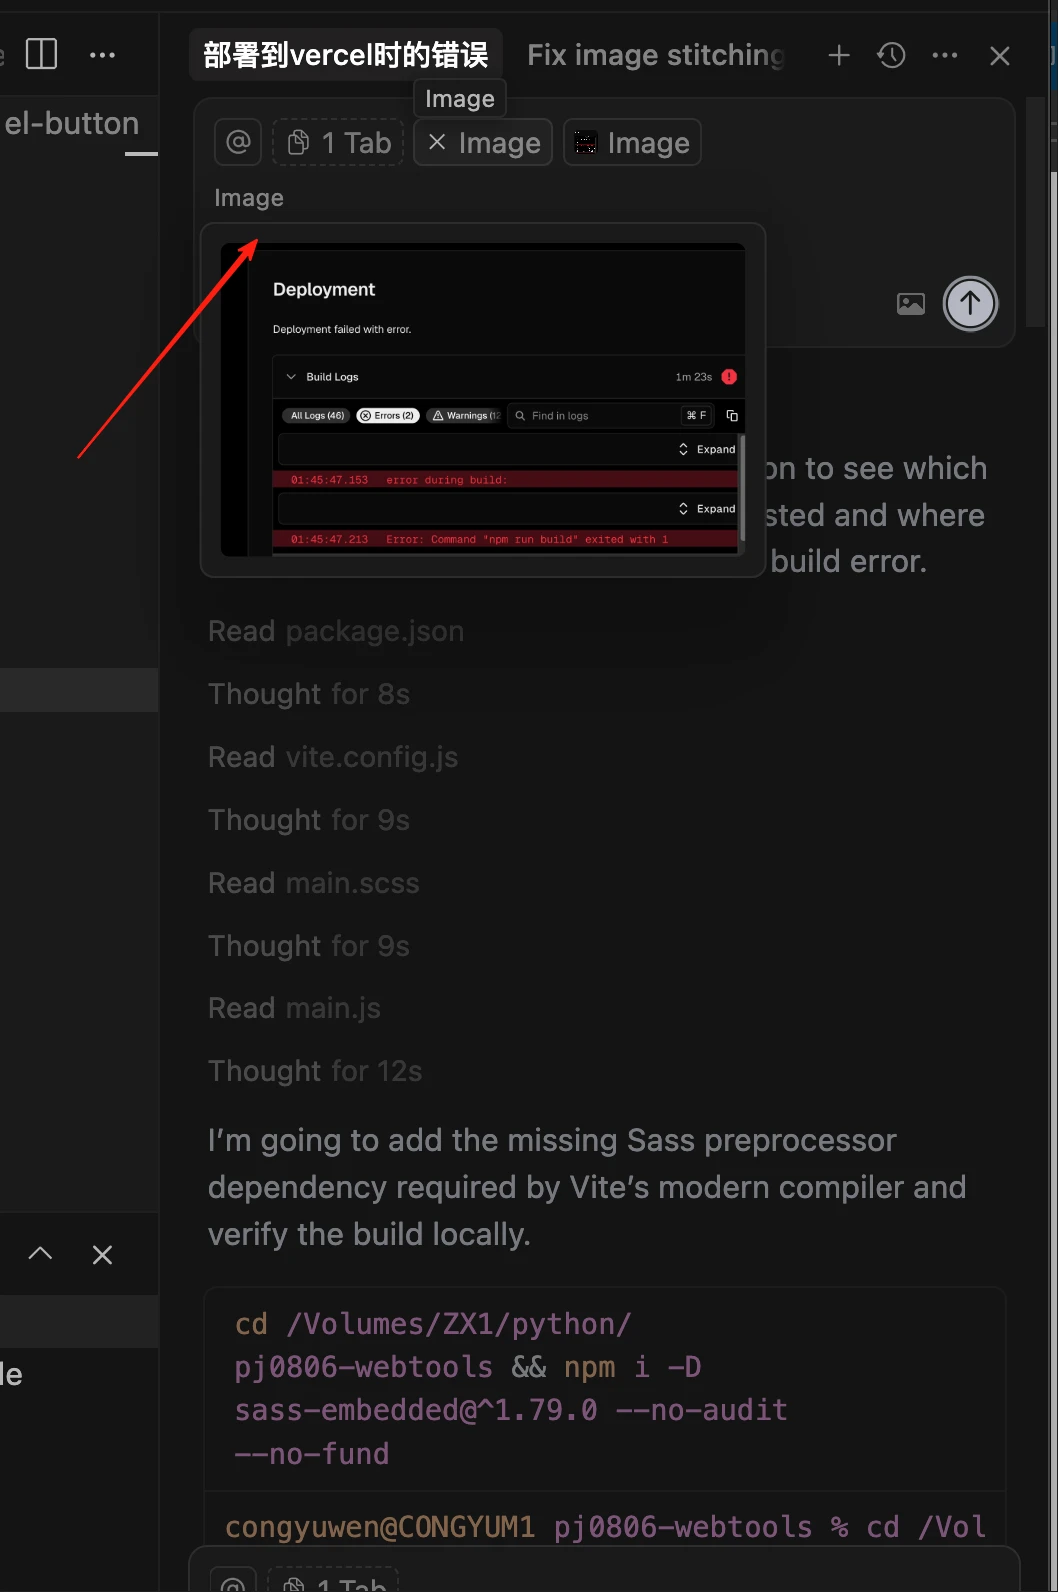
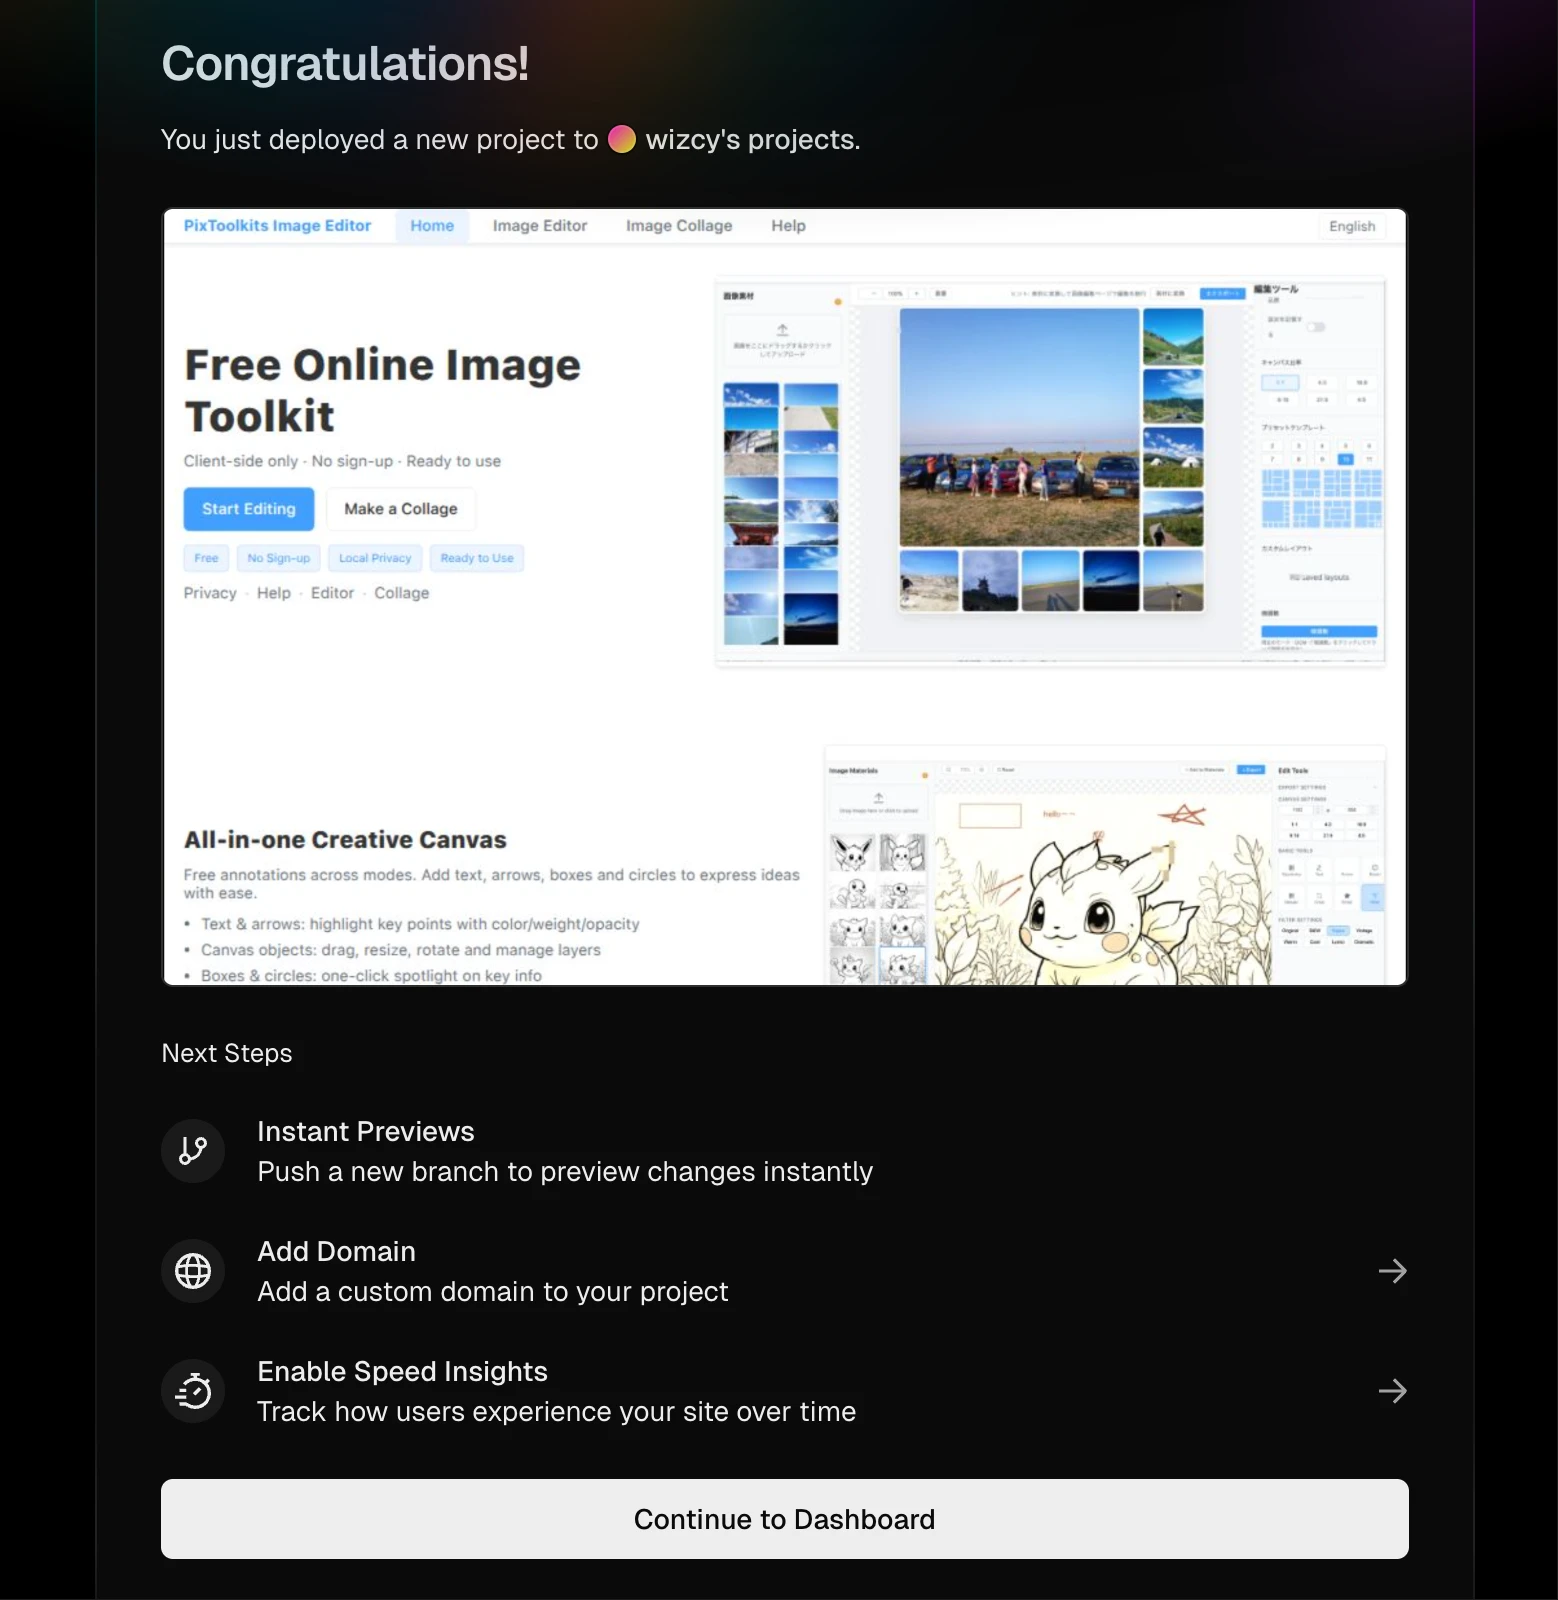
- After fixes, commit via Cursor → automatic deployment. Successful deployment shows dashboard link
5) Domain Binding, DNS & HTTPS
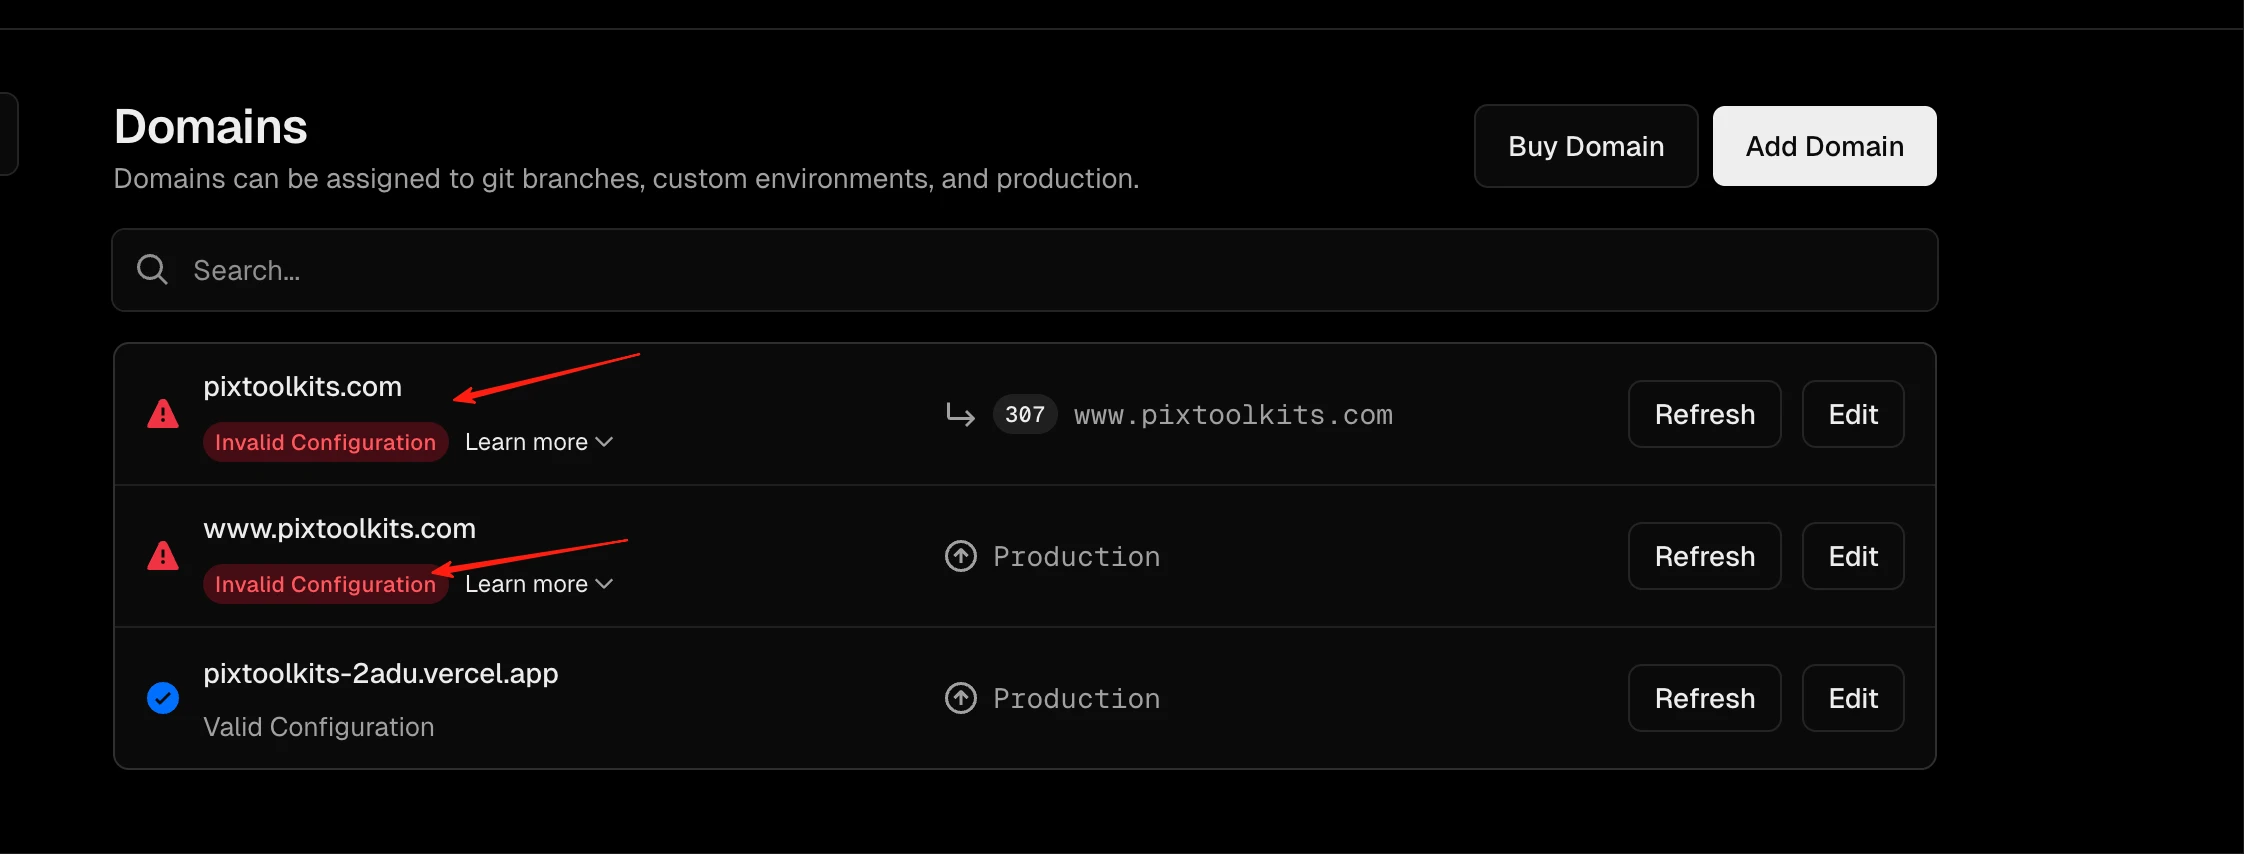
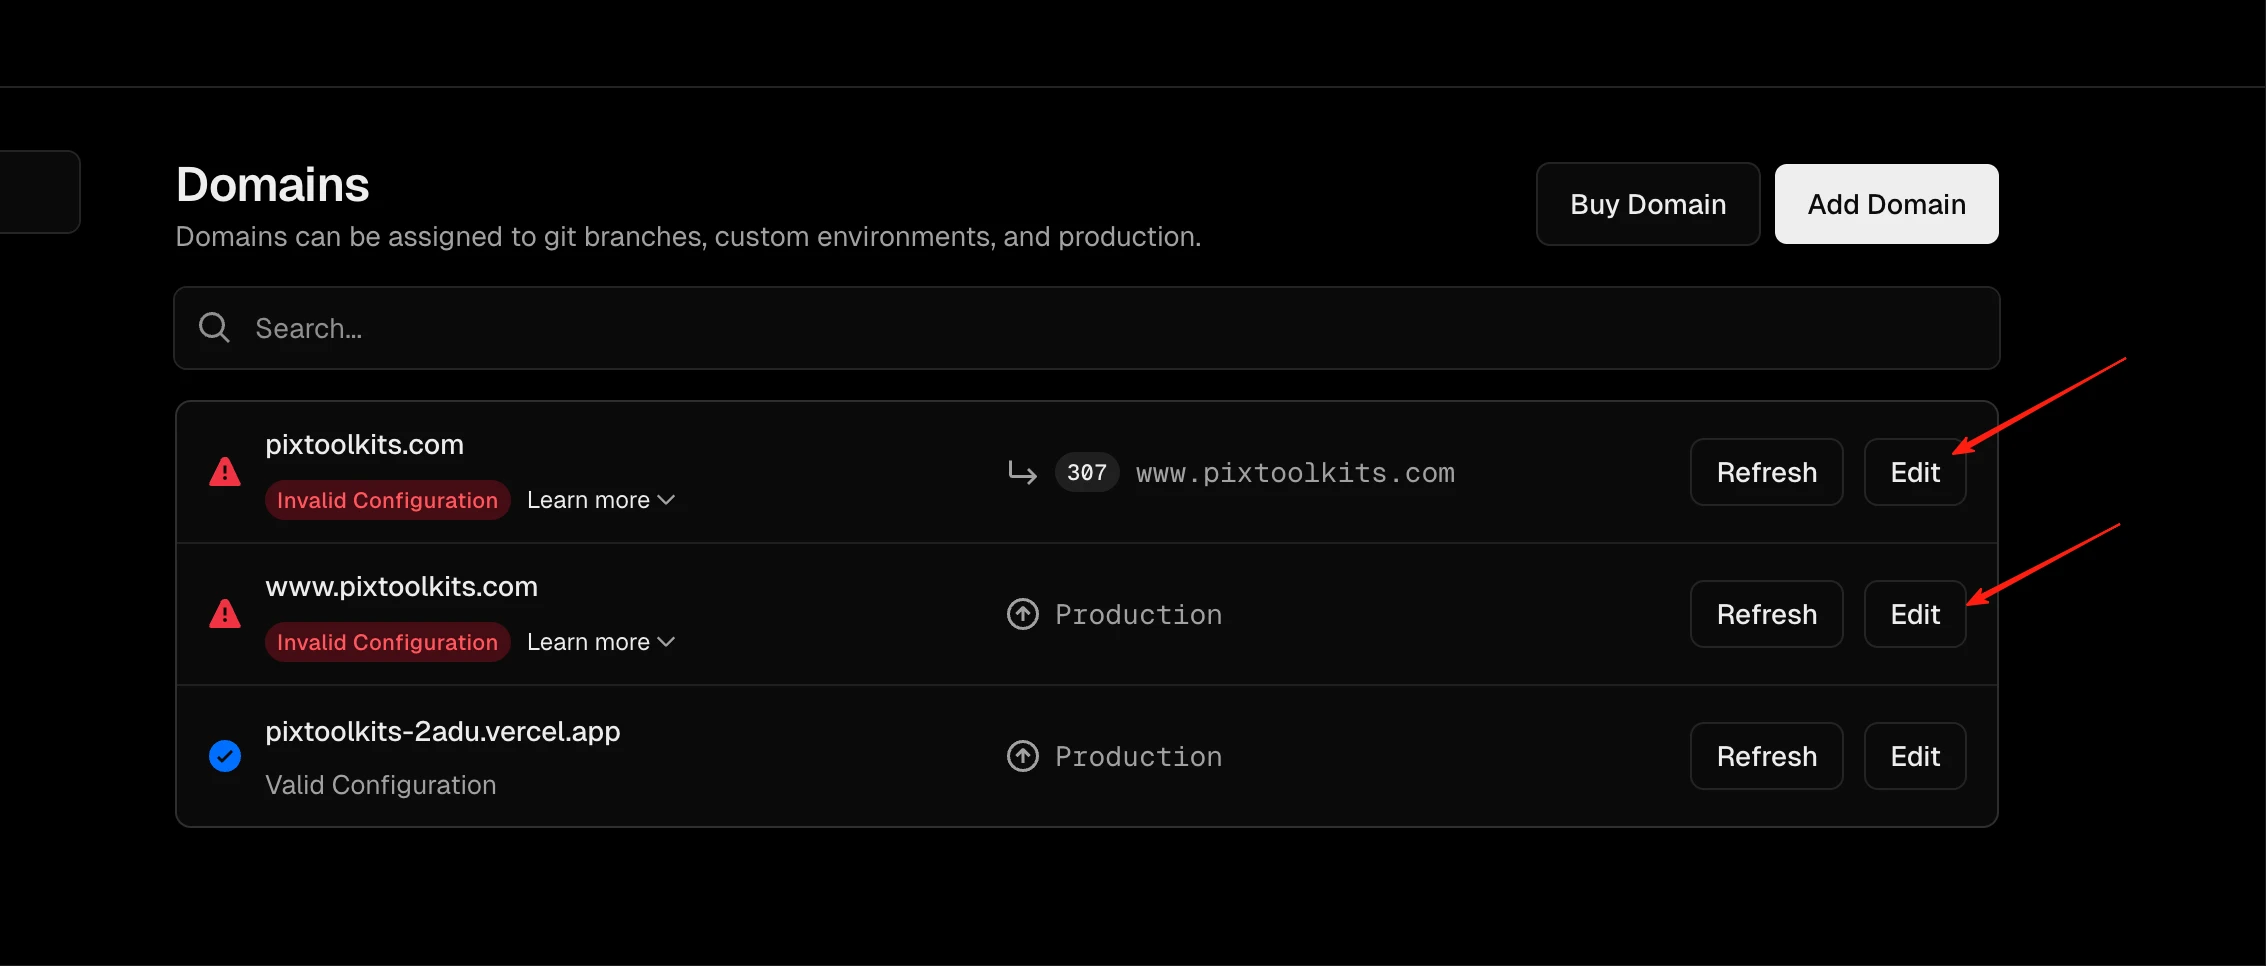
- In Vercel: Settings → Domains → 'ADD Domain'
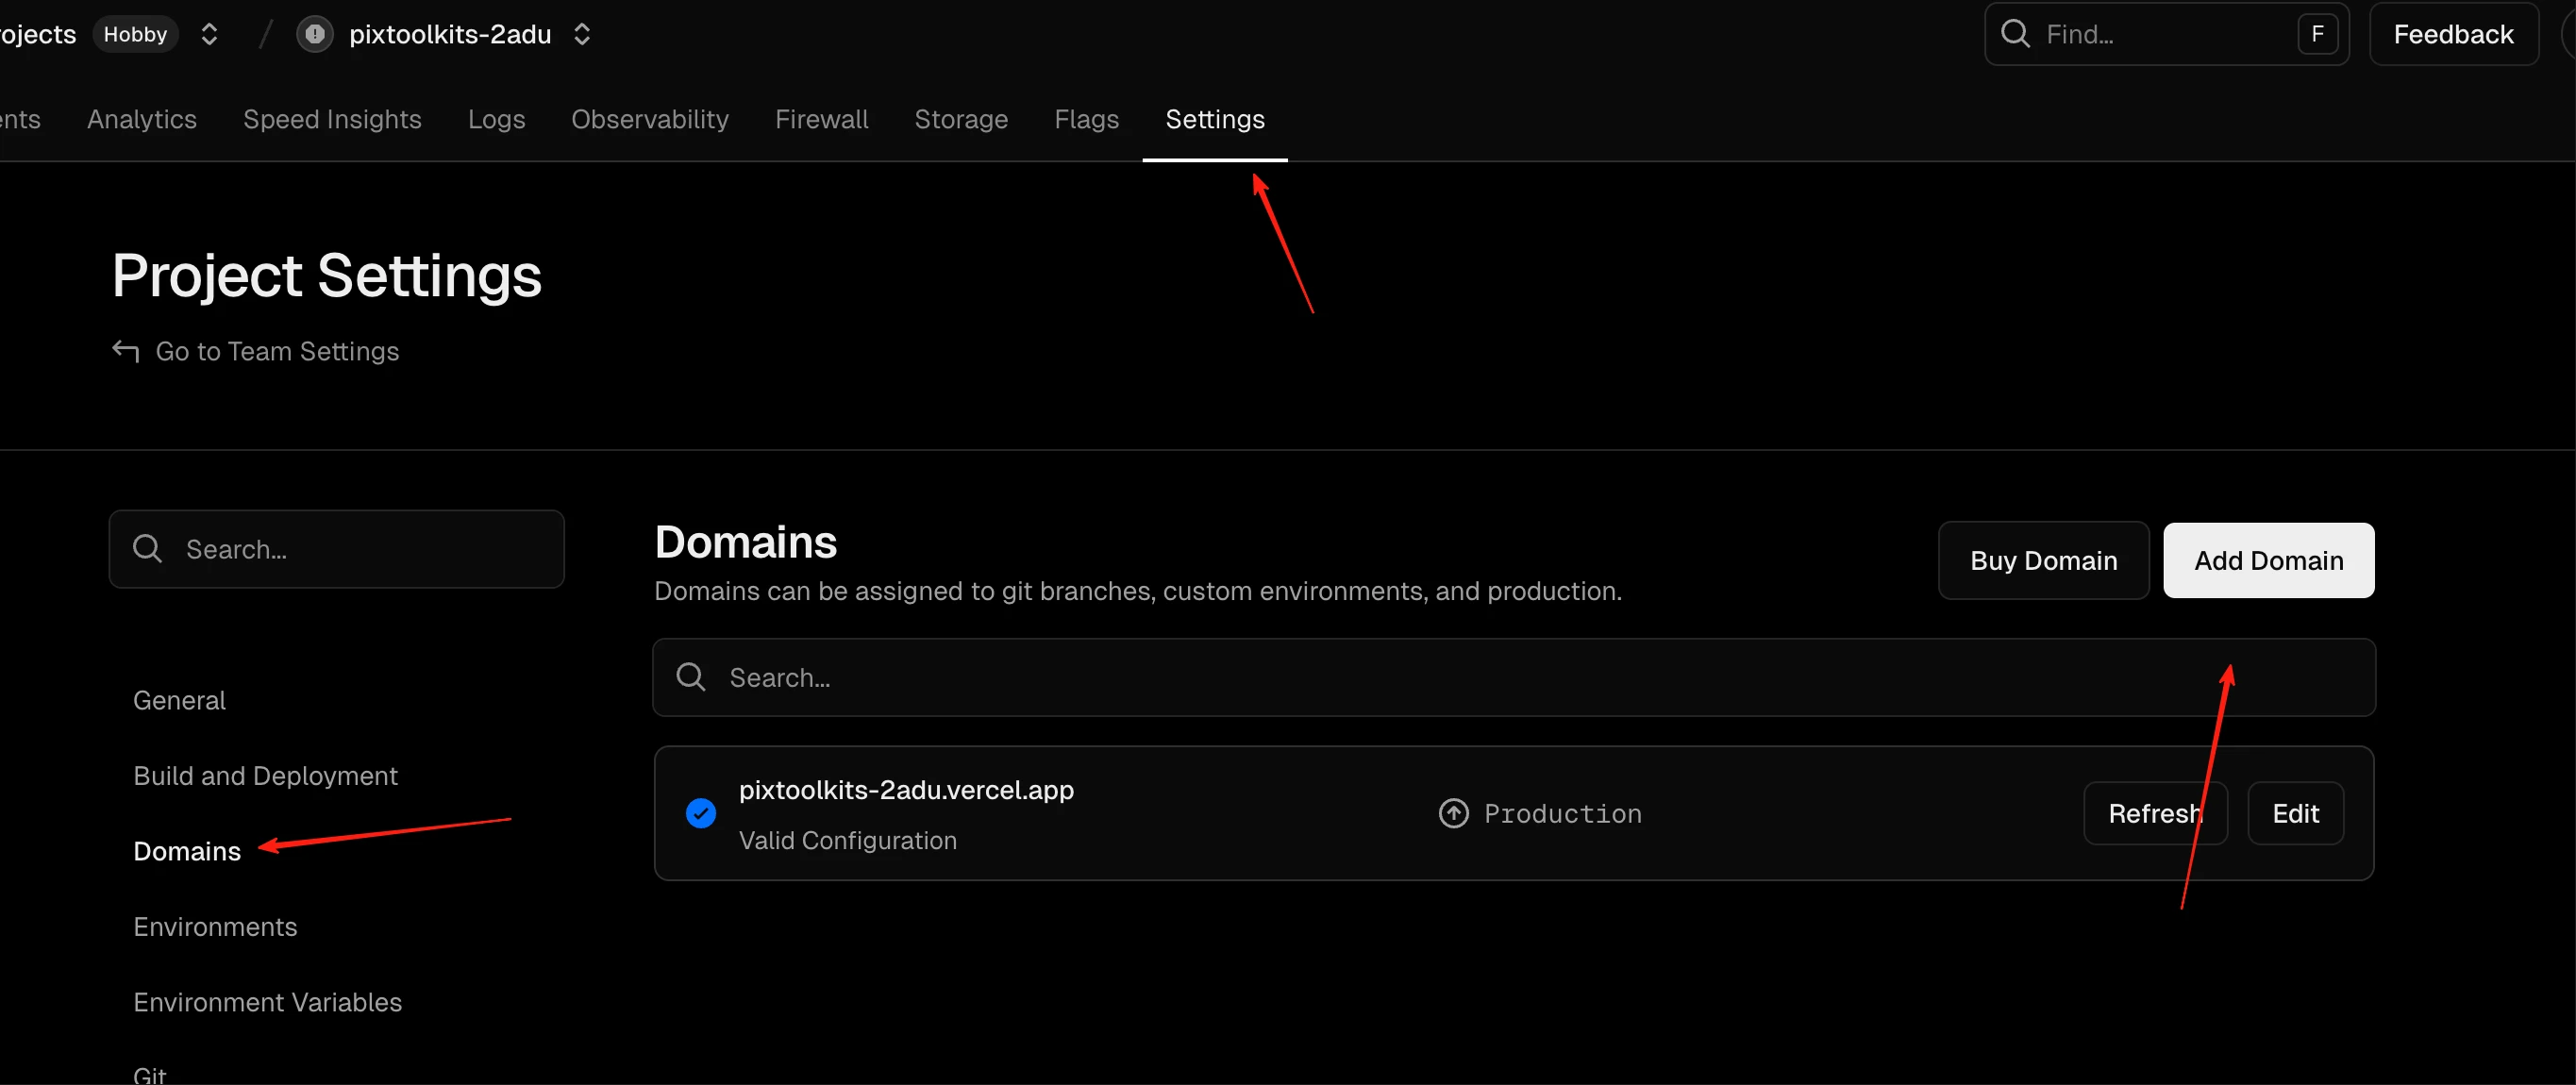
- Enter domain (pixtoolkits.com), enable www redirect
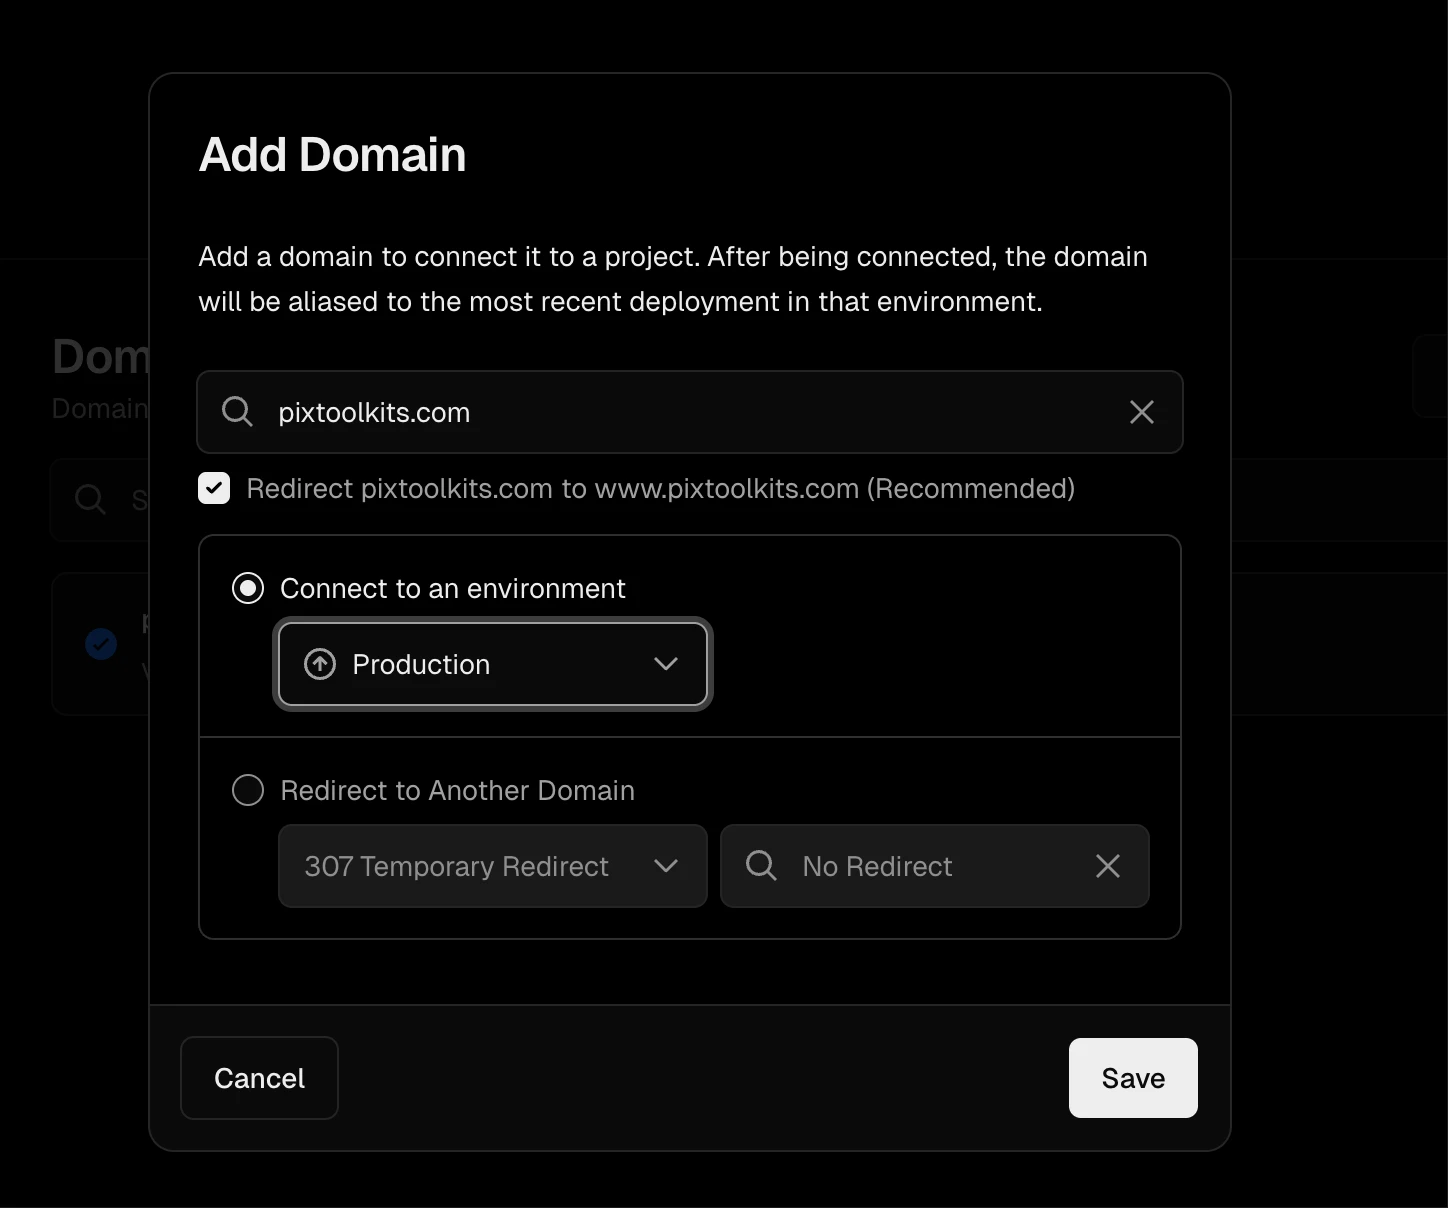
- SSL warning appears (requires Cloudflare setup)
- Cloudflare setup: Register → 'Account Home' → 'Onboard a domain'
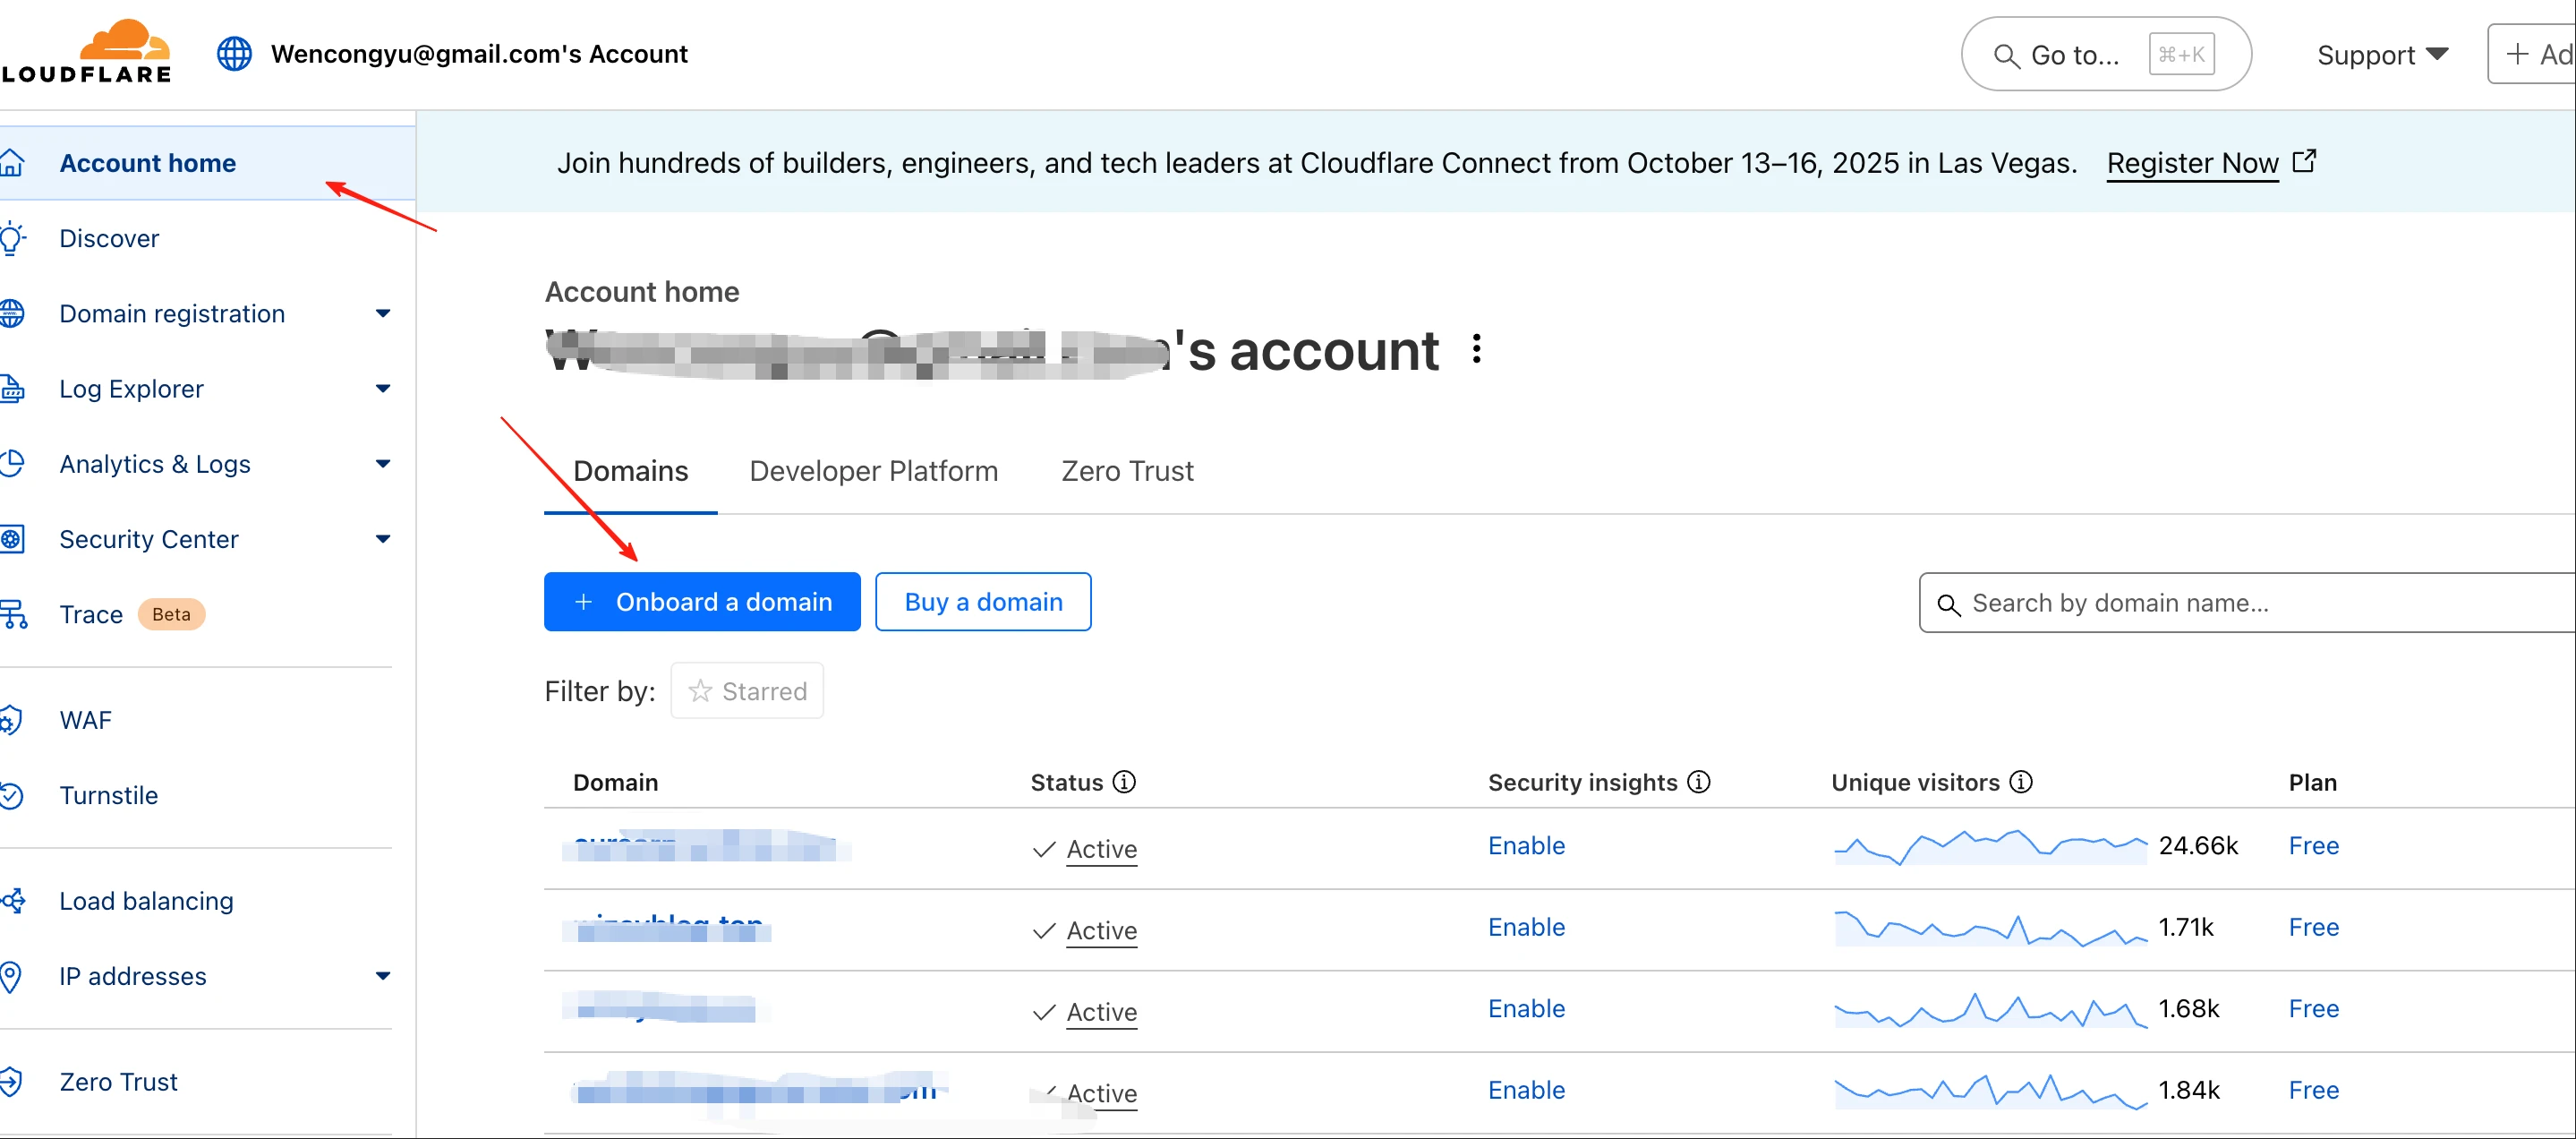
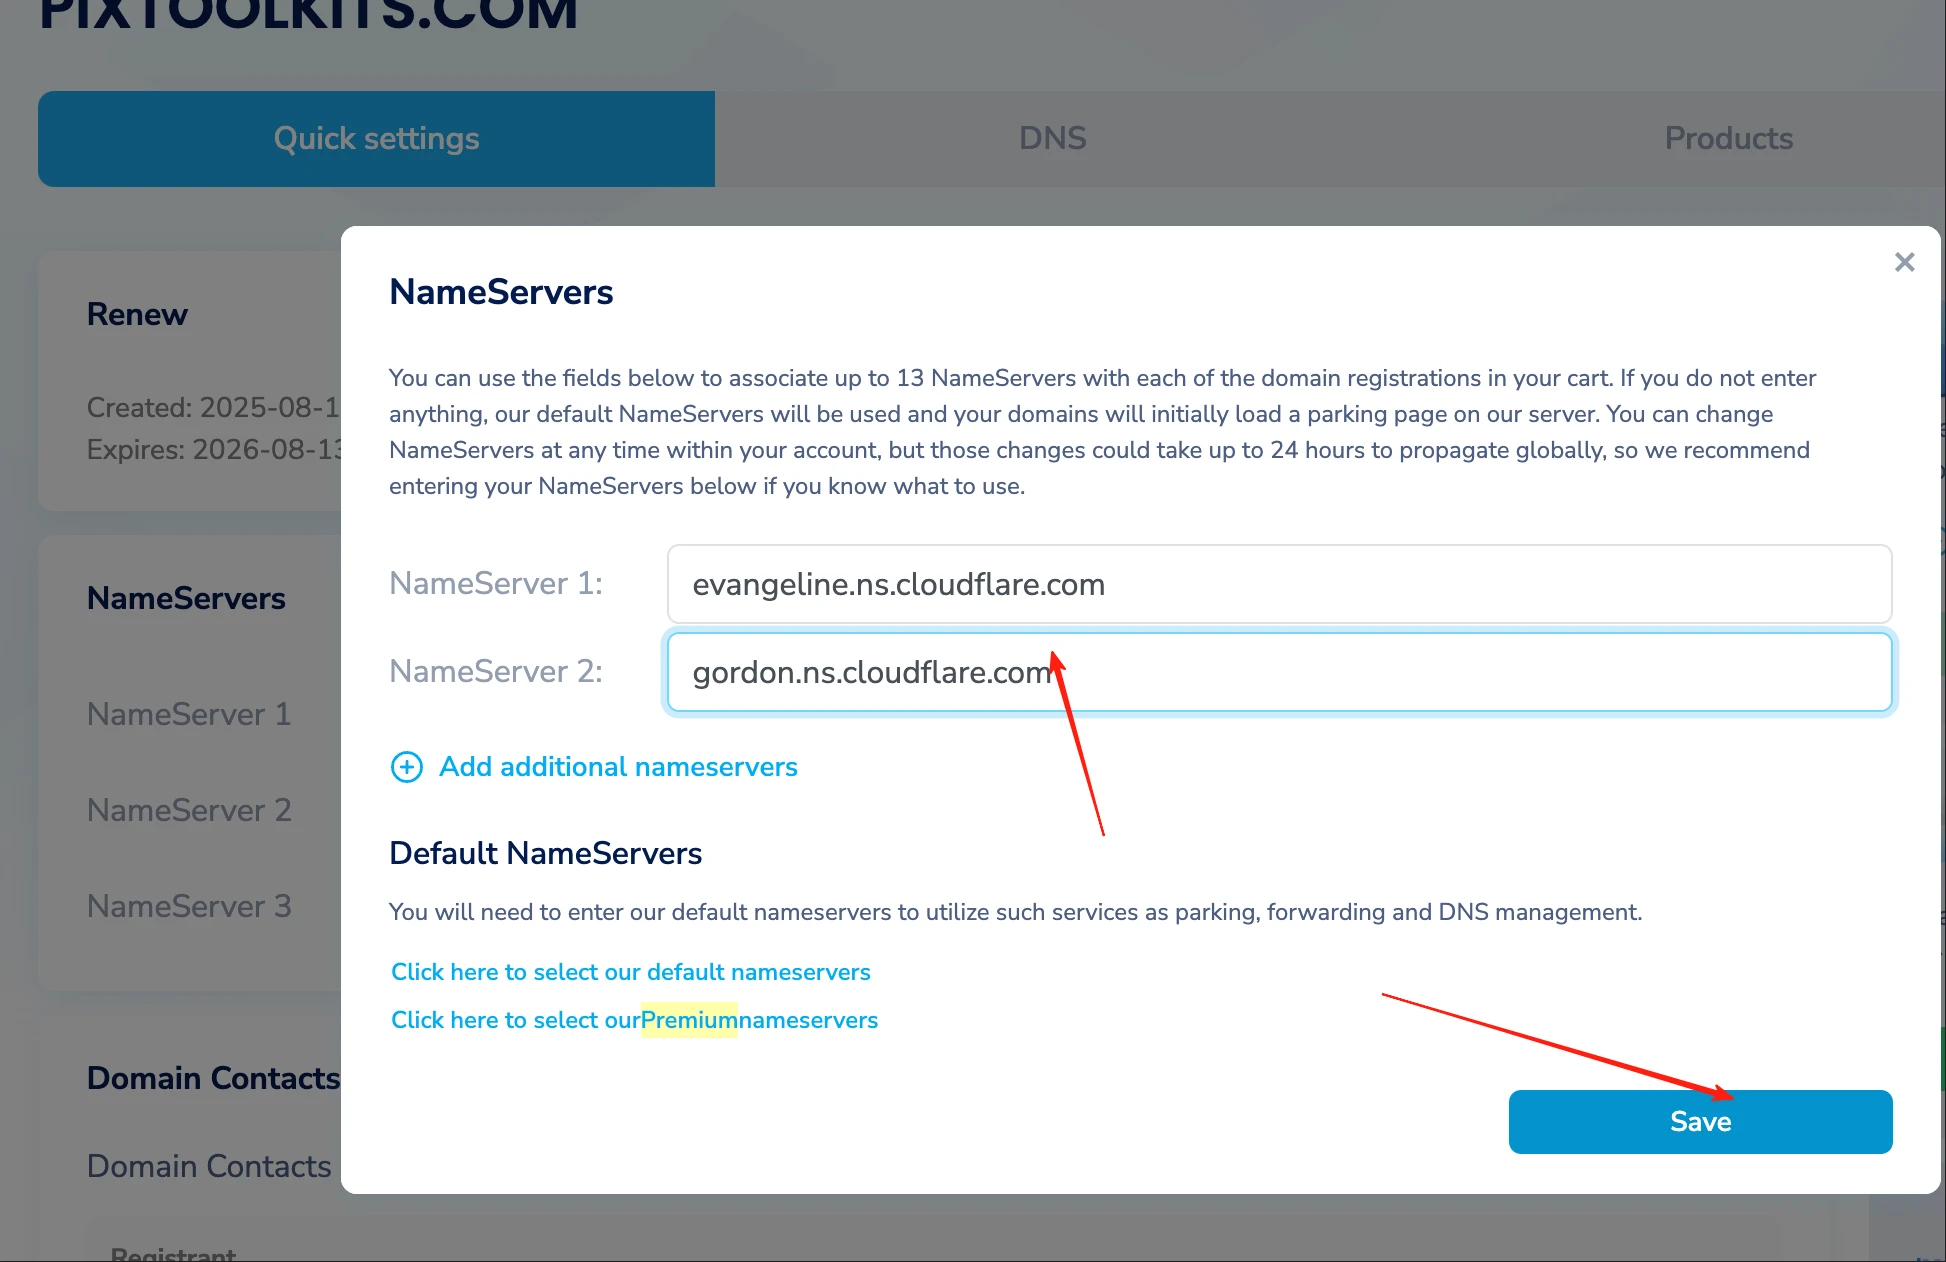
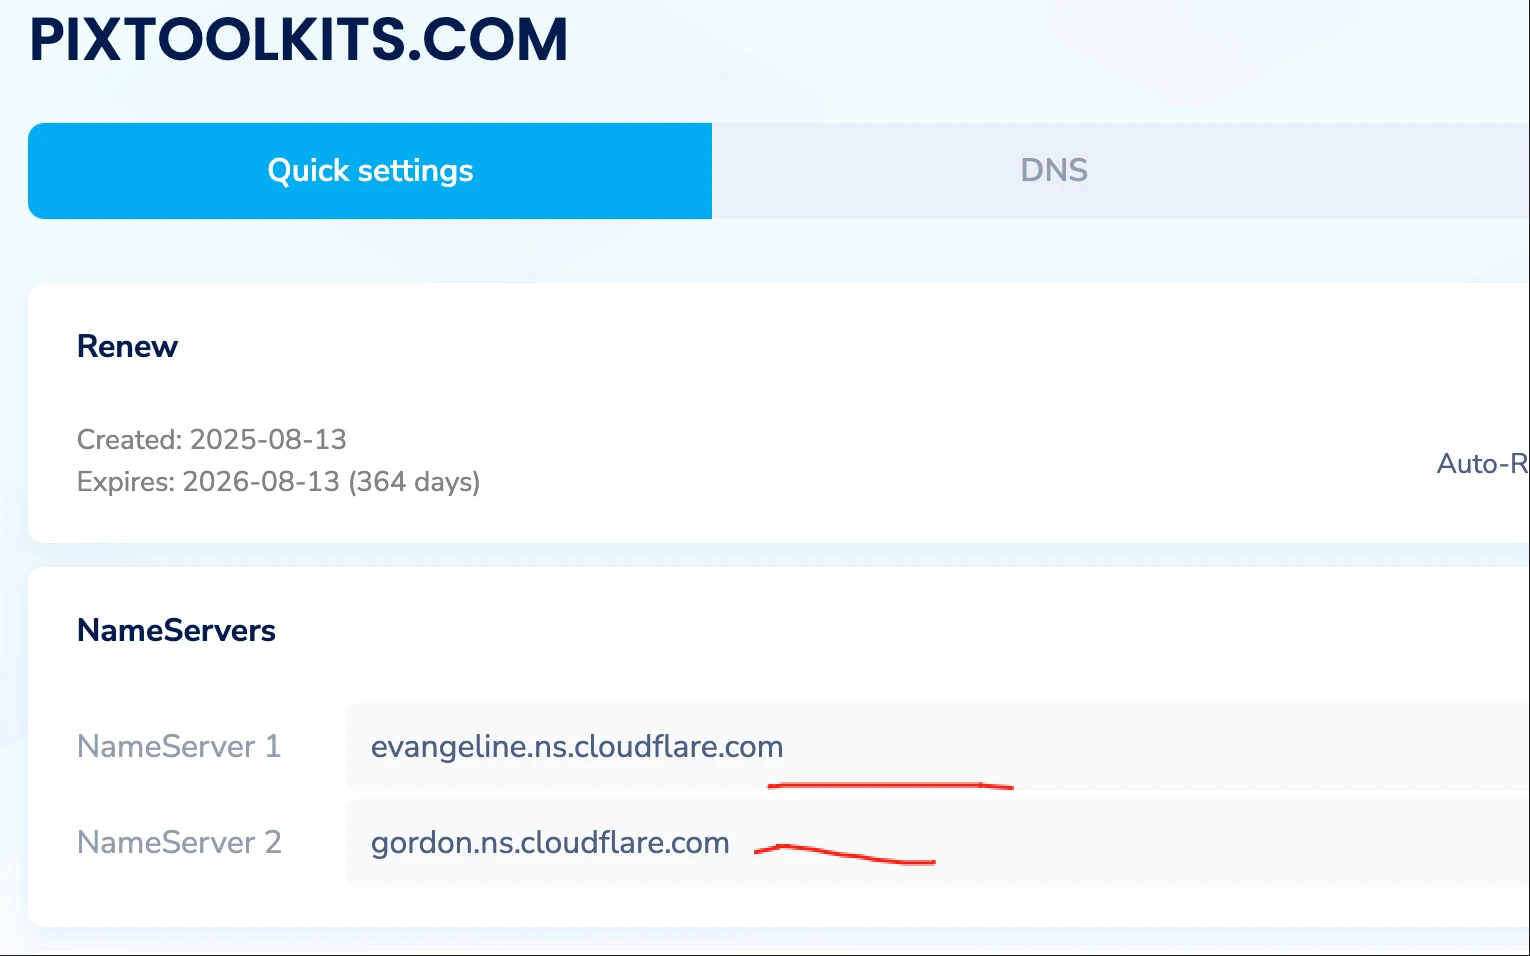
- Enter domain → Manual DNS → Note nameservers for registrar update
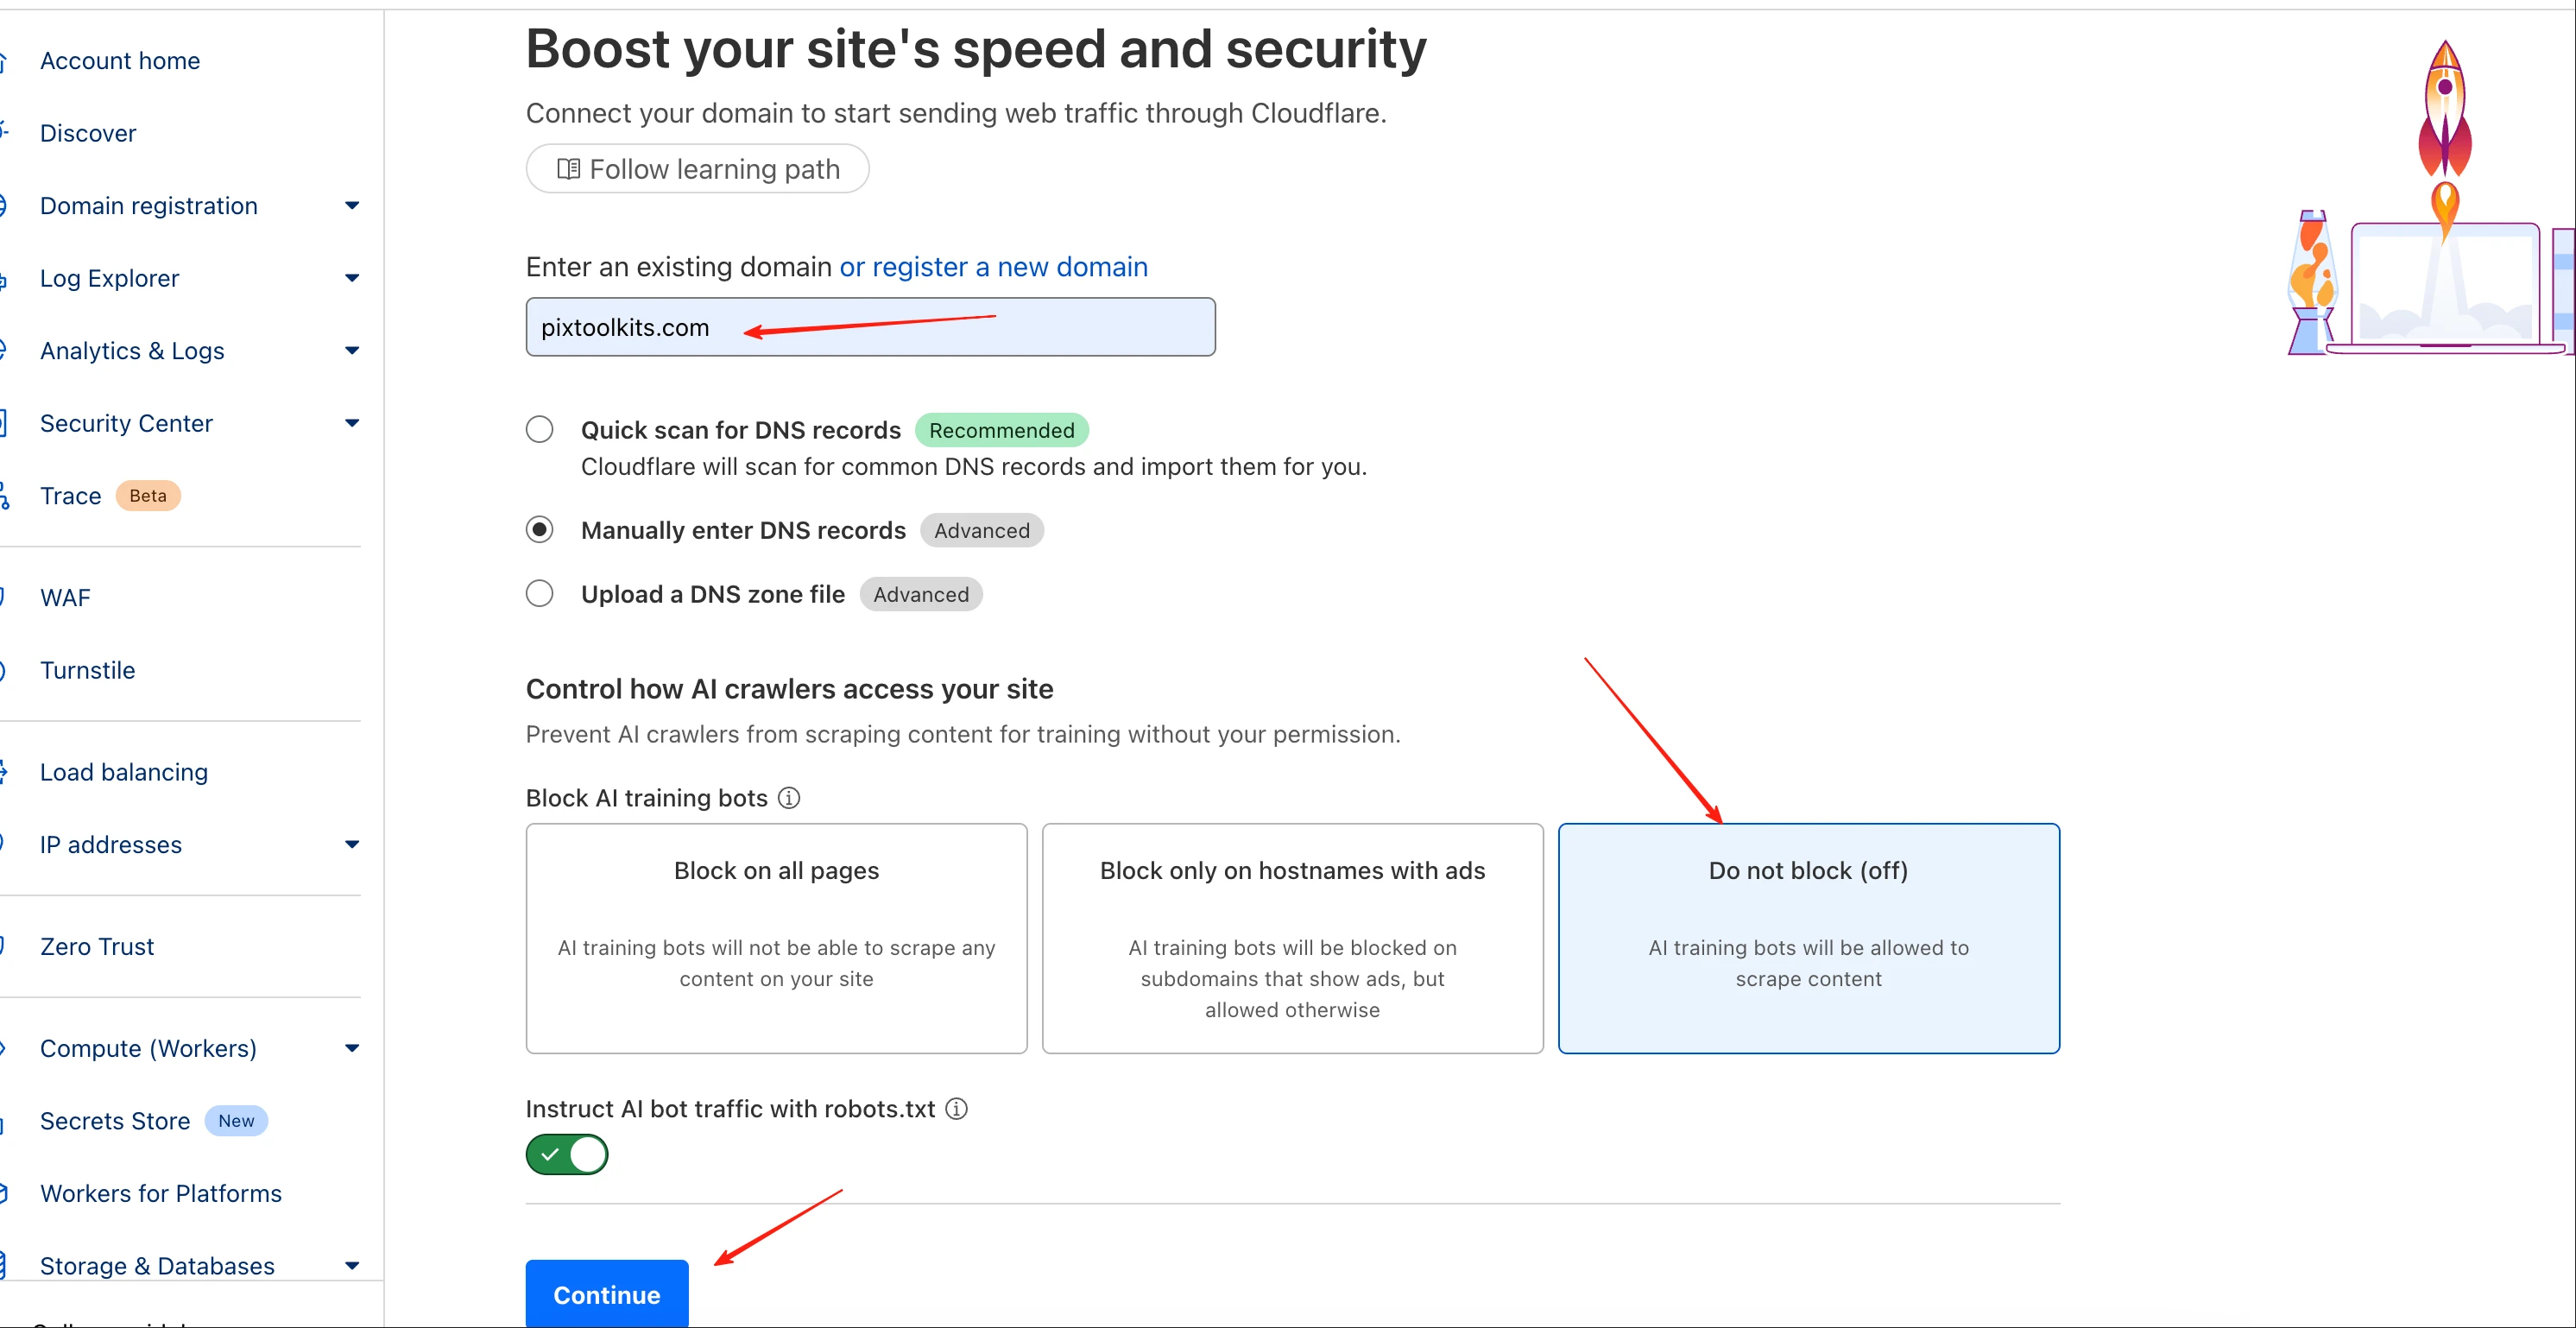
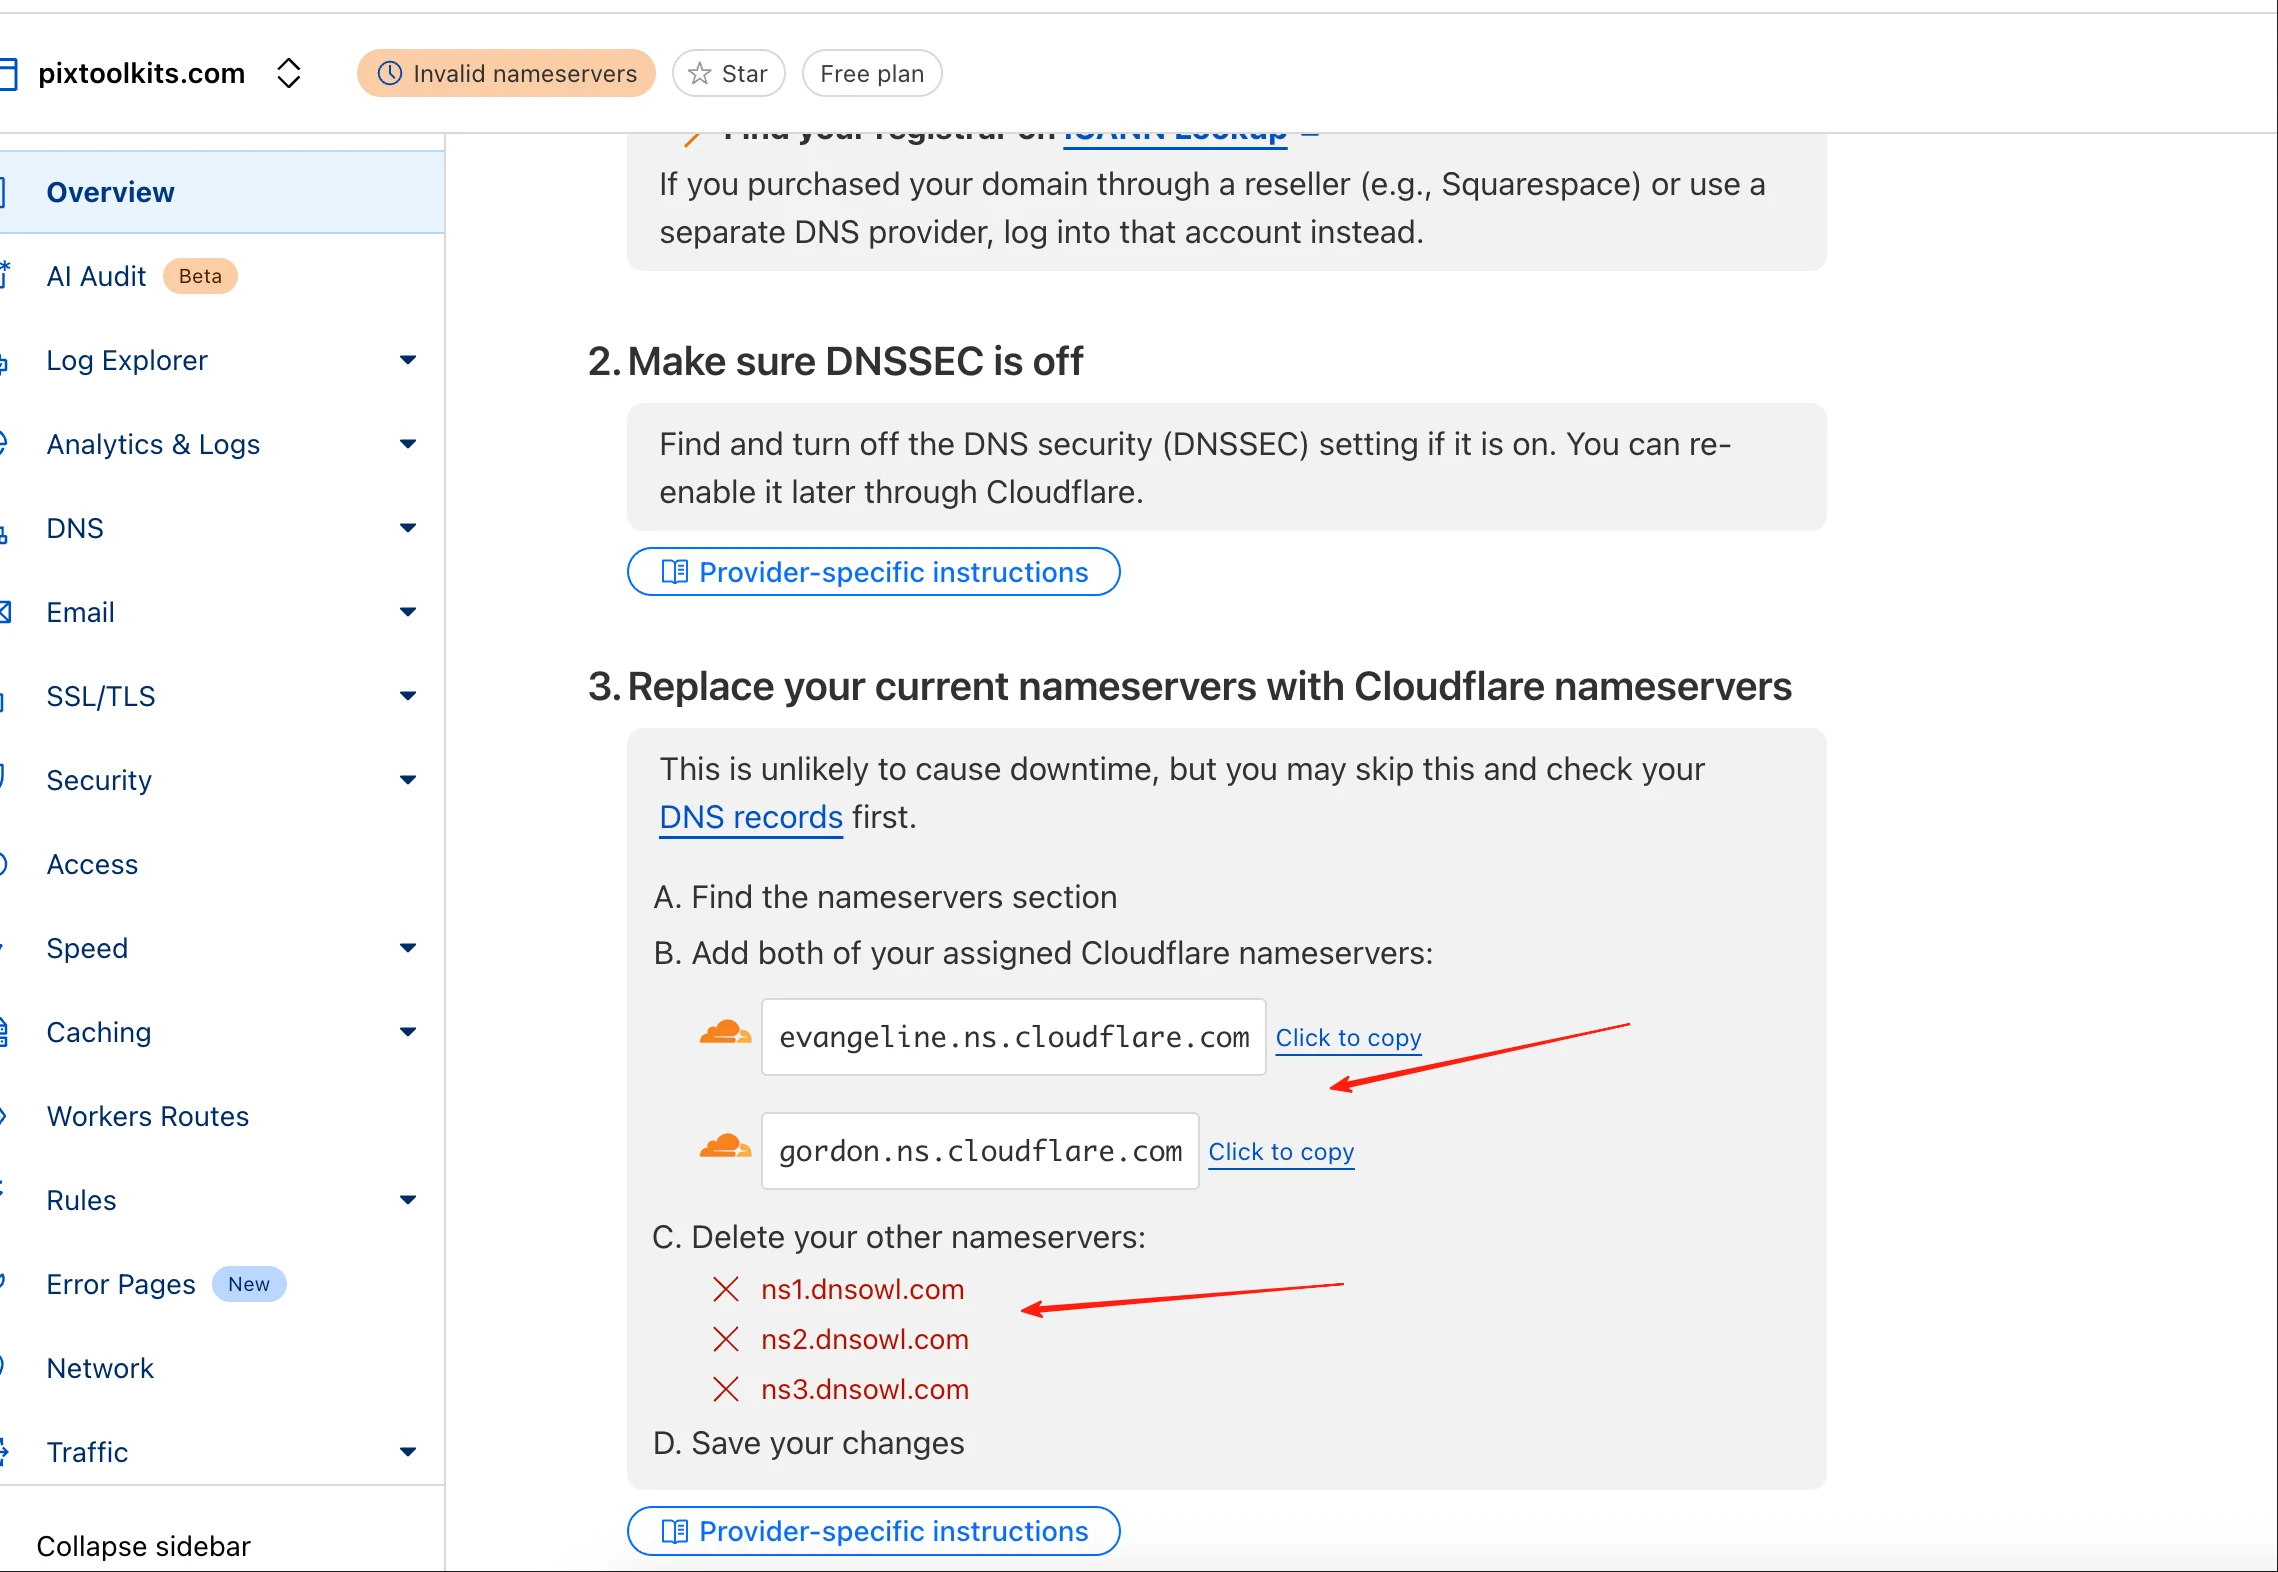
- Update nameservers at NameSilo (remove extra entries)
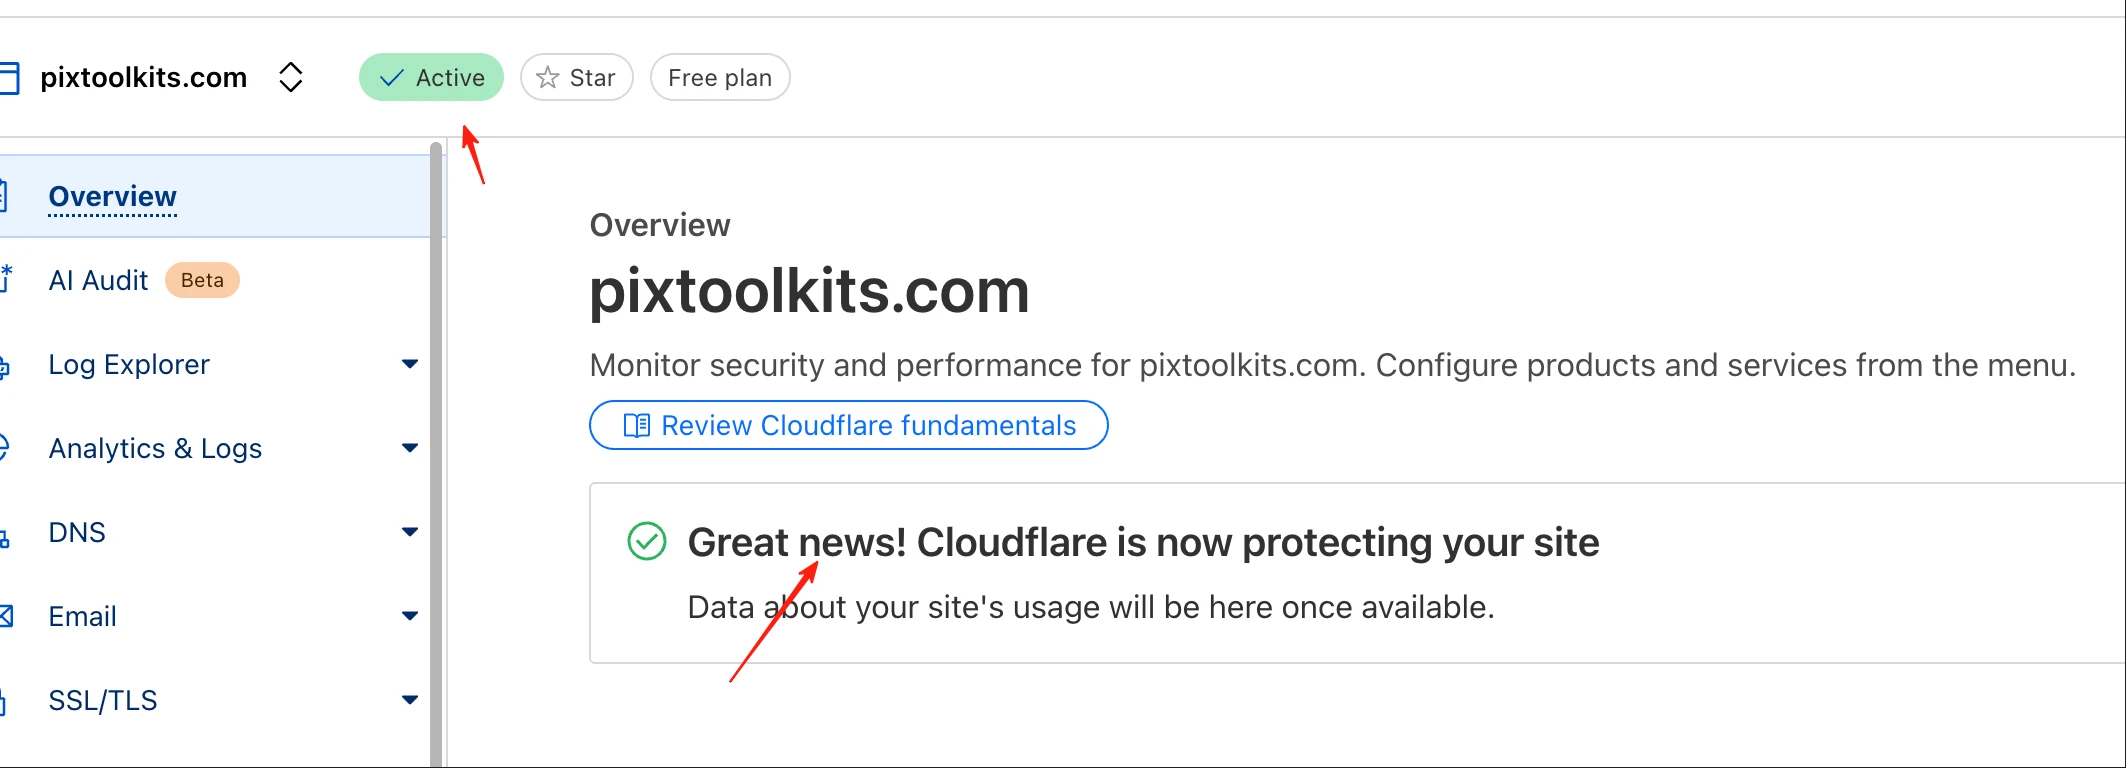
- Cloudflare shows 'Active' when DNS propagates
- Back to Vercel: Copy deployment IP for Cloudflare DNS
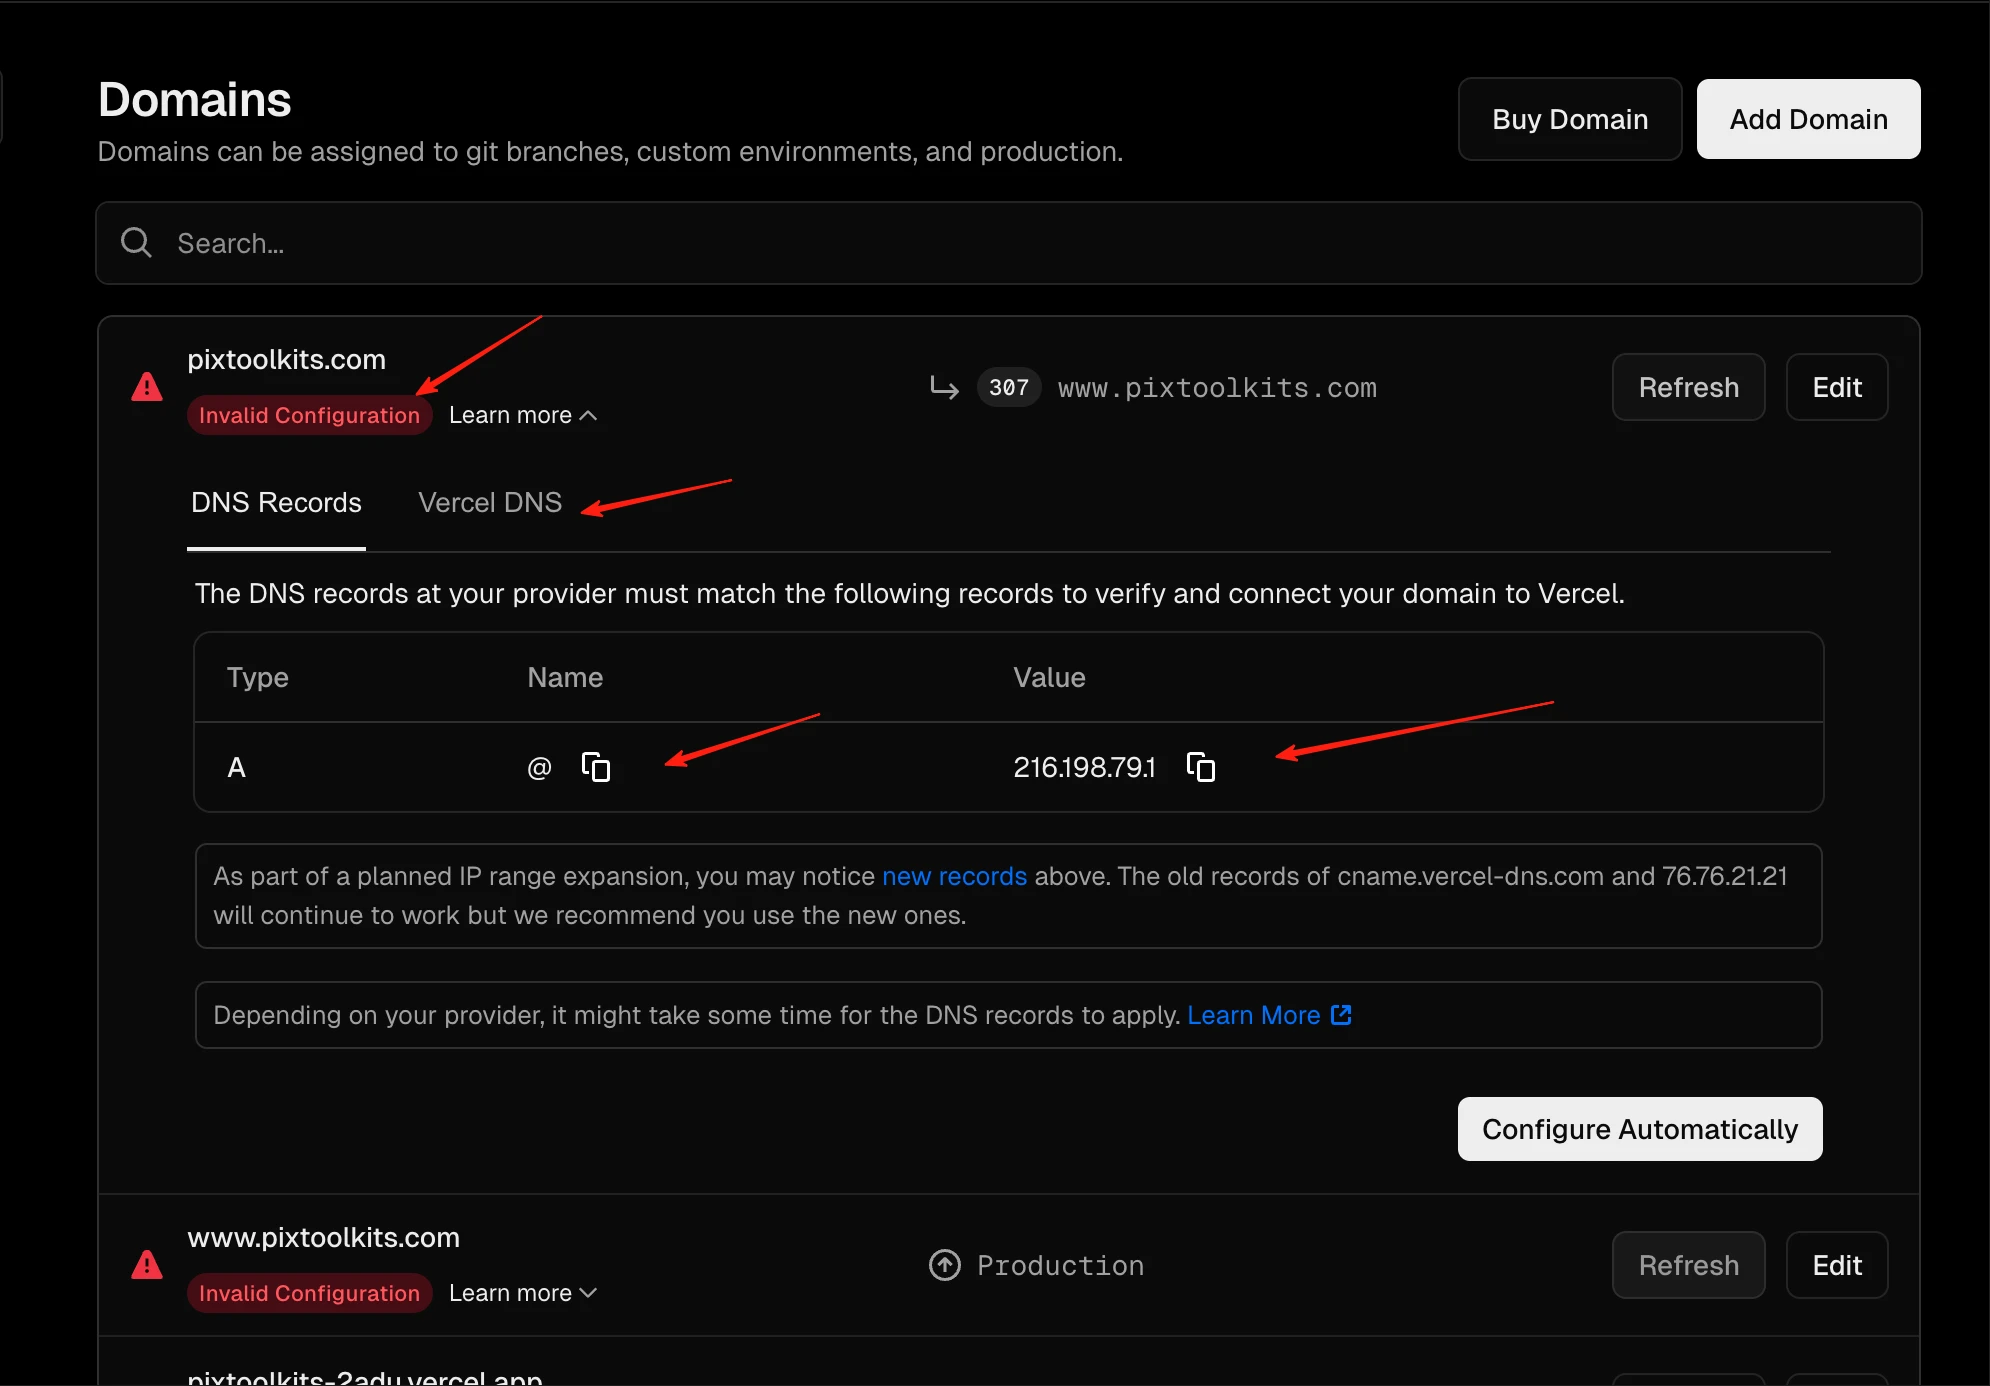
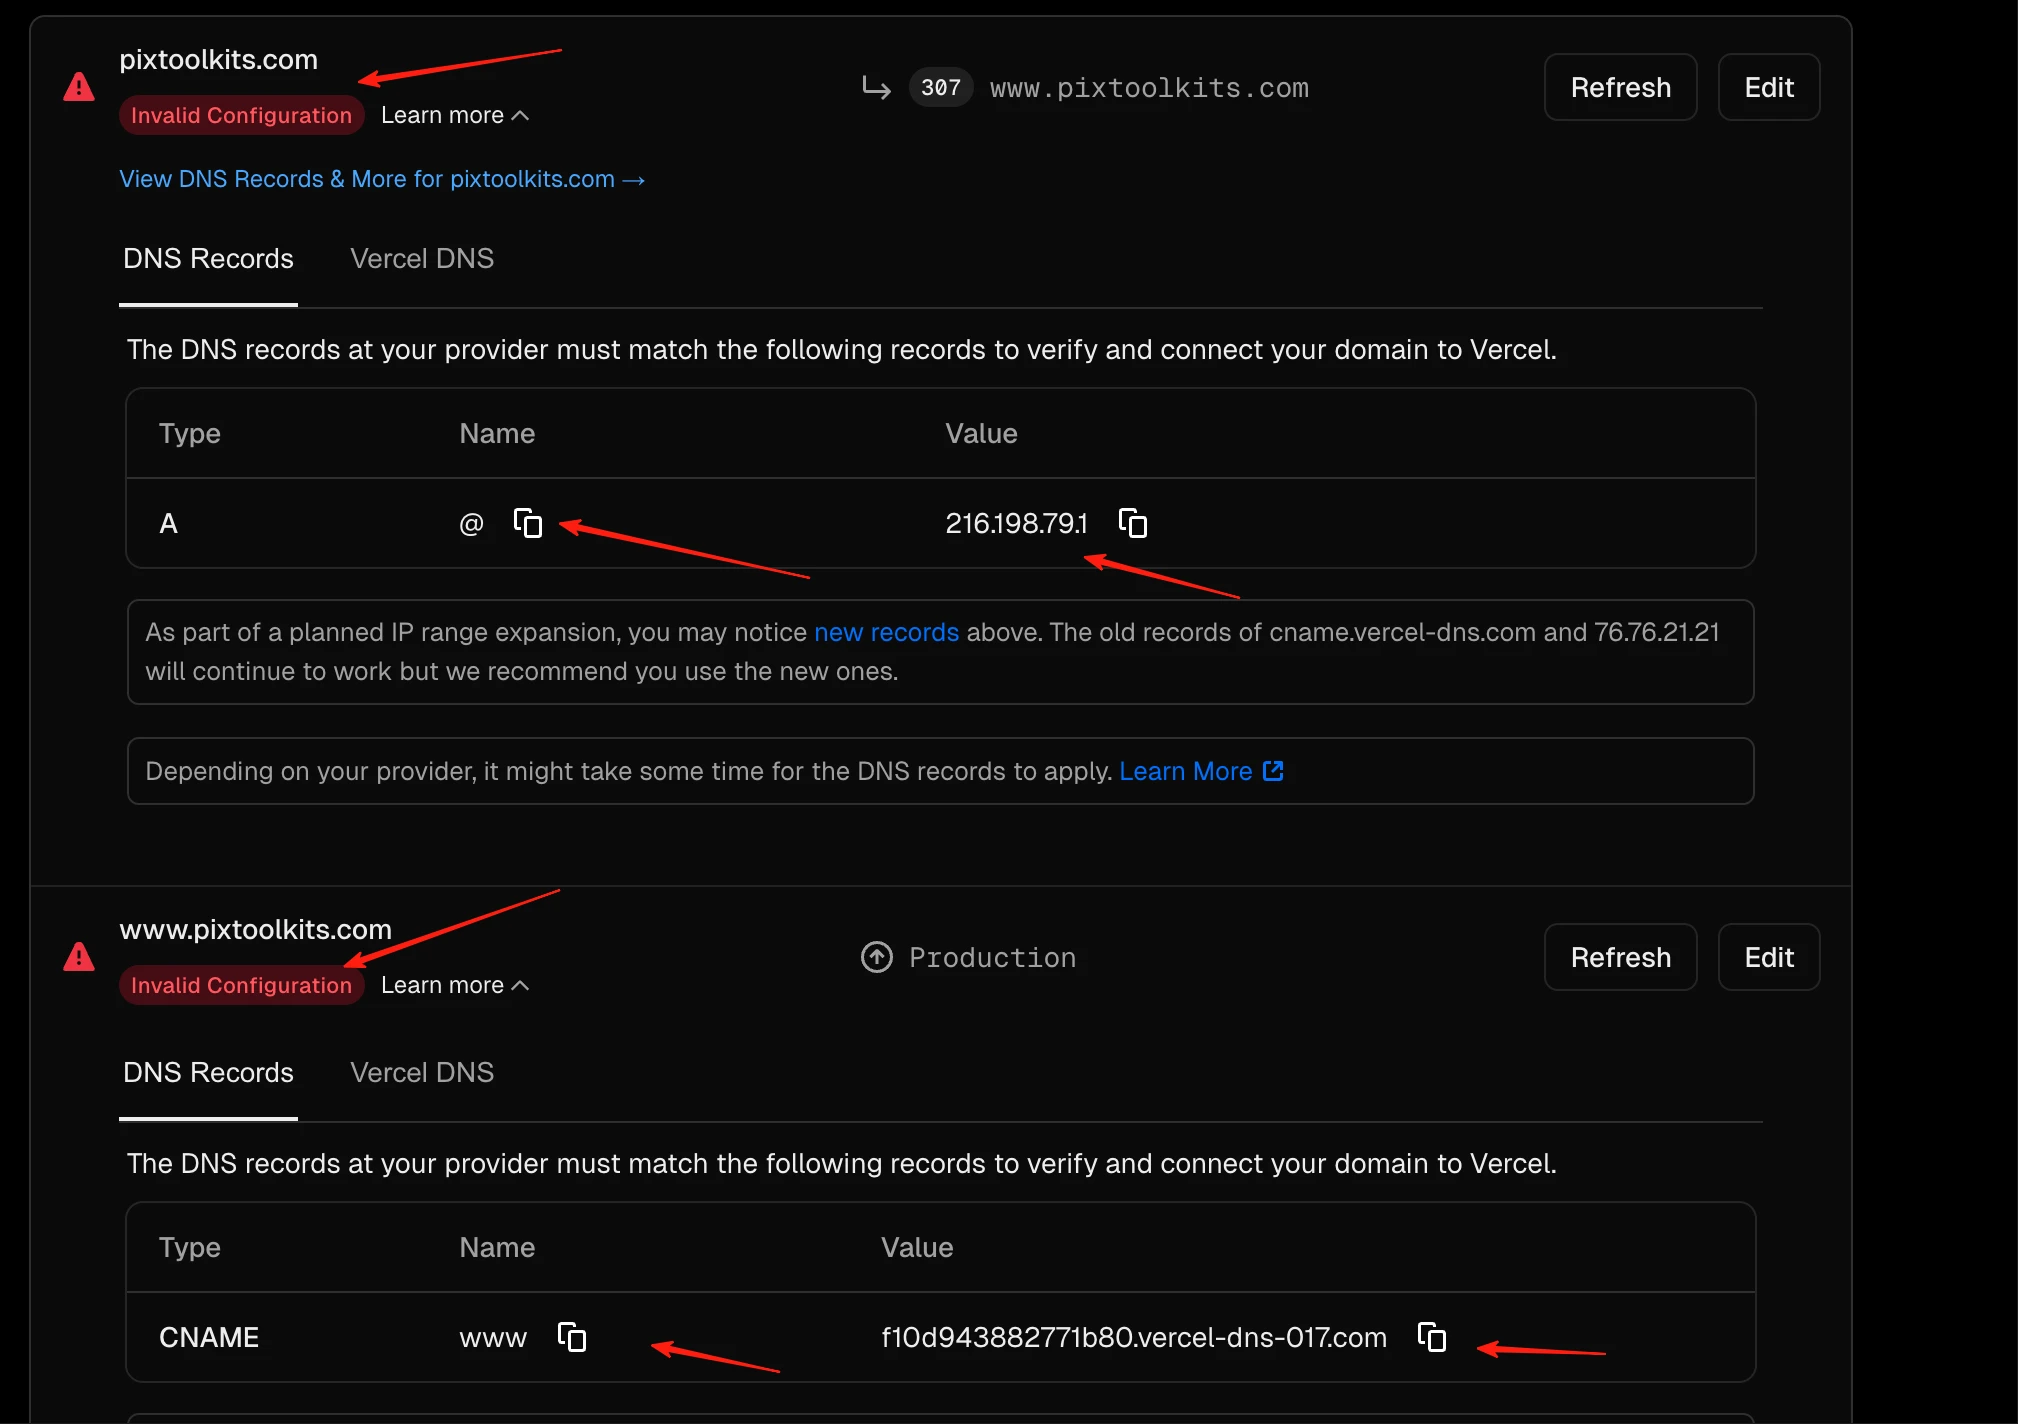
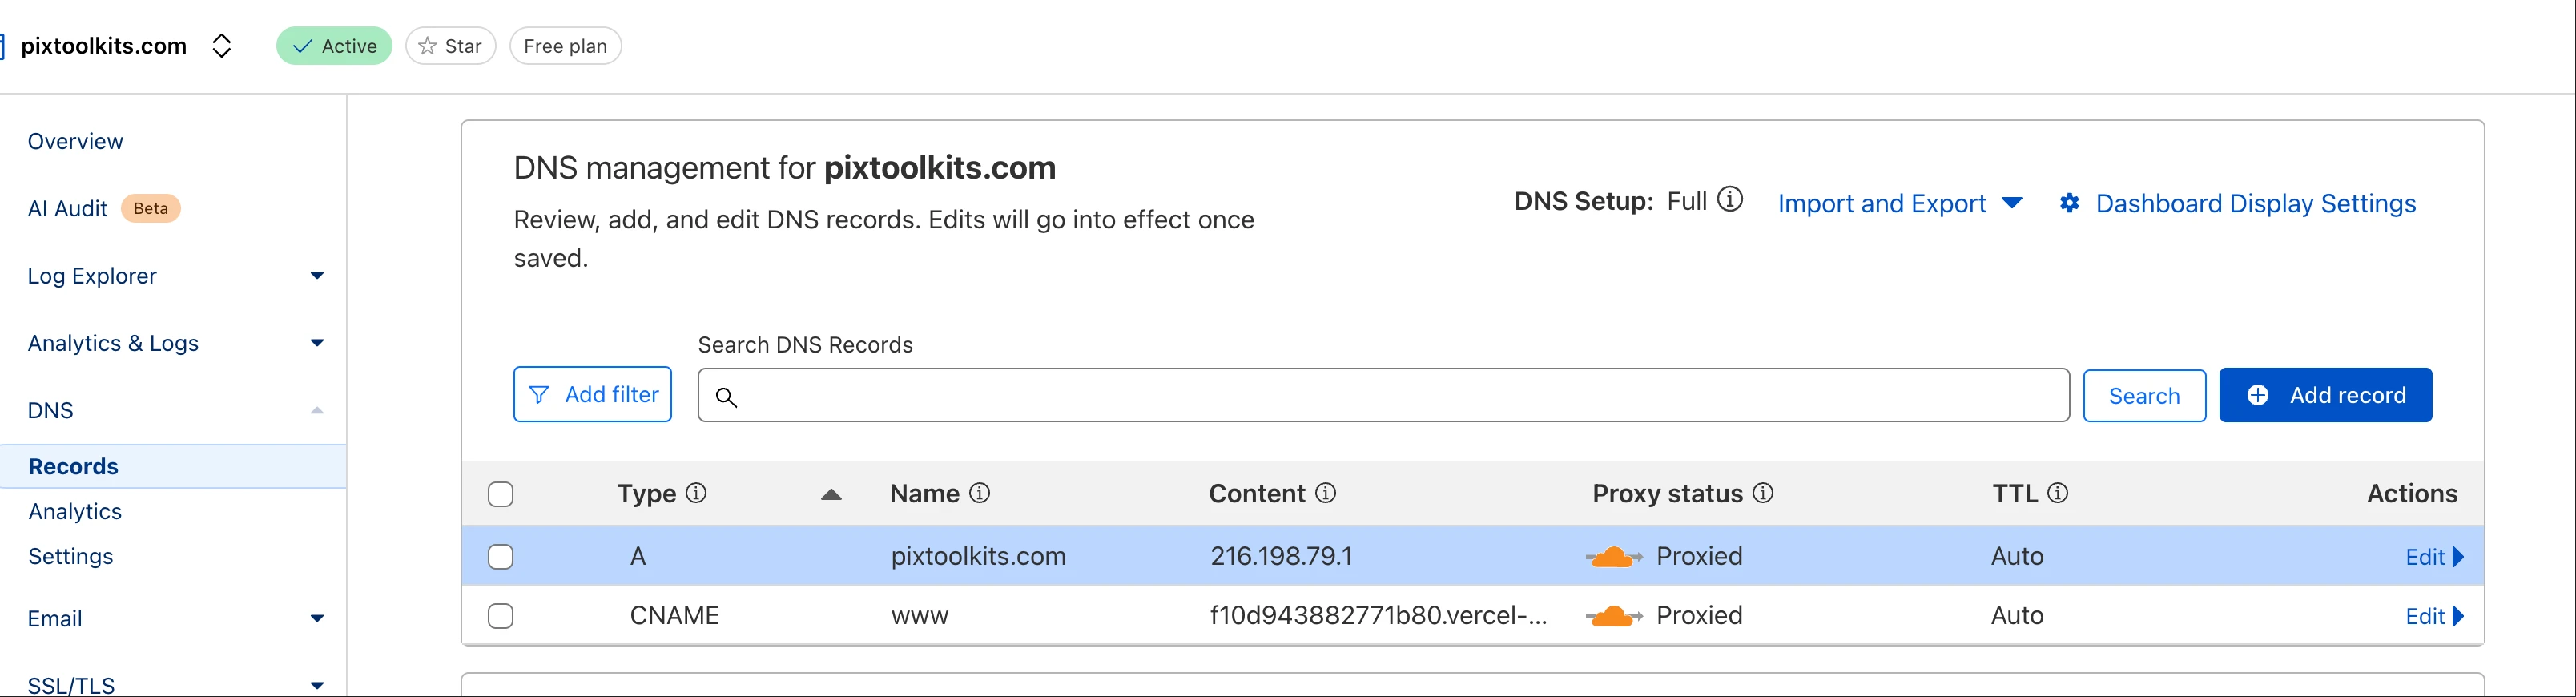
- Cloudflare DNS: Add A record with Vercel IP
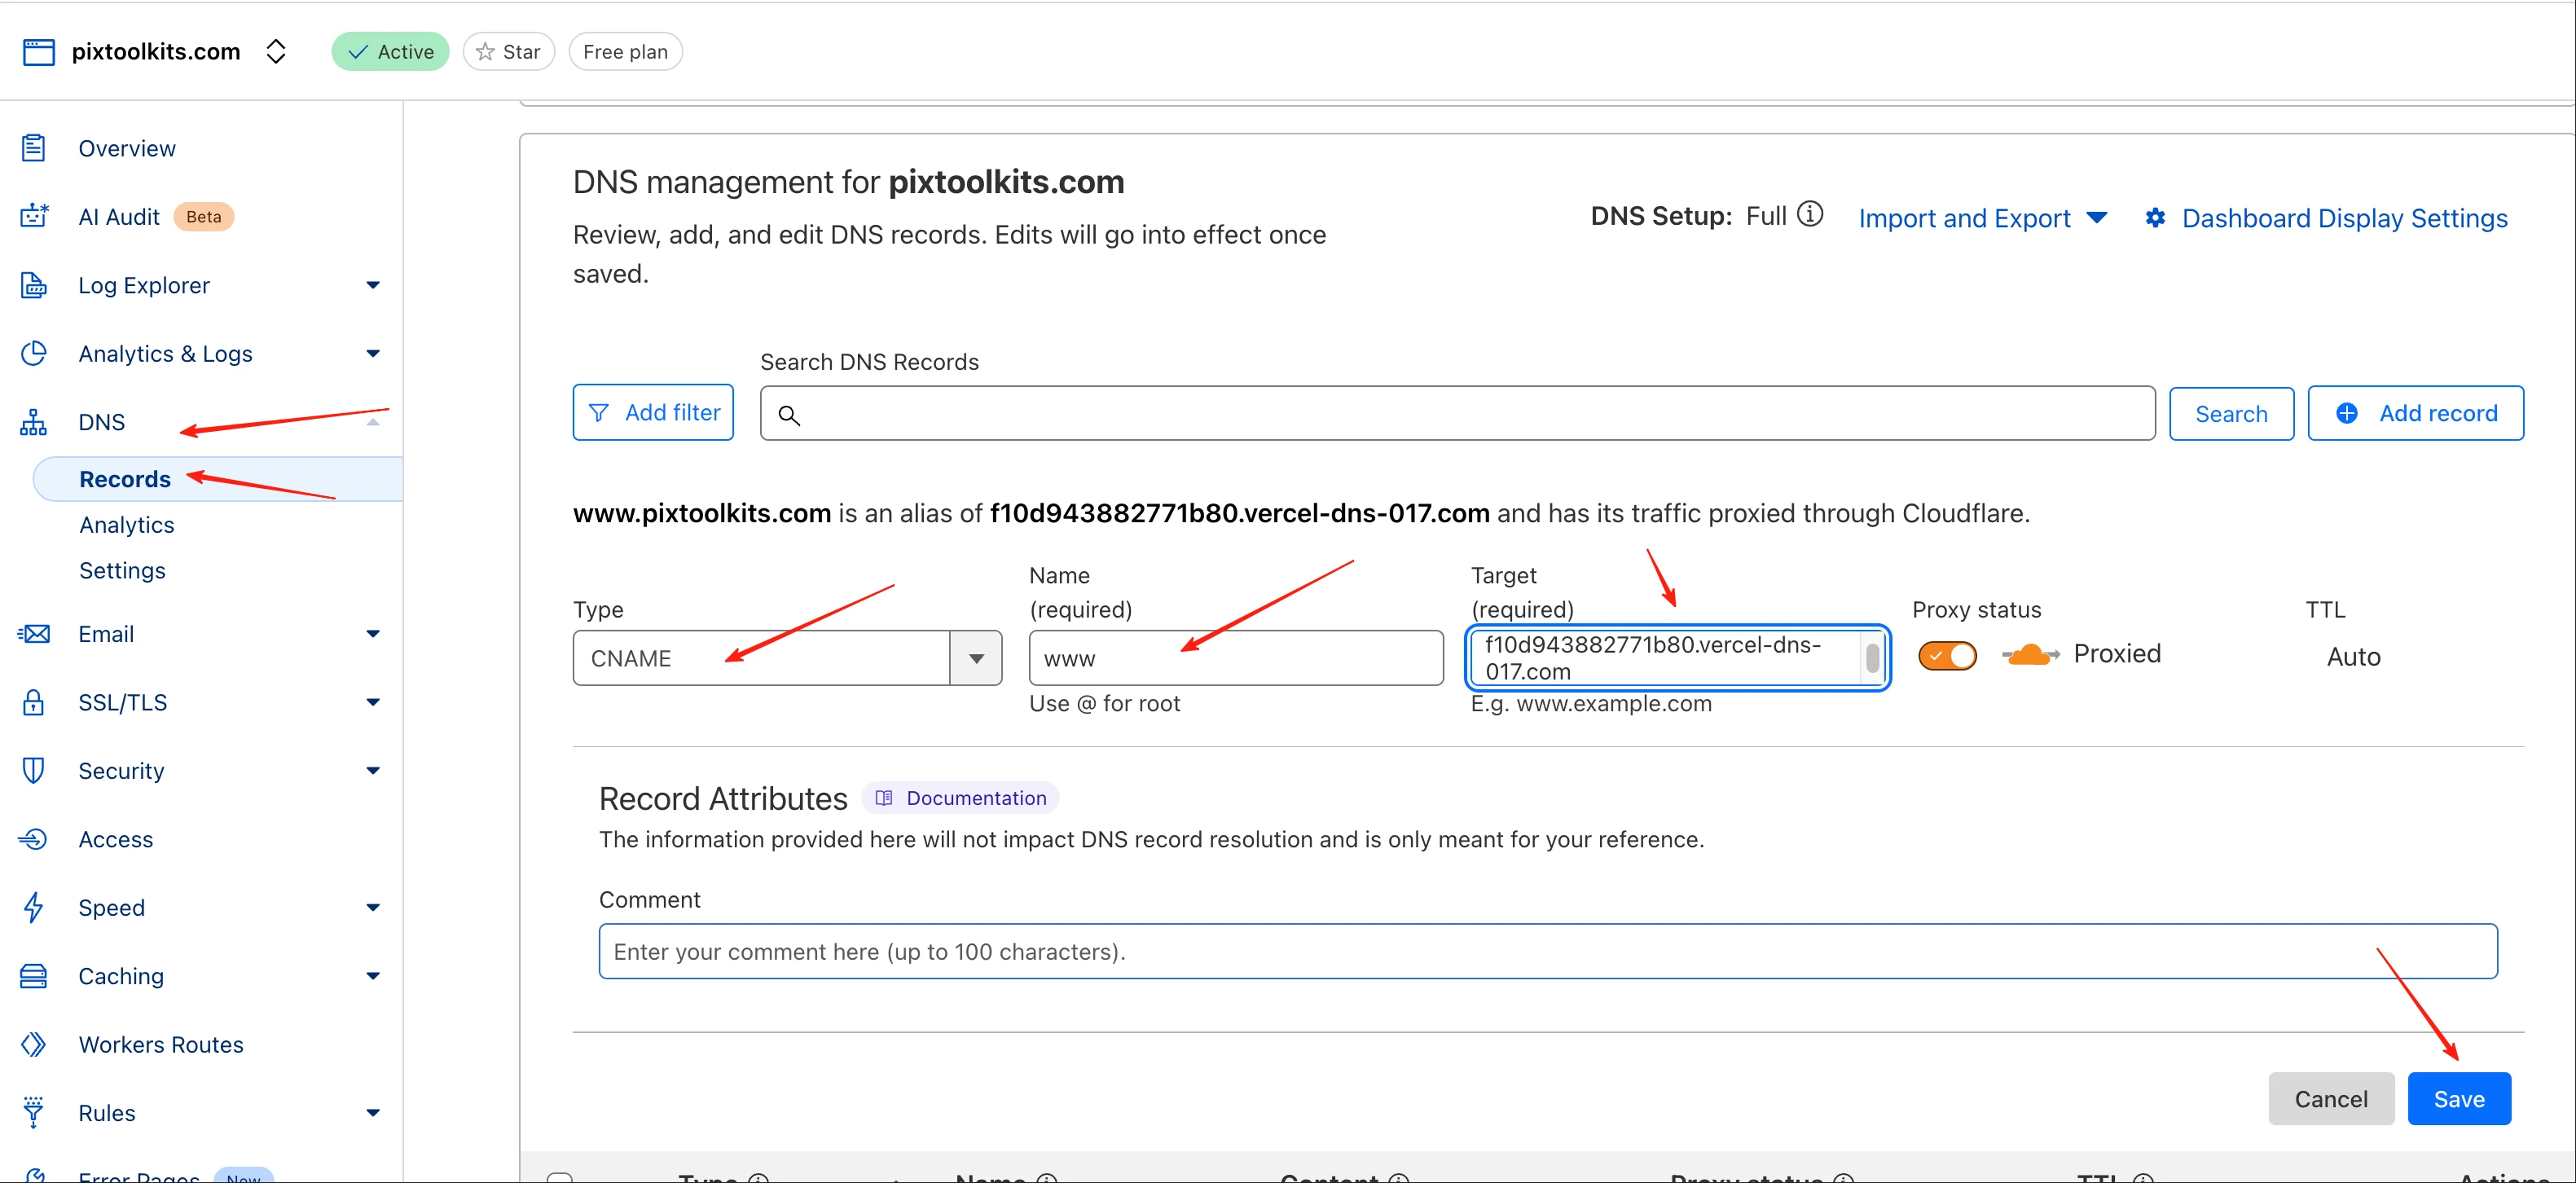
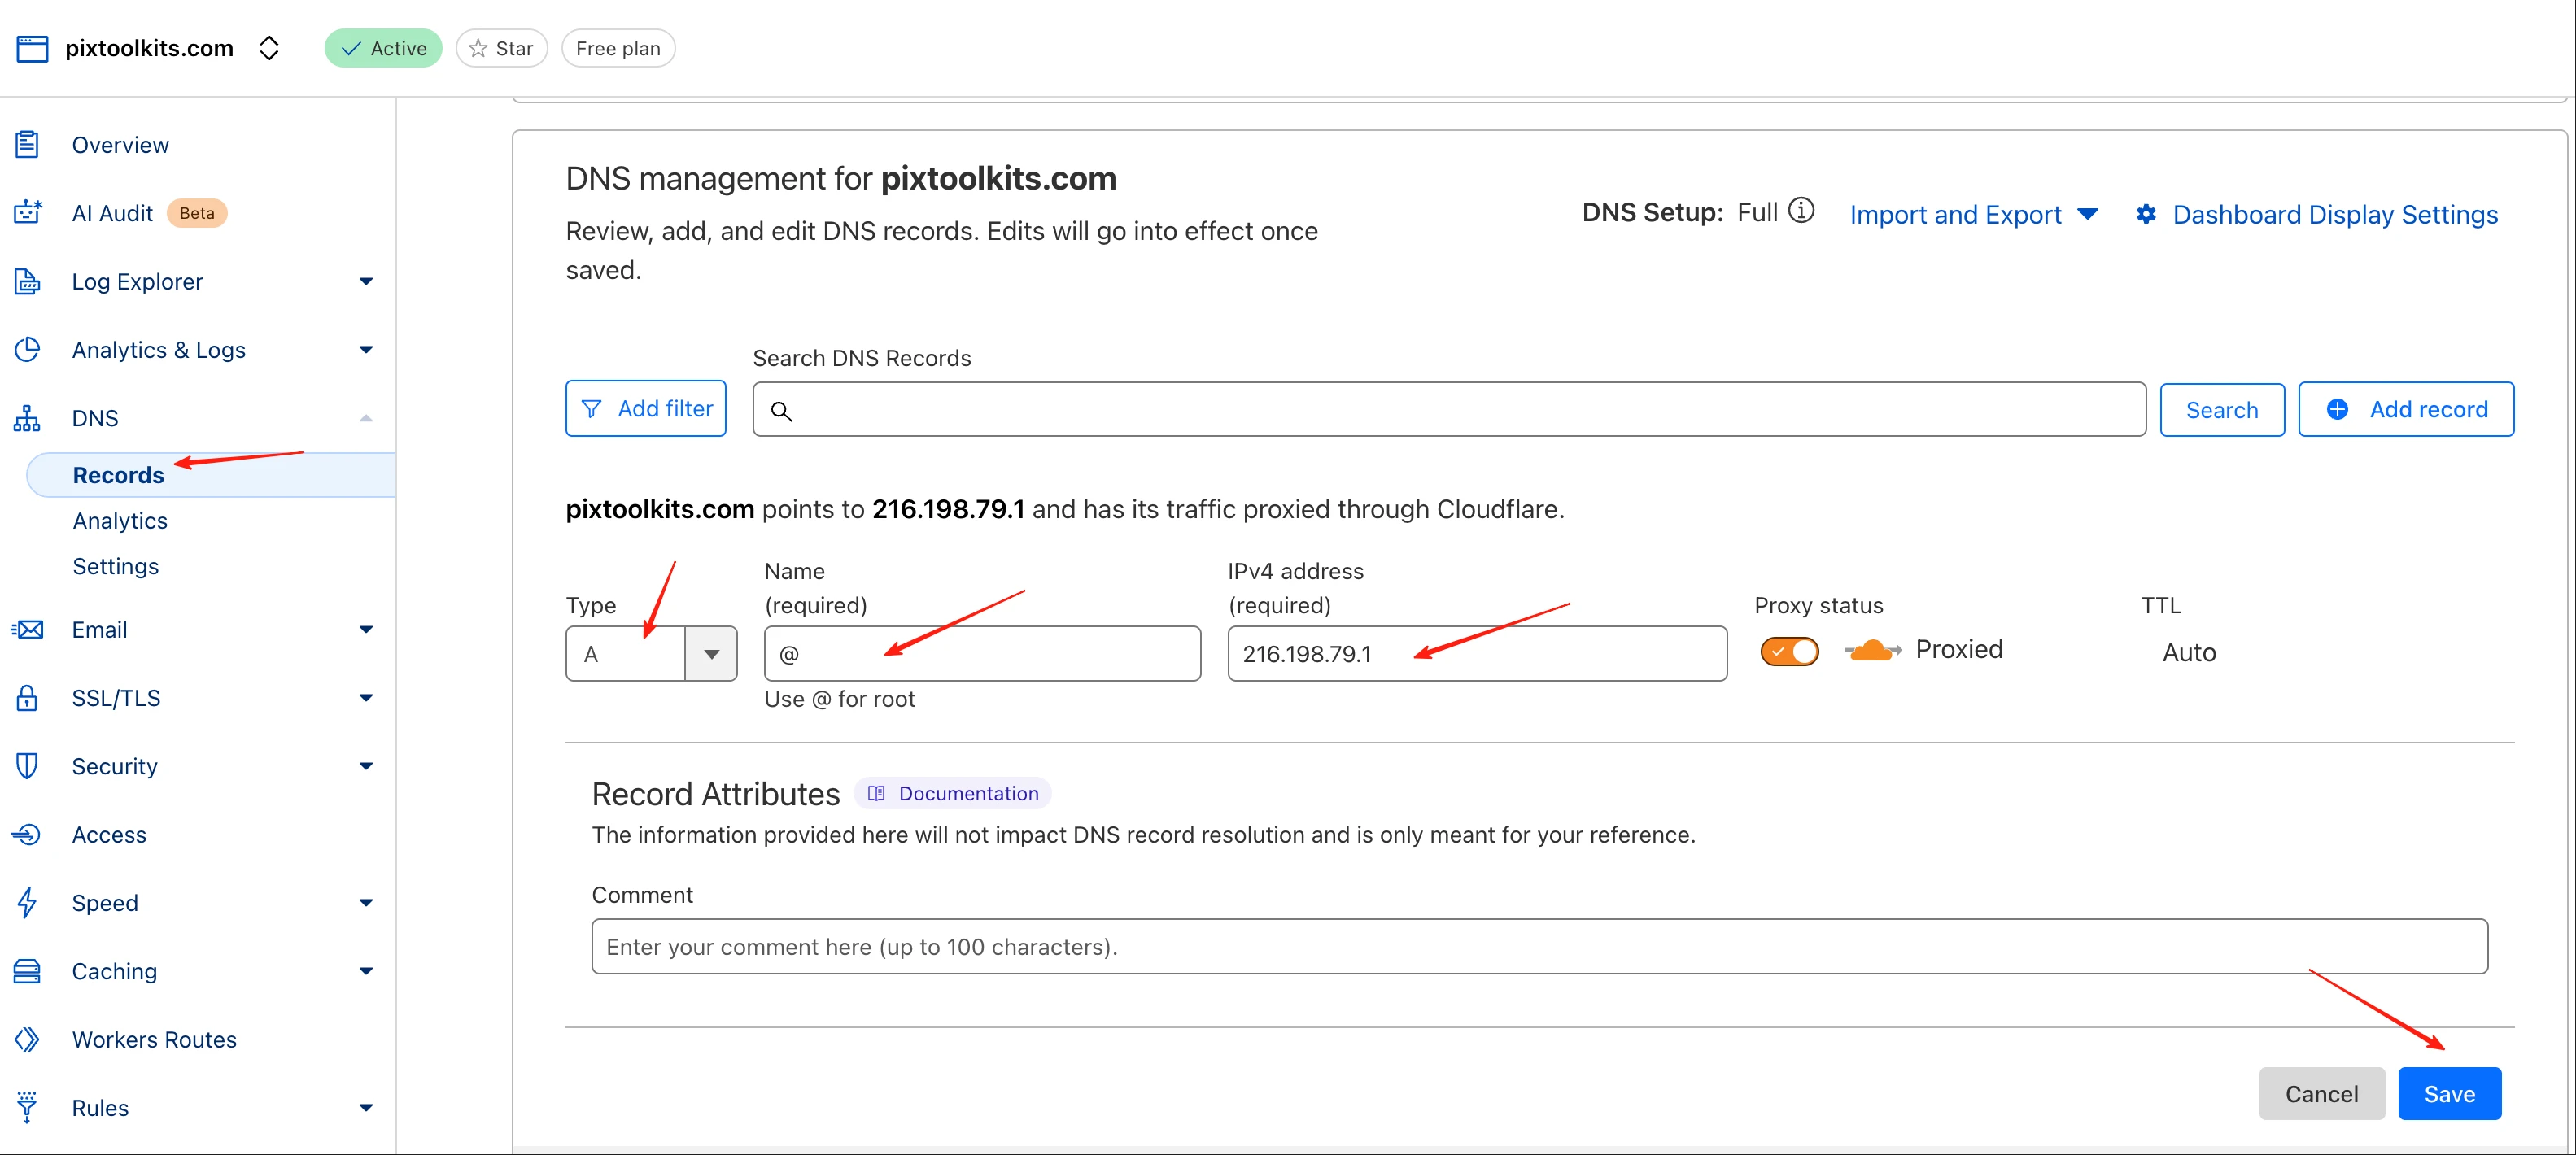
- Final DNS setup
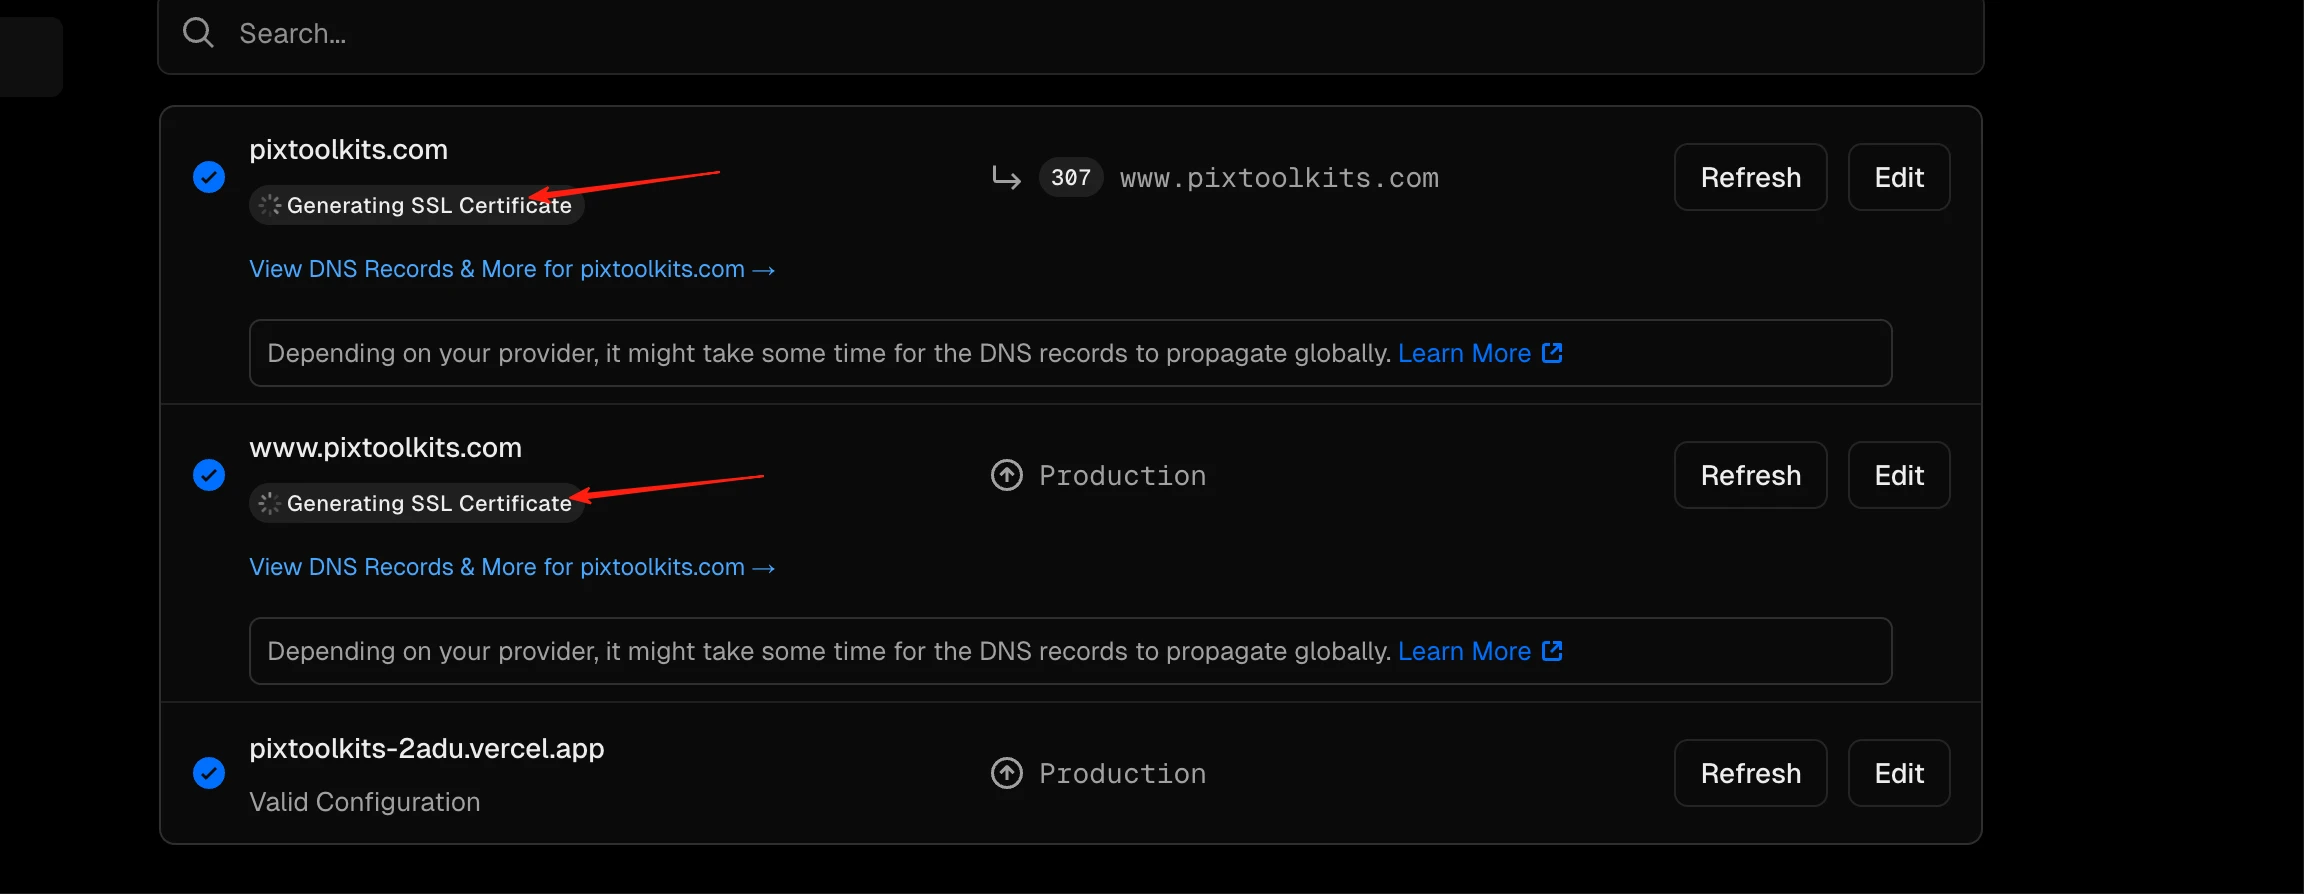
- Vercel SSL generation begins automatically
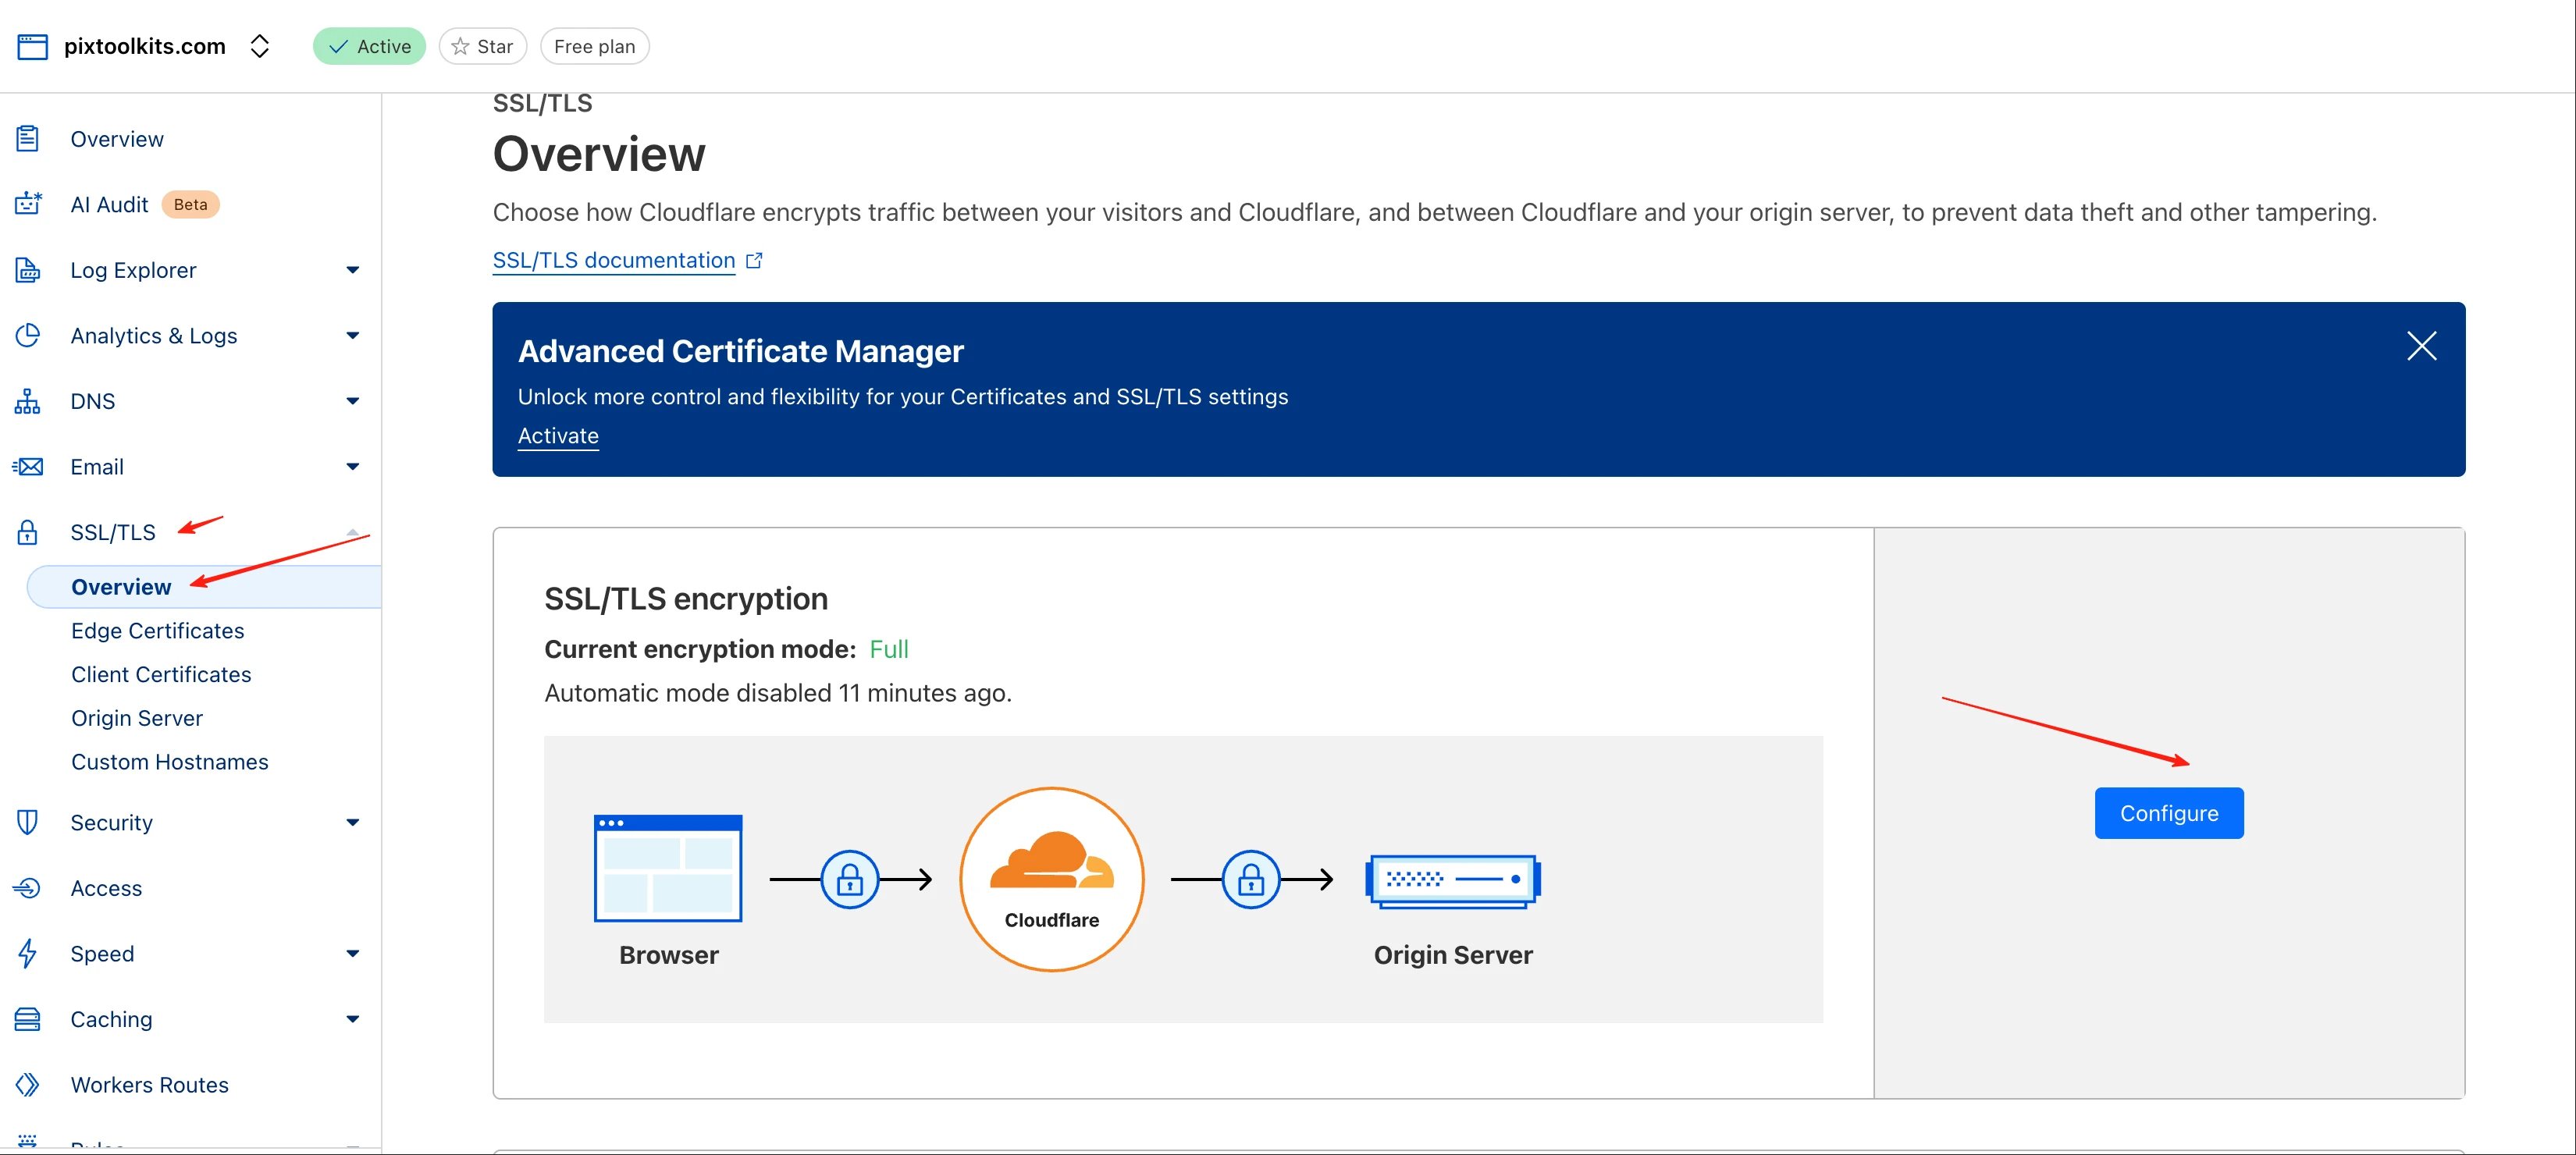
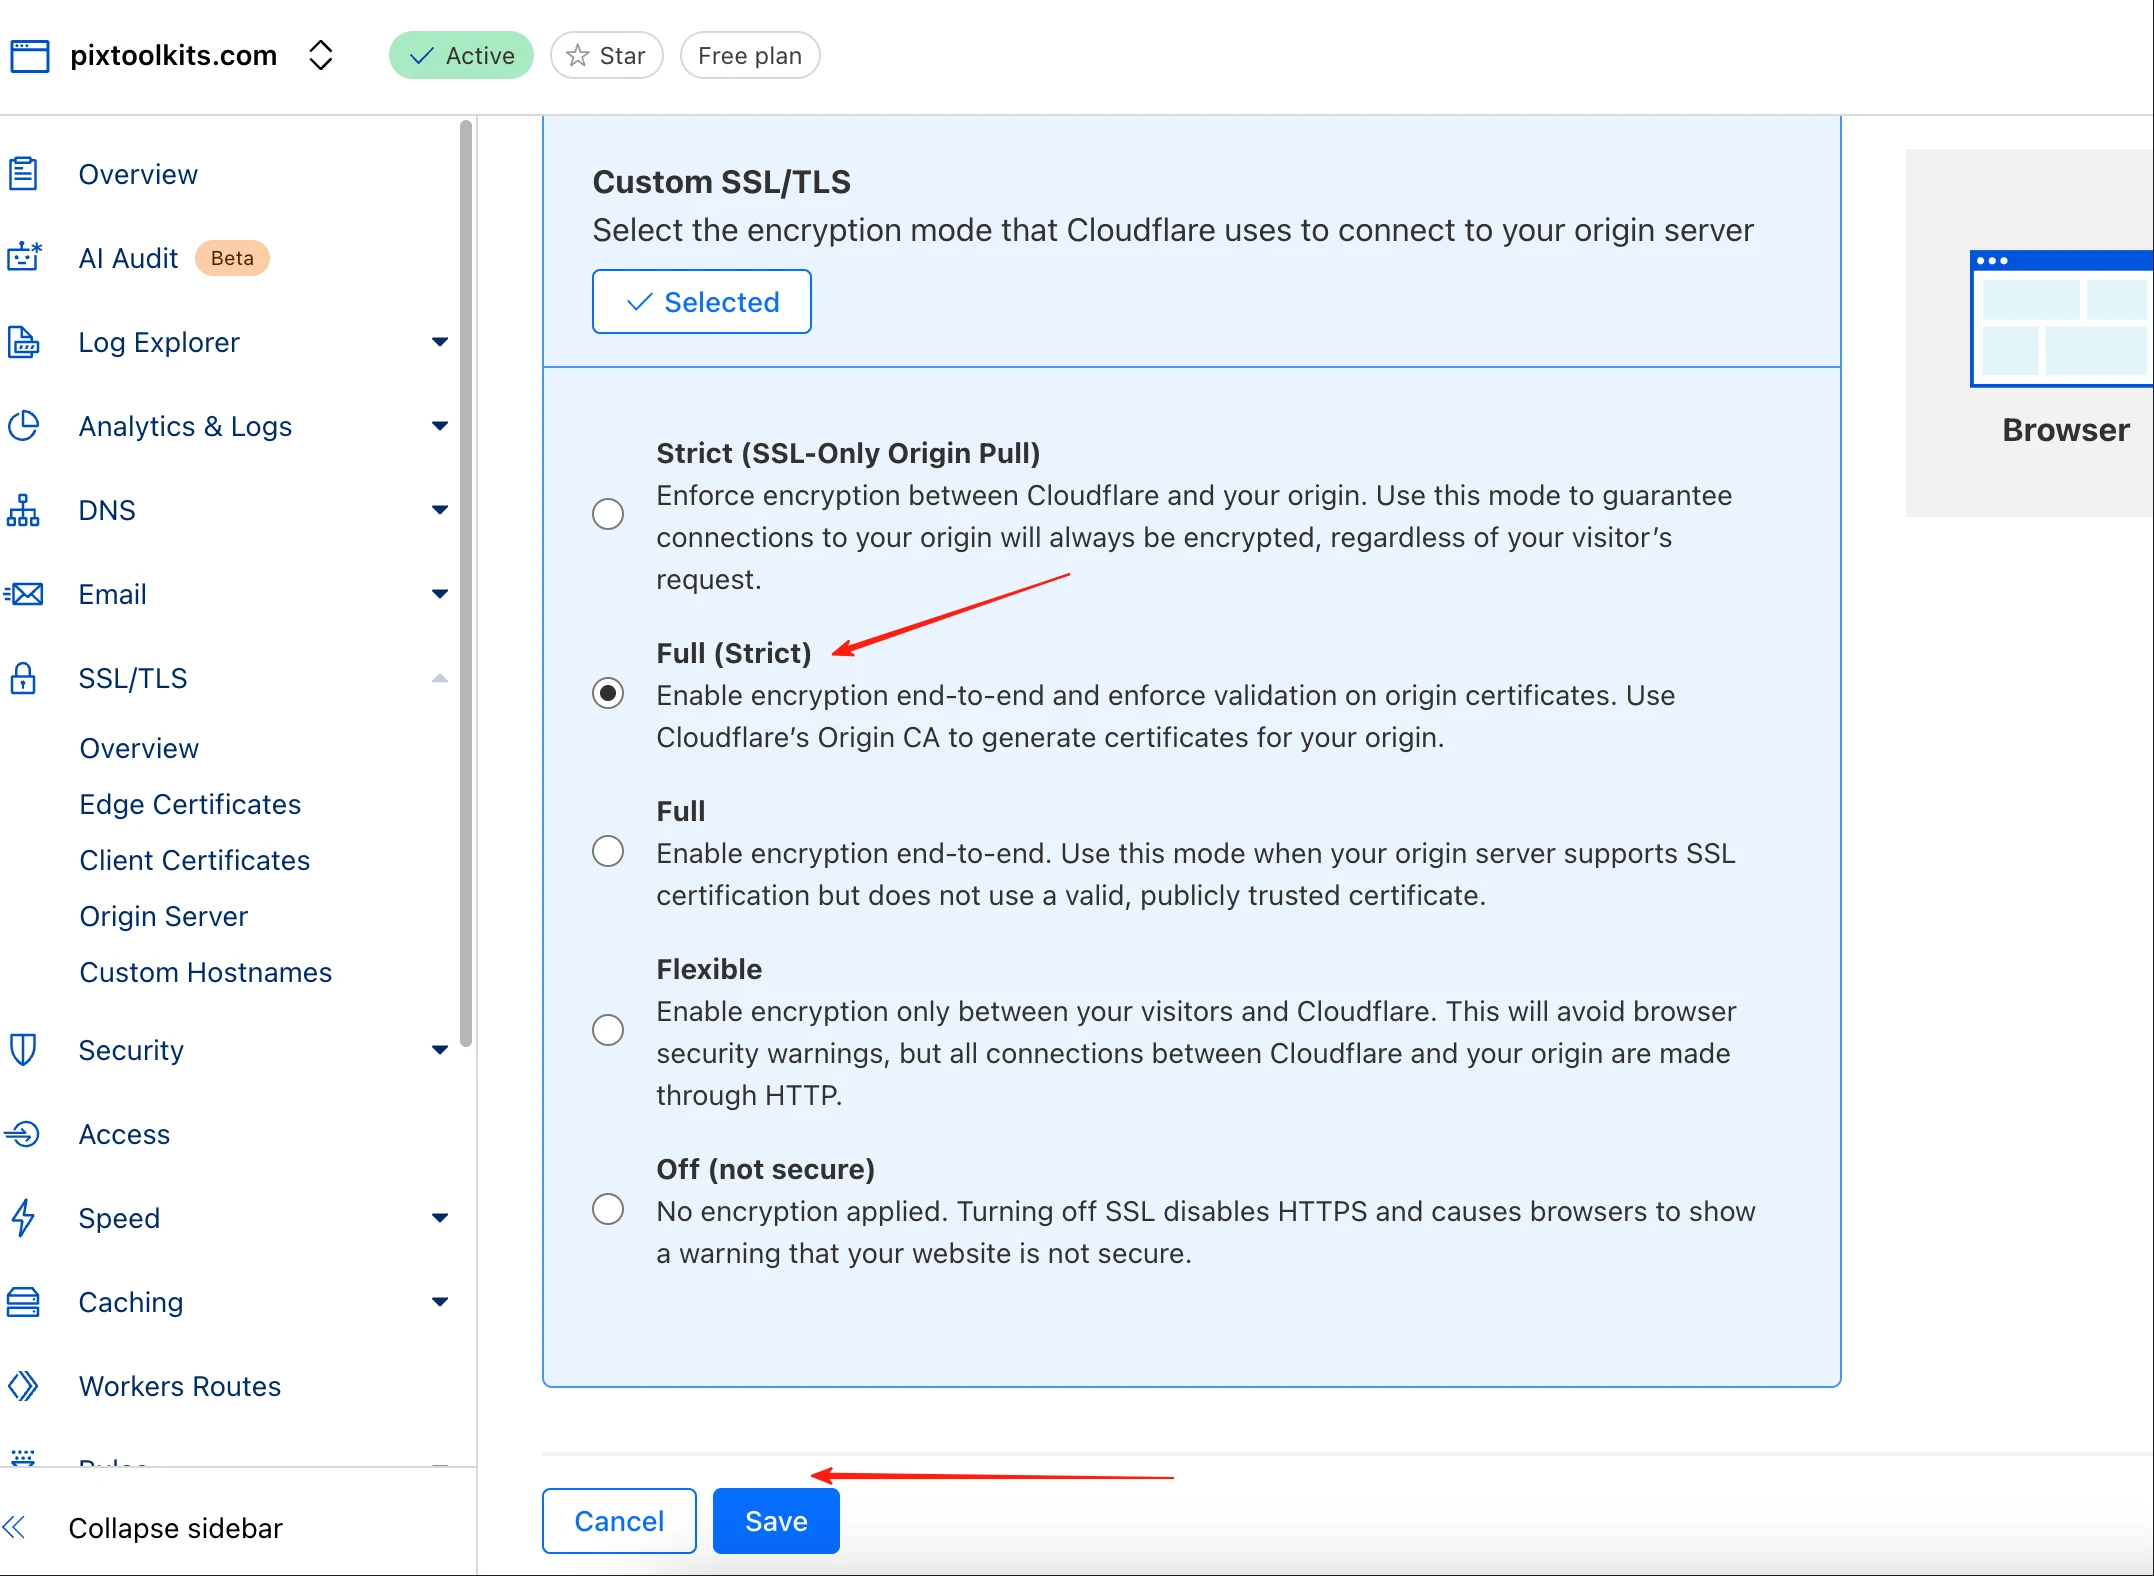
- Final Cloudflare SSL setting: SSL/TLS → Overview → 'Full (Strict)'
6) Access via Domain
- Done! Open browser → pixtoolkits.com
- Future updates: Push to GitHub → automatic site updates
Series
- Cursor Practice Project-13: Rapid Development of Social Media Image Tools with Cursor - A Complete Guide from Concept to Launch (Part 1)
- Cursor Practice Project-14: Rapid Development of Social Media Image Tools with Cursor - A Complete Guide from Concept to Launch (Part 2) - Basic Image Processing and Clipboard Image Handling
- Cursor Practice Project-15: Rapid Development of Social Media Image Tools with Cursor - A Complete Guide from Concept to Launch (Part 3) - Photo Wall and Image Stitching
- Cursor Practice Project-16: Rapid Development of Social Media Image Tools with Cursor - A Complete Guide from Concept to Launch (Part 4) — Domain Purchase + GitHub + Vercel + Cloudflare -> Website Deployment (Current Article)
- Cursor Practice Project-17: Rapid Development of Social Media Image Tools with Cursor - A Complete Guide from Concept to Launch (Part 5) — Analyzing Website Traffic with Google Analytics